

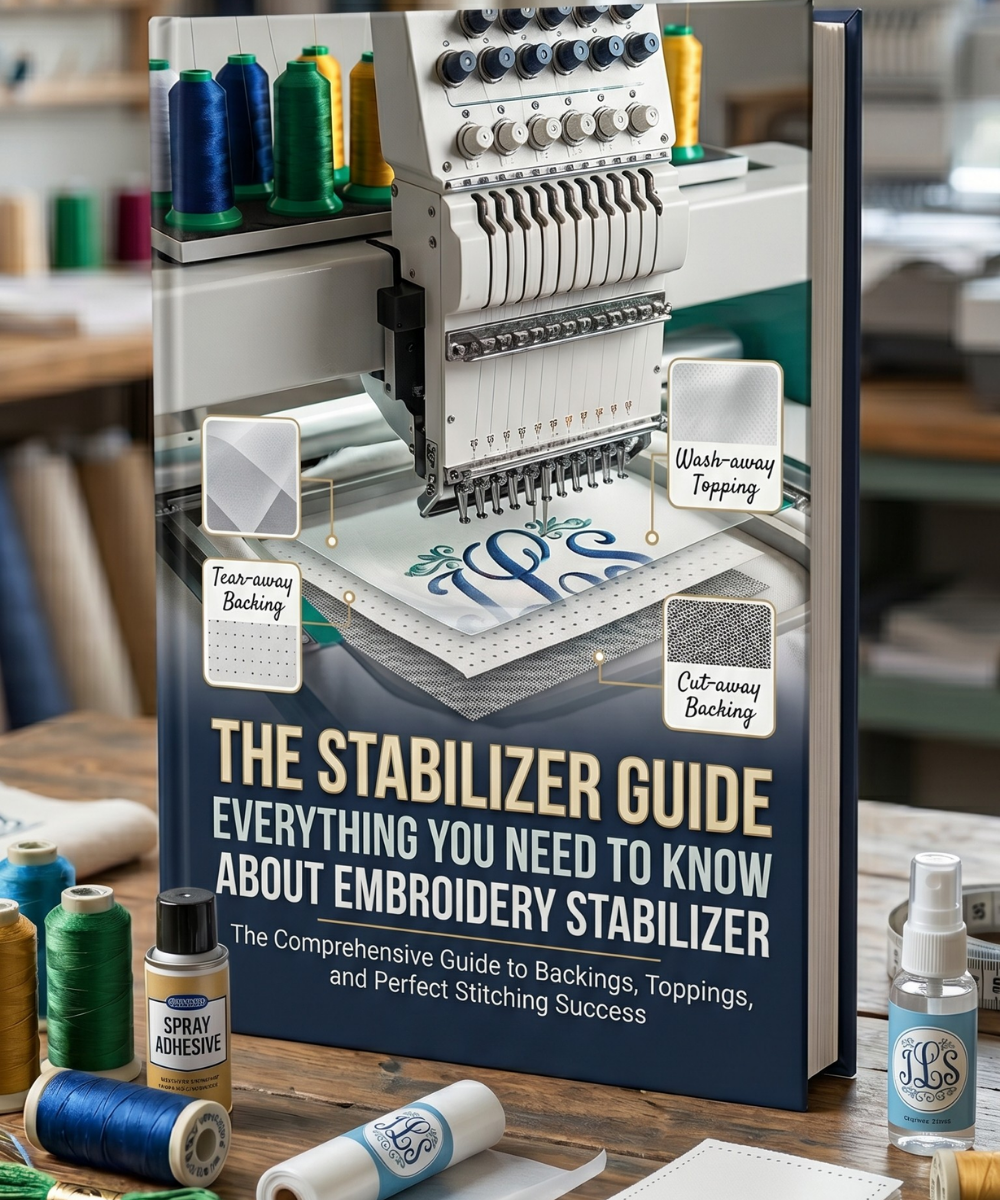
THE COMPLETE GUIDE TO
EMBROIDERY STABILIZER
Every Type, Every Use, Every Chart — In One Place
Stabilizer is the foundation of every successful embroidery project. Choose it correctly and your designs run beautifully. Choose it incorrectly and no amount of machine skill or digitizing quality will save you. This guide covers everything.

|
PUBLISHED BY Stephen Wilson |
STABILIZER TYPES 8 Types Covered |
CHARTS & TABLES 6 Reference Charts |
WHAT THIS GUIDE COVERS
Part 1 Why stabilizer matters — the foundation principle
Part 2 The 8 types of stabilizer — complete descriptions and uses
Part 3 Stabilizer selection charts — by fabric, design, and application
Part 4 Weight and density reference
Part 5 Toppers — what they are and when to use them
Part 6 Troubleshooting — what went wrong and how to fix it
Stabilizer is the foundation of your embroidery. Without the correct stabilizer, the registration of your design may be off, your fabric will pucker, and your design will distort. Your choice of stabilizer can make or break a stitch-out — and it is almost always the first place to look when something goes wrong.
The Fundamental Problem
When an embroidery machine stitches, it drives thousands of needle penetrations through fabric in rapid succession. Each penetration creates tension, pulling the fabric in the direction of the stitch. Without support, the fabric shifts, stretches, and distorts with every stitch. The result: designs that do not align, fabric that puckers around embroidery, and finished pieces that look amateur regardless of design quality.
Stabilizer solves this by providing a rigid or semi-rigid foundation beneath — and sometimes on top of — the fabric. It absorbs the tension of the stitching, holds the fabric flat, and keeps registration accurate from the first stitch to the last. No stabilizer, no quality. It is that simple.
|
"The first thought when embroidery goes wrong is always to blame the machine or the digitizer. The real culprit — nine times out of ten — is the wrong stabilizer." |
The Two Principles
◆ Do not under-stabilize — Insufficient stabilizer causes puckering, distortion, and designs that shift mid-run. When in doubt, go more supportive rather than less. You can always trim excess stabilizer — you cannot undo a distorted design.
◆ Do not over-stabilize — More stabilizer is not always better. The wrong type of stabilizer — even a heavy one — for the fabric or design can cause its own problems: stiffness, bulk, difficulty in removal, and visible backing through light fabrics. Choose the correct type for the job from the start.
Stabilizer vs. Interfacing — Not the Same Thing
Stabilizer and interfacing are both paper-like materials that go behind fabric, so they are frequently confused. They serve fundamentally different purposes. Interfacing adds body and structure to fabric permanently, and is used in garment construction. Stabilizer supports fabric during the embroidery process — it may be removed afterward (tearaway, wash-away) or remain as permanent backing (cutaway). Never substitute one for the other
|
2 |
Part 2 — The 8 Types of Embroidery Stabilizer |
Every stabilizer type has a specific role. Understanding the character of each — not just its name — is what allows you to make confident choices for any project. Here are all eight types, with complete descriptions, pros, cons, and primary uses.
|
TYPE 1 | Tearaway Stabilizer — TEMPORARY |
|
T/A TEMPORARY |
Tearaway Stabilizer The most common stabilizer — used for most stable woven fabrics Tearaway stabilizer is a non-woven, paper-like backing that tears away cleanly after the embroidery is complete. It provides firm support during stitching but is not intended to remain as a permanent part of the finished piece. Available in light, medium, and heavy weights. The heavier the weight, the more support it provides. Pros ✓ Inexpensive and widely available ✓ Removes easily — no residue on most fabrics ✓ Available in multiple weights for different design densities ✓ Can be layered for additional support without permanent bulk ✓ Works for the majority of stable woven fabric projects
Cons ✗ Does not support knits or stretch fabrics ✗ Can leave small fragments at stitch edges if not torn carefully ✗ Not suitable for dense designs on lightweight fabrics — can tunnel through |
◆ Best for — Stable woven fabrics — cotton, denim, canvas, linen, oxford. Towels, scarves, table linens, structured bags.
◆ Avoid for — Knits, T-shirts, stretchy fabrics, hosiery, performance wear — anything that has stretch or give.
◆ Weight guide — Light weight (1.0–1.5 oz) for low-density designs. Medium weight (2.0–2.5 oz) for most standard designs. Heavy weight (3.0+ oz) for satin-heavy or dense designs.
|
TYPE 2 | Cutaway Stabilizer — PERMANENT |
|
C/A PERMANENT |
Cutaway Stabilizer The strongest stabilizer — the professional standard for garments Cutaway stabilizer is a non-woven backing that remains permanently attached to the fabric after embroidery. After stitching, the excess stabilizer is cut away to within approximately 1/4 inch of the design edge — it stays under the design forever. This permanent support prevents distortion over time, especially through repeated washing and wearing. It is the backing you see on the inside of professionally embroidered polo shirts and uniforms. Pros ✓ Provides permanent, ongoing support through repeated washing ✓ Essential for stretch and knit fabrics — prevents design distortion over time ✓ Available in firm and soft versions for different applications ✓ No-show mesh variants virtually invisible on light fabrics ✓ Used by commercial embroiderers as the professional standard
Cons ✗ Cannot be fully removed — stays as part of the garment ✗ Can add slight stiffness to finished piece ✗ May show through very sheer or light fabrics unless no-show mesh is used |
◆ Best for — T-shirts, sweatshirts, knits, jerseys, performance wear, stretchy fabrics, polo shirts, any garment that will be worn and washed repeatedly.
◆ Avoid for — Projects where a clean, no-backing finish is required. Very delicate or sheer fabrics where the backing may show.
◆ Variants — Firm cutaway (for dense designs), soft cutaway (for light designs on sensitive fabrics), no-show mesh (for light or white fabrics), fusible cutaway (iron-on adhesive backing).
|
TYPE 3 | No-Show Mesh Stabilizer — PERMANENT / LIGHTWEIGHT |
|
NSM PERM / LIGHT |
No-Show Mesh Stabilizer The invisible permanent option — ideal for light and white fabrics No-show mesh is a lightweight, semi-transparent cutaway stabilizer made from a fine mesh construction. Its open weave makes it far less visible through light-colored fabrics than standard cutaway. It provides permanent support like all cutaway stabilizers but without the opacity that can shadow through white or pale garments. This is the go-to stabilizer for baby items, white T-shirts, and anything where the backing showing through would be visible. Pros ✓ Nearly invisible through light and white fabrics ✓ Permanent support without the bulk of standard cutaway ✓ Soft against the skin — ideal for baby items and delicate garments ✓ Does not stretch or shrink after repeated washing ✓ Can be layered for additional support on dense designs
Cons ✗ More expensive than standard cutaway ✗ Fewer weight options than standard cutaway ✗ Not suitable for very dense designs where more substantial support is needed |
◆ Best for — White T-shirts, baby onesies, infant clothing, light-colored knits, anything where backing visibility through the fabric is a concern.
◆ Pro tip — Layer two pieces of no-show mesh perpendicular to each other for extra support on denser designs without adding visible bulk.
|
TYPE 4 | Water-Soluble Stabilizer — DISSOLVES COMPLETELY |
|
WSS DISSOLVES |
Water-Soluble Stabilizer Disappears in water — the only choice for freestanding lace and delicate fabrics Water-soluble stabilizer (WSS) dissolves completely when immersed in water, leaving zero trace behind. It comes in two forms: a film type (heavier, used for freestanding lace) and a non-woven fabric type. The film type handles high stitch counts needed for FSL and 3D embroidery. The non-woven type is softer and works well under delicate fabrics. Neither type provides any support after washing — so WSS is never the right choice for garments that need permanent stabilization. Pros ✓ Disappears completely — zero residue after rinsing ✓ The only correct choice for freestanding lace (FSL) embroidery ✓ Perfect for sheer, organza, and very delicate fabrics where any backing would show ✓ Can be used as a topping to prevent stitches sinking into textured fabrics ✓ Produces a clean, professional finish on both sides of the embroidery
Cons ✗ Provides no permanent support — not for garments or items that will be washed ✗ More expensive than tearaway or cutaway ✗ Requires a water rinse step to complete the project ✗ Not suitable for fabrics that cannot be wetted |
◆ Best for — Freestanding lace designs, sheer fabrics (organza, chiffon, voile), delicate items where no backing should remain, 3D embroidery projects.
◆ FSL tip — For stiff freestanding lace, wet the design after stitching rather than fully rinsing. The stabilizer will dry back into the stitches, adding structure and stiffness to the lace.
|
TYPE 5 | Heat-Away Stabilizer — DISSOLVES WITH HEAT |
|
HTA HEAT DISSOLVES |
Heat-Away Stabilizer Disappears with iron heat — for fabrics that cannot get wet Heat-away stabilizer disappears when heat from an iron or heat press is applied directly to it. It is the solution for projects where water cannot be used to remove stabilizer — velvet, heat-sensitive fabrics, and items that must not get wet. Once heat is applied, the stabilizer breaks down into a fine powder that brushes away cleanly. It provides firm support during stitching. Pros ✓ No water required for removal — ideal for water-sensitive fabrics ✓ Disappears completely with direct iron or heat press application ✓ Provides firm support during stitching ✓ No residue on most fabrics after heat application
Cons ✗ More expensive than water-soluble options ✗ Requires care with heat application — too much heat can scorch some fabrics ✗ Cannot be used on heat-sensitive fabrics that cannot tolerate iron temperature ✗ Less commonly available than tearaway or cutaway |
◆ Best for — Velvet, silk, heat-tolerant fabrics where water removal is not an option. Any project where the backing must disappear completely but the item cannot be wetted.
|
TYPE 6 | Adhesive / Sticky Stabilizer — HOOPING ALTERNATIVE |
|
ADH STICKY BACK |
Adhesive Stabilizer The hooping alternative — holds fabric without a hoop Adhesive stabilizers have a sticky surface that holds fabric in place during embroidery without hooping. The stabilizer itself is hooped, and the fabric is adhered to its surface. This is essential for items that cannot be hooped directly — velvet, leather, thick pile fabrics, very small items, sock cuffs, and anything where hoop marks would damage the material. Available in tearaway, cutaway, and wash-away variants with adhesive backing. Pros ✓ Eliminates hoop marks on delicate or pile fabrics ✓ Essential for items too small or awkward to hoop directly ✓ Works on velvet, leather, and other hoop-resistant materials ✓ Provides precise fabric positioning through adhesion ✓ Available in all stabilizer types with adhesive backing added
Cons ✗ More expensive than non-adhesive versions ✗ Adhesive can gum up needles if design stitches through it repeatedly ✗ Must be refreshed or replaced for each new piece ✗ Not as many weight options as non-adhesive versions |
◆ Best for — Velvet, leather, very small items (socks, cuffs, hats), items where hoop marks are unacceptable, and any fabric that resists traditional hooping.
|
TYPE 7 | Fusible Stabilizer — IRON-ON PERMANENT |
|
FUS IRON-ON |
Fusible Stabilizer Bonds permanently with heat — adds structure and prevents shift Fusible stabilizer has a heat-activated adhesive on one side that bonds permanently to fabric when pressed with an iron. Unlike adhesive spray which is temporary, fusible stabilizer becomes part of the fabric. It prevents stretch fabrics from distorting during hooping and stitching by making them temporarily stable. Available in cutaway versions for garments and stiffer versions for bags, patches, and structured items. Pros ✓ Prevents stretchy fabrics from shifting during hooping ✓ Adds body and structure for bags, totes, and stiff items ✓ Becomes part of the fabric — no shifting or separation ✓ Excellent for T-shirt quilts and projects requiring fabric stability before cutting ✓ No adhesive spray needed — clean and consistent application
Cons ✗ Permanent — cannot be removed once pressed ✗ Fabric must tolerate iron heat for application ✗ Adds stiffness that may be undesirable in some garments ✗ Slightly slower to apply than adhesive spray |
◆ Best for — T-shirts before quilting, stretchy fabrics that need stabilizing before hooping, tote bags and structured accessories, patches requiring extra body.
|
TYPE 8 | Specialty Stabilizers — SPECIFIC APPLICATIONS |
Several stabilizer types are designed for specific niche applications. Each has a specific purpose and should be used only in the context for which it was designed.
◆ Badgemaster / Film WSS — A heavy film-type water-soluble stabilizer specifically designed for freestanding lace applications requiring very high stitch counts. Provides firm support for dense FSL designs.
◆ Wash-Away Mesh — A non-woven water-soluble stabilizer with a mesh construction. Used under towels and other napped fabrics to provide clean removal after washing. The mesh dissolves in the washing machine.
◆ Wet N Stick / Perfect Stick — Water-activated adhesive stabilizers that become sticky when moistened. Ideal for embroidering on terry cloth, velvet, and other fabrics where permanent adhesive spray is undesirable.
◆ Topping (WSS / Heat-Away) — Applied on top of the fabric rather than beneath it. Prevents stitches from sinking into textured or pile fabrics. Covered in detail in Part 5.
|
3 |
Part 3 — Stabilizer Selection Charts |
These charts are the practical heart of this guide. Use them as quick references for any project. The fabric chart tells you which stabilizer type to start with. The design density chart tells you which weight to choose. The application chart maps specific products to specific situations.
Chart 1 — Selection by Fabric Type
This is the most important chart. Match your fabric to the correct stabilizer type before choosing weight or brand.
|
Fabric Type |
Stabilizer Type |
Weight |
Notes |
|
Woven cotton / linen |
Tearaway |
Medium (2.0 oz) |
Most versatile combination — covers 80% of projects |
|
Denim / canvas |
Tearaway |
Heavy (3.0 oz) |
Dense weave requires heavier support |
|
T-shirt / jersey knit |
Cutaway or NSM |
Soft (1.8 oz) |
Never use tearaway — will cause design distortion over time |
|
Sweatshirt / fleece |
Cutaway |
Firm (2.5 oz) |
Plus water-soluble topping on top to prevent stitch sink |
|
Performance / athletic wear |
Cutaway or NSM |
Soft (1.8 oz) |
NSM preferred for lighter colors |
|
Terry cloth / towels |
Tearaway + WSS topping |
Medium (2.0 oz) |
Topping prevents stitches sinking into pile |
|
Velvet / velveteen |
Adhesive tearaway |
Medium (2.0 oz) |
Float fabric — do not hoop directly |
|
Leather / faux leather |
Adhesive cutaway |
Firm (2.5 oz) |
Hoop marks are permanent — always float |
|
Silk / satin |
Tearaway or WSS |
Light (1.0 oz) |
Test on scrap — delicate fabrics need gentle tearaway |
|
Organza / chiffon |
Water-soluble |
Film WSS |
Backing must disappear completely |
|
Freestanding lace (FSL) |
Water-soluble |
Film WSS (heavy) |
Badgemaster or Sulky Solvy for high stitch counts |
|
Structured bags / totes |
Fusible cutaway |
Firm (2.5 oz) |
Iron-on for extra body and structure |
|
Caps / hats |
Tearaway + cap backing |
Medium (2.0 oz) |
Use cap frame and specialized cap backing |
|
Baby items / onesies |
No-show mesh |
Soft (1.8 oz) |
NSM essential — soft and invisible against skin |
Chart 2 — Selection by Design Density
Use this chart in combination with the fabric chart. The design density determines the weight within your chosen stabilizer type.
|
Design Type |
Stitch Count |
Stabilizer Weight |
Special Considerations |
|
Simple monogram / text |
Under 5,000 |
Light (1.0–1.5 oz) |
Single layer usually sufficient |
|
Standard logo / left chest |
5,000–12,000 |
Medium (2.0–2.5 oz) |
The most common scenario — medium covers most |
|
Dense fill / large design |
12,000–25,000 |
Heavy (2.5–3.0 oz) |
Consider layering or upgrading to cutaway |
|
Very dense / patch-weight |
25,000–50,000 |
Firm cutaway (2.5 oz+) |
Always cutaway at this density — tearaway will fail |
|
Satin stitch heavy |
Any count |
Medium–Heavy |
Satin pulls through light tearaway — size up |
|
Freestanding lace |
High (30,000+) |
WSS film (heavy) |
Badgemaster or equivalent — high stitch count film WSS |
|
3D puff embroidery |
Medium–High |
Firm cutaway |
Puff material adds thickness — extra support required |
|
Applique designs |
Low–Medium |
Tearaway or cutaway |
Follow fabric type — design stitch count is lower than fills |
Chart 3 — Selection by Application Type
For specific product categories and applications, this chart maps directly to the recommended stabilizer without requiring you to assess fabric and density separately.
|
Application |
Stabilizer |
Topping Needed? |
Notes |
|
Corporate polo shirts |
Cutaway (firm) |
No |
Industry standard — firm cutaway under all polos |
|
T-shirt personalization |
No-show mesh |
No |
NSM keeps light colors clean |
|
Hooded sweatshirts |
Cutaway (firm) |
WSS topping |
Heavy fleece pile needs topping to prevent stitch sink |
|
Baby onesies |
No-show mesh |
No |
Soft NSM — never scratchy against infant skin |
|
Canvas boat totes |
Tearaway (heavy) |
No |
Stable canvas holds tearaway well |
|
Monogram on towels |
Tearaway (med) + WSS topping |
Yes |
Topping is critical for terry cloth pile |
|
Hat / cap embroidery |
Cap backing + tearaway |
No |
Specialized backing designed for cap frames |
|
Leather goods |
Adhesive cutaway |
No |
Always float leather — never hoop |
|
Velvet apparel |
Adhesive tearaway |
No |
Float and use sticky back to hold position |
|
Freestanding lace |
WSS film (heavy) |
N/A |
Only material suitable for FSL |
|
Patch making |
Firm cutaway + poly-twill |
No |
Two layers of cutaway for maximum density support |
|
Sock embroidery |
Adhesive tearaway |
No |
Float on sticky back — socks cannot be hooped |
|
Silk scarves |
Light tearaway or WSS |
No |
Test first — delicate tearaway only |
|
Art embroidery frames |
Cutaway + fusible |
No |
Fusible gives art piece body for framing |
|
4 |
Part 4 — Weight and Density Reference |
Stabilizer weight is measured in ounces per square yard. The heavier the stabilizer, the more support it provides. Choosing the right weight within your stabilizer type is the second most important selection decision after choosing the correct type.
Understanding Stabilizer Weight
Most commercially available stabilizers range from 1.0 oz (very lightweight) to 3.0+ oz (heavy commercial weight). The weight you need depends on two factors: the density of your embroidery design and the stability of your base fabric. A dense design on a stable fabric needs heavier backing than a light design on the same fabric.
|
Weight Range |
Classification |
Best For |
Typical Use Case |
|
1.0–1.5 oz |
Light |
Low-density designs, delicate fabrics |
Monograms on scarves, light cotton items |
|
2.0–2.5 oz |
Medium |
Standard designs, most common use |
Logo shirts, standard monograms, totes |
|
2.5–3.0 oz |
Heavy |
Dense fills, thick fabrics |
Sweatshirts, denim, satin-heavy designs |
|
3.0+ oz |
Commercial / Firm |
Patch-weight, maximum density |
Patches, corporate uniforms, art embroidery |
Layering Stabilizer
When the weight you need is not available as a single sheet, stabilizer can be layered. Two sheets of 1.5 oz tearaway provide approximately the same support as one sheet of 3.0 oz. When layering cutaway, place the sheets perpendicular to each other for maximum multi-directional support. However — always prefer the correct single-weight choice over layering when possible. Layering should be a workaround, not a habit.
|
★ The Weight Escalation Test If your design is puckering or distorting with your current stabilizer weight, the solution is almost always to go up one weight tier — not to add more layers of the same weight. Moving from medium (2.0 oz) to heavy (2.5 oz) tearaway solves most puckering problems on stable wovens. Moving from tearaway to cutaway solves most distortion problems on stretch fabrics. |
|
5 |
Part 5 — Toppers — What They Are and When to Use Them |
The Topper Problem
On smooth fabrics, stitches sit cleanly on the surface. On textured fabrics — terry cloth, fleece, velvet, canvas with a visible weave, minky — the needle pushes down into the texture, and the stitches partially disappear into the pile or weave rather than sitting proud on the surface. The result is embroidery that looks fuzzy, undefined, and unprofessional. A topper completely prevents this.
Types of Toppers
◆ Water-soluble topping (film) — The most commonly used topper. A clear or white film that tears away easily after stitching and dissolves completely in water. Place it on top of the fabric before the design runs — the stitches penetrate through it and hold the fabric fibers down. Tear away the bulk when stitching is complete, then rinse or dab away any remaining film fragments.
◆ Heat-away topping — Functions identically to water-soluble topping but disappears with iron heat rather than water. Preferred by many embroiderers because it does not require a rinsing step. Particularly useful for projects where moisture is undesirable.
◆ Water-soluble mesh topping — A softer, mesh version of water-soluble topping. Used under towels as backing (the mesh dissolves in the washing machine) and as a topping for very heavy pile fabrics. More flexible than the film version.
When to Use a Topper
|
Fabric |
Topper Required? |
Type |
Notes |
|
Terry cloth / towels |
Always |
WSS film or mesh |
Topping is non-negotiable on terry — stitches will sink without it |
|
Fleece / sweatshirt |
Recommended |
WSS or heat-away |
Prevents stitches sinking into fleece pile |
|
Canvas / heavy texture |
Sometimes |
WSS film |
Test first — use on visible weave textures |
|
Velvet |
Always |
WSS film |
Float the fabric AND use a topper |
|
Minky / plush |
Always |
WSS film |
Deep pile requires topper for clear design definition |
|
Smooth woven cotton |
Never |
N/A |
No topping needed on smooth surfaces |
|
Knit / jersey |
Never |
N/A |
Topping not needed — use correct cutaway backing |
|
PRO TIP Get in the habit of using a topper on everything you embroider on textured fabrics — terry, fleece, canvas, and pile. The difference in finished quality is immediately visible and the cost per project is under 10 cents. It is one of the highest-return investments in your embroidery workflow. |
|
6 |
Part 6 — Troubleshooting — Diagnosing Stabilizer Problems |
Most embroidery problems are stabilizer problems in disguise. Before blaming your machine or your digitizer, run through this troubleshooting chart. Nine times out of ten, the solution is a stabilizer adjustment.
The Stabilizer Troubleshooting Chart
|
Symptom |
Most Likely Cause |
Solution |
|
Design is puckering around the edges |
Stabilizer too light for design density |
Upgrade to heavier weight or add second layer |
|
Fabric distorting or warping |
Wrong stabilizer type — tearaway on stretch fabric |
Switch to cutaway stabilizer for all knit and stretch fabrics |
|
Design shifts or drifts mid-run |
Fabric not secured — moving in the hoop |
Use adhesive spray or adhesive-backed stabilizer; re-hoop tighter |
|
Stitches sinking into fabric surface |
No topper on textured or pile fabric |
Add WSS or heat-away topping on top of fabric before running |
|
Backing shows through fabric |
Stabilizer too opaque for light fabric |
Switch to no-show mesh stabilizer for light or white fabrics |
|
Design looks fine but wadded up after washing |
No permanent support — tearaway used on stretch fabric |
Switch to cutaway — design needs permanent stabilization |
|
Stabilizer tearing through during stitching |
Too light for design density |
Upgrade weight or switch to medium/heavy tearaway or cutaway |
|
Hoop marks visible on fabric |
Fabric hooped too tightly or delicate fabric hooped directly |
Use adhesive stabilizer — hoop the stabilizer and float the fabric |
|
Letters or small details looking fuzzy |
No topping on textured fabric |
Add WSS or heat-away topping to hold fabric fibers flat |
|
Excessive stabilizer lint in bobbin case |
Incorrect backing type — paper products used |
Use only proper embroidery stabilizers — no coffee filters, paper towels, etc. |
|
Freestanding lace too limp after rinsing |
WSS over-rinsed |
Wet design rather than rinse — let WSS dry into stitches for stiffness |
|
Design registration off on first stitch |
Stabilizer not taut in hoop |
Re-hoop — stabilizer must be drum-tight with no slack |
The Stabilizer Decision Flowchart
When starting any new project, work through these five questions in order. The answers will point you to the correct stabilizer 95% of the time:
1. Does the fabric stretch? YES = Cutaway. NO = Continue.
2. Is it a very delicate or sheer fabric? YES = Water-soluble. NO = Continue.
3. Is it velvet, leather, or hoop-resistant? YES = Adhesive stabilizer. NO = Continue.
4. Is it freestanding lace (FSL)? YES = WSS film. NO = Continue.
5. It is a stable woven fabric. Use tearaway. Choose weight based on design density
I hope this huide will help you make those tought stabilizer decisions.
Stephen


1 comment
thankyou very informative