Members Only Blog

Pricing Embroidery
Recently I taught a class at B-Sew Inn called Unlocked: Stitch to Success, where we covered a whole range of topics on starting and growing an embroidery business. I'm currently writing the book based on that class, and while it comes together, I wanted to share a few excerpts here on the Anita's Studio Blog. This download dives into embroidery pricing — how to actually price your services on garments. Pricing is one of those things that trips up so many of us, so I hope this gives you some clarity and takes away a little of that fear. Enjoy the read! Stephen click the image below to download Pricing Embroidery PDF
Learn more
The Complete guide to Embroidery Stabilizer
Stabilizer is the foundation of every successful embroidery project. Choose it correctly and your designs run beautifully. Choose it incorrectly and no amount of machine skill or digitizing quality will save you. This guide covers everything.
Learn more
Guide to Creating Patches
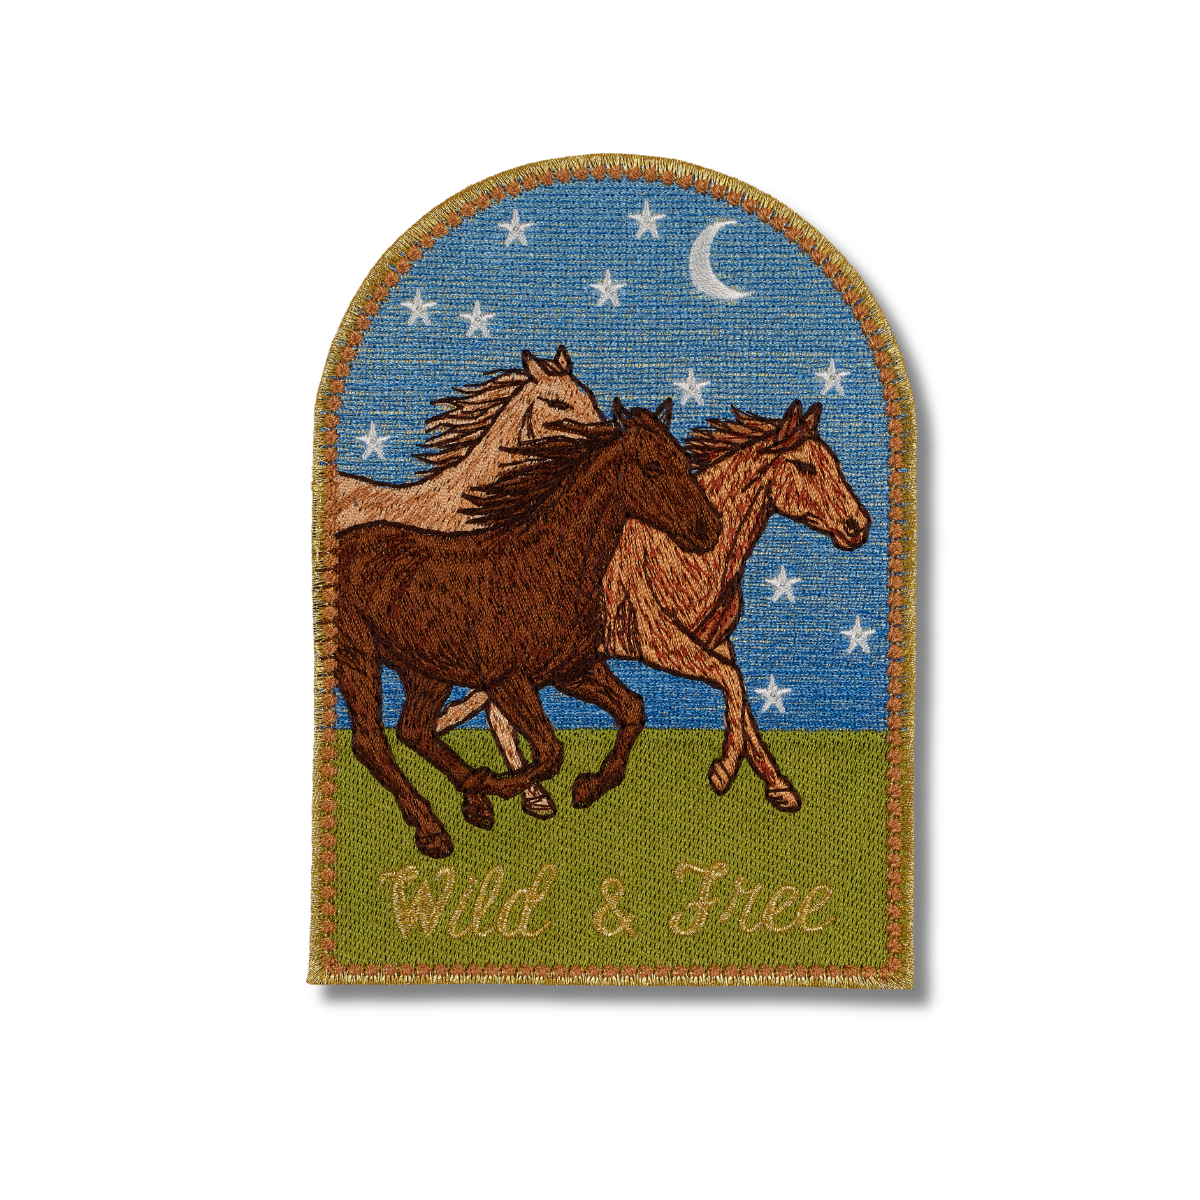
Patches are one of my favorite ways to level up your embroidery — they're quick to make, endlessly versatile, and can be stitched onto just about anything: jackets, bags, hats, you name it. Whether you're new to patches or looking to refine your technique, this guide walks you through the whole process — prepping your design, embroidering it, finishing the edges, and attaching it to your project like a pro. Ready to get started? Download the Patch PDF today and start stitching! Download your PDF here
Learn more
Double sided Bag Charms
We've totally revamped the Double Sided Charm Tutorial—and honestly, it's a game-changer. The new version strips away the fluff and gives you exactly what you need to create stunning charms without all the head-scratching. Cleaner steps, sharper directions, zero confusion. Download the updated PDF and get creating! Download the PDF Here
Learn more
Creating your first Boat Tote
"Ready to personalize your totes with patch collages? Discover how to layer patches by size, find inspiration from themed designs, and master three attachment methods: iron-on backing, fabric glue, and stitching. Includes real examples and expert tips for creating one-of-a-kind bags. Download your 20-page PDF to learn how." Click here to download the PDF tutorial
Learn more
How I pick design colors
GUIDE TO PICKING THE PERFECT Embroidery Thread Colors A Branded Approach to Building Your Thread Palette Think Like a Brand, Not Just an Embroiderer I recently taught a two-day class at B Sew Inn in Oklahoma. We covered a lot of ground — tote bags, patches, charms — and everything coordinated beautifully. Then someone asked a question I wasn’t quite expecting: “How do you choose your thread colors so that everything works together?” My answer surprised a few people: I approach my designs like a brand, not just as an embroiderer. As embroiderers, we tend to be collectors — hundreds of thread colors, metallics, specialty threads, fall sets, holiday sets. This is fine, but we often wind up spending more time picking colors than actually stitching. The result is inconsistency: designs that don’t coordinate, collections that feel scattered rather than curated. “Once I started approaching my palette the way a brand does, everything changed. My collections finally looked like they belonged together.” What the Best Brands Already Know I spent time researching brands whose visual identities I admired — Ralph Lauren, Lilly Pulitzer, Louis Vuitton, Tula Pink, and others. Very different companies, but they all share one thing: they don’t use very many colors. More importantly, they stay ruthlessly consistent in the colors they do use. That consistency is what makes their work immediately recognizable and cohesive. I applied that same philosophy to my own work. I stripped my everyday thread selection down to the bare essentials — enough variety to execute any design in my current catalog, but not so many that collections stop coordinating with each other. The result was four distinct palettes, each built around a specific aesthetic. One important rule across all four palettes: I deliberately avoid jewel tones. Deep saturated purples, electric blues, vivid emeralds — beautiful in isolation, but they’re the colors most likely to throw off an otherwise cohesive palette. Treat them as specialty accents, not staples. 01 Modern Muse The Foundation Palette — Contemporary & Versatile Modern Muse is my base palette — the one I reach for first, for everything. These are the colors I use across the widest range of designs, and the collection I recommend to anyone building their first curated thread selection. With 29 carefully selected colors including two metallics, this palette covers warm neutrals, earth tones, a full range of blues and greens, and enough reds and pinks to handle florals, Americana motifs, and fashion-forward details. The colors are bright but intentionally restrained — contemporary without being trendy. If you’re building from scratch, start here. 02 Western Warm Neutrals & Classic Western Tones The Western palette is built on a foundation of rich neutrals — tans, khakis, warm browns, and saddle tones — with the classic accent colors that define western design: neutral reds, burnished golds, and deep navy blues. This is the palette for anything with a southwest, ranch, or country feel: horseshoe charms, serape patches, boot motifs, and anything that wants to feel worn-in and authentic. Metallics here lean warm — antique brass and aged gold rather than bright chrome. The reds are dusty and muted, which keeps everything cohesive and avoids the over-saturated look that makes western designs feel costume-y rather than genuinely crafted. 03 Coastal Modern Muse + Coastal Brights The Coastal palette is essentially Modern Muse with the color temperature shifted toward the water. The foundation is the same — warm neutrals, metallics, classic earth tones — but it expands into brighter shades of aqua, sky blue, seafoam, sandy orange, and warm yellows. Think of it as Modern Muse after a beach vacation. The personality is looser and sunnier, but it never breaks into jewel territory. The teals stay true, the blues stay sky-bright rather than electric, and the corals and ambers read as sun-baked rather than neon. With 28 colors, this is the palette for coastal collections, tropical motifs, and anything that evokes a warm-weather outdoor lifestyle. 04 Reverie Soft, Muted & Vintage — Less Is More Reverie is my smallest palette — 18 colors — and intentionally so. This is the vintage palette, built for florals, heirloom designs, cottage-core aesthetics, and anything that wants to feel soft, timeless, and romantic. Every color here is muted. No bright pinks — only blush, rose quartz, and champagne. No vivid blues — only soft sky, baby blue, and a quiet denim. Even the metallics lean antique and soft rather than modern and bright. The Reverie palette proves that a smaller, more focused selection is often more powerful — when every color belongs to the same visual family, everything you make automatically coordinates. Using This System About the Thread Charts All charts show Madeira threads. If you prefer a different brand — Robison-Anton, Isacord, Sulky, Floriani — use any of the free online thread conversion tools to find equivalent colors. The color names and visual swatches are your most important reference regardless of brand. I Didn’t Throw Anything Away This system is my default toolkit — not a restriction. I still use specialty colors, seasonal palettes, and individual favorites for specific projects. Think of it like a capsule wardrobe: the capsule is your cohesive daily foundation. That doesn’t mean you never reach outside it — it means you always have a reliable base that’s ready to go. Starting Your Own Palette ◆ Choose one aesthetic for your primary collection and build that palette first. ◆ Start with neutrals and metallics — the connective tissue of any palette. ◆ Add your most-used accent colors, but keep the total under 30. ◆ Lay threads out together visually. Do they look like a family? ◆ Remove any color that fights the others. When in doubt, take it out. ◆ Stitch consistently within the palette for one full collection and see how your work changes. “The goal isn’t fewer colors for its own sake. The goal is a palette where every color belongs — and where every design you make belongs to the same story.” Wild Threads • Anita Goodesign • anitagoodesign.com
Learn more
How do you sell a custom Boat Tote
THE BOAT TOTE Embroidery, Patches & Personalization Your complete guide to direct tote embroidery, creative design thinking, combination products, niche development, and building a brand around the boat tote. DURATION 2.5 Hours LEVEL All Levels PRESENTED BY Stephen Wilson CLASS AGENDA Opening The Boat Tote Opportunity — Market & Business Case Part 1 Embroidering Directly on a Tote — Technique & Process Part 2 Getting Creative — Design, Colour & Personalisation Part 3 Creative Combinations — Building Premium Products Part 4 Niche, Collection & Brand — Thinking Like a Designer Part 5 From Idea to Product — Your Creative Process Closing Pricing, Selling & Your Next Steps WHO IS SELLING PERSONALIZED BOAT TOTES RIGHT NOW? Threadart | 14 oz natural cotton canvas boat totes. Offers varsity chenille letter, shadow block monogram, and glossy thread styles. Sells for $35–$65 per tote with custom embroidery. Kits Threads | 16 oz 100% cotton canvas XL boat tote, 22.5" handles. Embroidered name or monogram on front pocket. Custom fonts via Shopify. Strong repeat customer base. MK Southern Creations | 18 oz and 14 oz canvas boat totes with Avery, Fishtail, and Blair monogram fonts. Traditional first-LAST-middle monogram format. Top-selling Etsy shop. KenzKustomz | 22.5" x 14.5" canvas boat totes. Embroidery included in base price; icon add-ons $3 each. Strong social media presence and repeat customer loyalty. Cece DuPraz | Premium bespoke embroidery on Ironic Boat Totes. Studio in Santa Monica. Specialty in custom phrases and text. 10–14 day turnaround. Commands top-of-market pricing. ★ Opening — The Boat Tote Opportunity The boat tote is one of the most recognized, most personalized, and most giftable canvas products in the market today. Embroidered boat totes are everywhere — and the demand for personalization continues to grow. Today we learn two distinct methods of personalizing them, giving you two products, two markets, and twice the opportunity. ◆ The commercial market — Top Etsy sellers and boutique brands charge $28–$85+ for personalized boat totes. The difference between a $32 sale and a $75 sale is usually the method: a directly embroidered monogram vs. a dimensional satin-border patch. ◆ Two methods, two markets — Direct embroidery appeals to customers who want clean, integrated, permanent personalization. Patch-adorned totes appeal to a fashion-forward buyer who values dimension, texture, and a more collectible aesthetic. ◆ The patch advantage — Patches can be made in batches and applied quickly. You can carry pre-made stock and personalize on demand — ideal for craft shows, activations, and pop-up events. ◆ What this guide builds — By the end of this guide you will be able to embroider directly on a tote bag, think creatively about design and combinations, build a product collection with a clear brand identity, and price your work for profit. ★ Two Products, Two Markets The boat tote is one of the most flexible and profitable embroidery canvases available. By the end of this guide you will not just know how to stitch on it — you will know how to design for it, how to build products around it, and how to develop a brand identity that makes your totes unmistakably yours. 1 Method A: Embroidering Directly on a Tote Bag Direct embroidery means stitching your design straight into the canvas fabric — no patch, no applique. The result is clean, integrated, and sophisticated. It is also the simplest approach, making it the ideal starting point for your tote embroidery journey. The Canvas Tote — Selecting the Right Blank ◆ Weight is everything — Minimum 10 oz canvas for direct embroidery. 12–16 oz is ideal — the denser weave holds stitches without puckering and resists distortion under hoop pressure. Avoid lightweight polyester grocery totes; they pucker badly and look unprofessional. ◆ Wholesale sources — S&S Activewear (Liberty Bags, Prime Line), JiffyShirts (Port Authority BG100), SanMar (Q-Tees). Natural or tan canvas shows thread most vividly. Navy and hunter green are strong sellers for gift markets. ◆ Construction to look for — Flat gusseted bottom for stability. Handles at least 22" for shoulder carry. An exterior front pocket is a bonus embroidery location — great for a small monogram while the main panel carries a larger design. ◆ Popular dimensions — Medium: 12" x 18" x 5.5". Large: 14" x 25" x 9". Extra-large: 22" x 16" x 6". Larger totes allow larger designs but increase hooping complexity. Stabilizer Selection for Canvas Totes The most common beginner mistake is choosing the wrong stabilizer for canvas. Canvas looks simple but has stretch when pulled, and hoop pressure leaves marks if you are not careful. Stabilizer Type Best For Why It Works Avoid When Cutaway (firm) Logos, large fills, dense designs Permanent support prevents distortion through repeated washing Very light canvas — too stiff Tearaway (medium) Monograms, open fills, text Easy removal; clean result on stable 12–16 oz canvas Density over 12,000 stitches — causes sinking Cutaway (soft) Script fonts, light designs Permanent support without stiffness; good for everyday-use bags Very high density — use firm cutaway instead Water-soluble topping Textured or open-weave canvas Prevents stitches sinking into canvas texture; dissolves cleanly Tight smooth canvas — not needed Hooping a Tote Bag — Step by Step Two challenges: the bag is closed at the sides, and the canvas is stiff. Here is the correct process for clean, distortion-free results. 1 Prepare the bag Turn the bag inside out. Push any interior pockets or liners away from the embroidery area so they cannot be accidentally caught in the hoop. 2 Mark placement Use a heat-erasable pen to mark the center of your design. Standard front-panel placement: 3"–4" down from the top opening, centered horizontally. Always measure — do not eyeball. 3 Apply stabilizer Place cutaway or tearaway stabilizer against the outside of the bag beneath the embroidery area. Use light adhesive spray (505 or KK2000) to hold it flat without hooping it separately. 4 Hoop the front panel only Slide the hoop between the front and back panels. Hoop only the front canvas layer plus the stabilizer — never hoop through the back of the bag. Choose a hoop large enough that its frame clears the side seams. 5 Check tension The canvas must be drum-tight. Any slack causes design registration errors. If the seam is pulling the fabric, re-hoop with the seam positioned outside the hoop frame. 6 Embroider and finish Run the design. After completion, remove stabilizer, lint-roll, and press the embroidered area with a pressing cloth to remove hoop marks. Design Placement Reference Placement Best Design Types Notes Front center (large panel) Oversized monogram, last name, large graphic Bold statement; leave 1" margin from edges Front lower-center Name + small icon, short phrase Casual, conversational feel Exterior pocket 3-letter monogram, small initial, single icon Easiest to hoop; great starting project Back panel Business logo, website, brand name Corporate and promotional totes Handle base Tiny repeat motif, small initials Subtle, understated detail ★ Time It Yourself Once you have the process down, time yourself from unboxing the tote to holding the finished monogrammed piece. Most experienced embroiderers complete a 3-letter monogram on a medium tote in under 12 minutes. That number — 12 minutes per tote — is what makes this product category so compelling for a production workflow. Keep a mental note of your personal time as you practice. 2 Getting Creative — Design, Colour & Personalisation The boat tote is one of the most versatile canvases in embroidery. Its generous front panel and clean canvas surface invite experimentation. This section is about pushing your creative thinking — going beyond the standard monogram into designs that stand out, sell fast, and reflect your personal aesthetic. Beyond the Monogram — Design Ideas That Sell The three-letter monogram will always be a bestseller — but it is far from the only thing this canvas wants to carry. The embroiderers building the most profitable tote businesses are the ones treating the bag as a design surface rather than a functional object. Here is where to start thinking creatively. ◆ Sayings and phrases — Short, bold typography works exceptionally well on canvas. A single sentence — a coastal phrase, a wine quote, a travel line — in a strong font reads from across a market stall and creates an instant emotional connection. Think: SALTY HAIR DON'T CARE, WINE O'CLOCK, NOT ALL WHO WANDER ARE LOST. ◆ Name plus motif — A customer's name paired with a personalised motif — a lighthouse, a shell, a floral wreath, their pet breed — creates a custom product that no online shop can copy. These are the highest-converting custom listings because they feel completely one-of-a-kind. ◆ All-over pattern panels — A repeating pattern element — shells, anchors, citrus, botanicals — stitched across a section of the tote rather than centred in one spot. This creates a visual texture effect that reads as considered and elevated. Lower stitch count than it looks. ◆ Oversized single motif — A large, bold, single design element that fills the panel — a maximalist floral, a giant initial, a crest, a detailed illustration. Oversized designs communicate confidence and stand out in a sea of small-chest-placement embroidery. ◆ Two-sided storytelling — The boat tote has a back panel that most embroiderers ignore completely. Stitch a coordinating design on the back — a compass rose that echoes the front anchor, a list of coastal coordinates, a word that completes the phrase on the front. ★ The Seasonal Rotation Strategy Create three to four tote designs per season — Spring, Summer, Fall, Holiday — and retire them at the end of each season. Seasonal exclusivity drives urgency: customers who love your summer coastal collection know it will be gone in September. This strategy increases sales velocity and gives your repeat customers a reason to come back every few months. Colour as a Design Decision The canvas is not your only colour choice. Thread colour, thread type, and their interaction with the natural canvas creates the finished aesthetic. Most embroiderers choose thread colours instinctively — here is a more intentional framework. ◆ Tone on tone — Navy thread on natural canvas. White thread on navy canvas. Cream thread on sand canvas. Tone-on-tone embroidery has a sophisticated, editorial quality that appeals to customers who want something elegant rather than bold. It also photographs beautifully. ◆ High contrast — Bright thread on dark canvas, or dark thread on white canvas. Maximum visual impact, reads well at a distance, stops people at a market stall. Best for statement pieces and phrases. ◆ Multi-colour storytelling — Using three or more thread colours intentionally — not just because the design calls for them, but because the colour relationship itself creates the mood. A sunset palette on a beach phrase. A botanical green palette on a floral. Colour as a narrative tool. ◆ Thread type as texture — The same design in rayon versus cotton versus metallic looks like three completely different products. Rayon has sheen and luminosity. Cotton is matte and vintage. Metallic reads as special occasion. Build thread type into your design decisions, not just as an afterthought. 3 Creative Combinations — Building Premium Products The most profitable tote products are almost never single-technique. They combine direct embroidery with another design element — appliqué, patch application, fabric inserts, or mixed materials — to create something that cannot be replicated by someone with just a machine and a blank. This is where your craft becomes your competitive advantage. Direct Embroidery + Appliqué Combining direct embroidery with appliqué elements on the same tote creates visual depth that neither technique achieves alone. The appliqué brings fabric texture and dimensional colour; the direct embroidery adds fine detail, lettering, and outline definition that appliqué cannot deliver at small scales. ◆ Monogram over appliqué field — Stitch a large fabric shape — a circle, a square, a chevron — as the appliqué background, then embroider a bold monogram or phrase directly over it. The fabric creates the colour block; the embroidery adds the personalisation. ◆ Floral wreath with fabric centre — A large embroidered wreath with an appliqué fabric circle at its centre — add a name, a date, or a motif to the fabric centre. The combination of thread and fabric in a single design reads as a sophisticated custom product. ◆ Patchwork panel effects — Multiple appliqué fabric pieces arranged in a geometric pattern — stripes, triangles, a quilt-block arrangement — with embroidery stitching over the joins. Creates a product with the visual complexity of a handmade quilt but produced with machine precision. The Combination Product — Direct + Patch One of the highest-value tote configurations: a directly embroidered element on one part of the bag — a small monogram on the pocket, a name on the handle strap, a date below the opening — combined with a dimensional patch on the main panel. The two techniques at different scales create a layered, considered product. Combination Type Effect Price Premium Large patch + pocket monogram Dimensional focal point with personal detail High — $55–$80 Phrase on front + name on handle Two personalisation points, one bag Medium — $45–$65 Appliqué colour block + embroidered monogram Fabric texture + thread detail combined Medium–High — $48–$70 Seasonal patch + year date below Collector appeal — dated keepsake Medium — $42–$60 Breed silhouette patch + owner name Pet personalisation — high repeat purchase High — $55–$75 4 Niche, Collection & Brand — Thinking Like a Designer The embroiderers who build the strongest businesses are not the ones with the most techniques — they are the ones with the clearest point of view. A niche, a collection structure, and a consistent visual language turn a collection of individual products into a brand. This section helps you think like a designer, not just a maker. Finding Your Niche A niche is not a limitation — it is a competitive advantage. When you are known for something specific, customers seek you out rather than stumbling across you. A coastal embroiderer has a different customer than a faith-based embroiderer or a dog-breed specialist. But within each niche, the boat tote is a perennial bestseller because it is a canvas that travels, displays, and gifts beautifully. ◆ Coastal and nautical — Anchors, lighthouses, shells, compass roses, coastal phrases. The natural-canvas boat tote is the home environment for coastal design. This niche has consistent year-round demand with a summer peak and a strong holiday gift season. ◆ Botanical and floral — Large-scale florals, herb bundles, leaf patterns, garden-inspired designs. Appeals to a home-decor and farmers-market customer. Elevated aesthetic, tends toward muted thread palettes and natural linen or stone canvas. ◆ Preppy and collegiate — Bold fonts, classic crests, university aesthetics, varsity letters. Strong demand in certain regional markets and among sorority and Greek life customers. Clean, high-contrast, and very repeatable. ◆ Pet and breed-specific — Breed silhouettes, custom pet names, paw motifs. One of the highest repeat-purchase niches in embroidery — pet owners collect items featuring their breed and often buy for themselves, as gifts, and as memorial pieces. ◆ Faith and inspiration — Verses, crosses, faith-based phrases, spiritual motifs. Strong community-based word-of-mouth marketing, consistent demand, and a customer base that values handcrafted personal items highly. Building a Collection, Not Just Products A collection is a group of products that belong together — same palette, same design language, same story. When a customer finds one piece they love in your shop and sees five more that feel like a family, they buy multiple. Individual products create individual sales. Collections create carts. 1 Choose a palette Three to four thread colours that work together across every design in the collection. Navy, cream, sand, and coral for a coastal collection. Sage, terracotta, cream, and gold for a botanical. The palette is the visual glue that makes products feel curated. 2 Establish a design motif One repeated element — a specific shell shape, a particular font, a framing device like a wreath or a banner — that appears in every design in the collection. Repetition creates recognition. Recognition creates brand. 3 Create product variations Same design language, different products: tote, small pouch, towel, baby item, hat. A customer who loves your coastal collection can now buy across product categories rather than just buying more totes. Breadth at consistent quality builds loyalty. 4 Name the collection A name turns a group of products into something a customer can talk about, share, and return to. Your summer coastal collection becomes The Harbour Edit or The Shore Collection. Naming creates narrative. Narrative creates attachment. Photographing for Impact Your photography is your most powerful marketing tool — more important than your Etsy SEO, your social media frequency, or your pricing. A beautifully photographed tote sells itself. A poorly lit photo of a great tote stays in the queue. Here is the photography framework that works for canvas totes specifically. ◆ The lifestyle context shot — A tote at a farmers market, on a beach blanket, hanging from a bicycle, at a winery. The customer does not just see the product — they see themselves with it. Context shots consistently outperform plain-background product shots for conversion. ◆ The flat lay — Tote laid flat with coordinating objects — sunscreen, a beach read, sunglasses, a shell. The flat lay tells the story of the bag's world. Coordinate the objects to the collection palette so everything reads together. ◆ The detail close-up — A macro shot of the embroidery itself — showing stitch quality, thread sheen, and design detail. This shot builds trust with embroidery customers who know what good stitching looks like and are looking for evidence of quality. ◆ Natural light always — A large north-facing window on an overcast day is a photography studio. No flash, no ring light needed. Embroidery thread reflects artificial light in ways that flatten the design — natural diffused light shows the dimensional quality of the stitching. 5 From Idea to Product — Your Creative Process Great embroidery products start with a clear creative brief, not just a machine and a hoop. This section gives you a repeatable process for moving from an idea — a trend you spotted, a customer request, a design that excited you — to a finished product ready for sale. The Creative Brief — Five Questions Before loading any design, answer these five questions. The brief takes two minutes and prevents hours of rework. 1 Who is this for? Describe the customer specifically. Not 'women who like totes' — 'coastal-lifestyle women 30–55 who shop at farmers markets and buy handmade gifts for themselves and friends.' The more specific the customer, the more targeted the design. 2 What feeling does it need to create? Elegant? Playful? Nostalgic? Bold? Seasonal? The feeling defines the font choice, the palette, the scale, and the thread type before you open a single design file. 3 Where will it be used? Beach bag, grocery bag, gift bag, work bag? The use context defines the design scale, the placement, and the appropriate fabric weight. A beach bag wants big, bold, and relaxed. A work bag wants refined and understated. 4 What makes it different from what already exists? Search Etsy for your intended design before you make it. If there are 400 identical listings, you need a creative angle — a different combination, a bolder scale, a unique phrase, an unexpected colour choice. 5 What is it worth? Price it before you make it. If the materials and time do not support the price point the market will bear, rethink the product rather than undercharging for it. A product that cannot be priced for profit should not be made. Testing Before Producing Every new tote design deserves a single test run before it goes into a collection or onto a listing. The test run is not just a quality check — it is a creative review. Here is what to assess when you hold the finished test piece: ◆ Placement — Is the design exactly where it should be — or does it need to move up, down, or sideways? Placement errors are invisible on screen and obvious on canvas. Always test. ◆ Scale — Does the design read correctly at the actual size on this specific tote? A design that looks right at 4 inches may need to be 5 inches on a large tote, or 3 inches on a small one. ◆ Thread colour on canvas — Thread colours shift significantly between screen and canvas. Navy reads differently on natural canvas than on white cotton. Always see the actual colour combination before committing to a production run. ◆ The one-second impression — Hold the finished tote at arm's length and look at it for one second. What does it communicate? What feeling does it create? If you cannot articulate the impression immediately, the design needs refinement. 💡 PRO TIP Keep a physical sample of every tote design you make — even failed experiments. Over time, your sample collection becomes a reference library and a portfolio you can show to wholesale buyers, boutique owners, and corporate clients. Physical samples sell in ways that photographs simply cannot. ★ Closing — Pricing, Selling & Your Next Steps Pricing the Boat Tote — All Methods Product Blank Cost Prod. Time Sell Price Est. Margin Direct embroidery tote (monogram) $4–$6 12 min $28–$42 78% Direct embroidery tote (large graphic) $4–$6 20 min $35–$55 83% Tote + traditional patch applied $5–$7 22 min $38–$58 80% Tote + two-hooping satin border patch $5–$7 35 min $48–$72 82% Tote + patch cluster (3 patches) $5–$7 50 min $65–$90 84% Tote + combination (direct + patch) $5–$7 40 min $55–$80 83% Your Next Steps 1. Embroider one tote using the direct method. Use the creative brief — answer all five questions before you start. 2. Source your blanks. Order at least 6 boat tote blanks in your preferred weight. Set up a reorder system with your wholesale supplier before your first sale. 3. Build two patch design files. One for the traditional method (single-hooping with outline) and one split into two files for the satin border method. Practice on scrap before committing to a tote. 4. Photograph the process. Document hooping, trimming, and pressing step by step. Behind-the-scenes content is highly engaging on Instagram and TikTok and builds an audience of future customers. 5. Price your first listing. Use today's table as your guide. Start with your best work — the two-hooping satin patch on a 12 oz canvas tote — and price it at its true value. THE BOAT TOTE PRINCIPLE Anyone can buy a tote bag. Nobody else has yours. Personalization is not a feature. It is the product.
Learn more
The Embroiderers Handbook
THE EMBROIDERERS HANDBOOK 25 Tips, Hacks & Creative Ideas For Hobbyists and Small Business Owners Whether you are stitching for joy or building a business, these are the tips the most successful home embroiderers swear by. PUBLISHED BY Wild Threads AUDIENCE All Levels TIPS INCLUDED 25 Practical Tips INTRODUCTION There is a moment every embroiderer knows. The machine is running, the thread is perfectly tensioned, the design is unfolding exactly as planned — and you feel like you could do this forever. Getting to that moment consistently, session after session, is what separates a frustrating hobby from an addictive and profitable one. The tips in this guide come from years of experience — both at the home machine and in the studio. Some are technical. Some are creative. Some will seem embarrassingly simple. But every single one will make your embroidery faster, better-looking, or more enjoyable. And for those building a business from the machine, several will directly affect your bottom line. We have organized these 25 tips into five categories: Foundation, Technique, Time-Saving, Creativity, and Business. Work through them in order, or jump to the section that speaks to where you are right now. Either way — your best embroidery is ahead of you. SECTION 1 | Foundation Tips — Getting the Basics Exactly Right Experienced embroiderers will tell you the same thing: ninety-five percent of embroidery success happens before you press start. The preparation decisions you make — stabilizer, hooping, needle, thread — determine whether the design runs beautifully or fights you every step of the way. 01 TIP Treat Stabilizer Selection as a Non-Negotiable The single most common cause of poor embroidery results is the wrong stabilizer for the fabric. Tearaway works beautifully on stable wovens. Cutaway is essential for knits, stretchy fabrics, and anything that will be washed repeatedly. Water-soluble stabilizer is your go-to for delicate or sheer fabrics where no backing should remain. When in doubt, go more supportive rather than less — you can always trim excess, but you cannot undo a distorted design. 02 TIP Label Your Stabilizers Before They Get Confused If you keep multiple types and weights of stabilizer on hand — and you should — label every roll or sheet with a small piece of tape at the corner. Tearaway, cutaway, no-show mesh, water-soluble: they look nearly identical in low light. Grabbing the wrong one mid-project is a frustrating and completely avoidable mistake. 03 TIP Hoop the Stabilizer, Not the Fabric For most projects, the stabilizer should be what goes into the hoop drum-tight, with the fabric adhered on top using adhesive spray. Hooping the fabric itself stretches and distorts it, leading to registration errors and fabric damage — especially on knits and delicates. Float the fabric. Your designs will be straighter, your fabric will be happier, and your hoop marks will be gone. 04 TIP Use a Non-Slip Mat Under Your Hoop If your outer hoop frame slides around when you are trying to hoop — and it will — place a non-slip mat or grip pad underneath. A child's non-slip meal mat works just as well as any specialty embroidery product. Consistent, even hooping tension is one of the most underrated skills in machine embroidery, and a stable surface makes it dramatically easier to achieve. 05 TIP Change Your Needle More Often Than You Think A dull or damaged needle is responsible for more skipped stitches, thread breaks, and fabric snags than almost any other single cause. The general rule is a fresh needle every eight to ten hours of stitching time, or at the start of every significant new project. Sharp needles for woven fabrics, ballpoint for knits, and a needle with a larger eye for metallic threads — the right needle for the right fabric is one of the highest-impact, lowest-cost improvements you can make. QUICK CHECKLIST ✓ Tearaway stabilizer for stable wovens — easy removal after stitching ✓ Cutaway stabilizer for knits and stretch fabrics — permanent support ✓ No-show mesh for lightweight fabrics — minimal bulk and visibility ✓ Water-soluble for delicates and freestanding work — dissolves completely ✓ Always label your stabilizer rolls — they all look the same in the heat of a project SECTION 2 | Technique Tips — The Details That Separate Good from Great Great technique is not about perfection on the first attempt. It is about building consistent habits that produce reliable results — and knowing exactly what to do when something goes sideways, because in embroidery, something always eventually does. 06 TIP Do a Test Stitch-Out on Every New Design Before committing to your final fabric or blank, always run the design on a scrap piece of similar weight and texture. This single habit will save you more money, materials, and frustration than any other practice in embroidery. A test stitch-out reveals tension issues, stabilizer problems, color sequence errors, and sizing mismatches — all of which are easily corrected before they matter. 07 TIP Sort Your Thread Colors Before You Press Start Lay out all the thread colors your design calls for before the machine runs. This sounds obvious, but many embroiderers rely on the 'I'll find it as I go' approach — and end up scrambling mid-sequence, losing their place, or making the wrong color swap. Pre-sorting takes two minutes and eliminates entirely a very common source of project errors. 08 TIP Float Difficult Items Rather Than Forcing Them Into the Hoop Not everything can or should be hooped directly. Very small items, thick items like hats and bags, and items with awkward shapes can be floated: the stabilizer is hooped drum-tight, and the item is secured to it using adhesive spray, basting stitches, or pins. This approach also works beautifully for items you cannot risk marking with hoop impressions, like fine leather or delicate silk. 09 TIP Fix White Bobbin Thread Pulling Through with a Permanent Marker When white or light-colored bobbin thread pulls through to the top of an embroidered design around the edges, do not panic and do not restart. A permanent marker in the same color as the embroidery thread dabbed over the offending thread blends it in invisibly. Keep a basic set of fine-tip permanent markers in your embroidery workspace — they solve this problem in under ten seconds. 10 TIP Use a Stitch Eraser for Mistakes on Irreplaceable Items When you make an embroidery mistake on a garment, bag, or blank that cannot be replaced, a Stitch Eraser tool is far faster than removing stitches one by one with a seam ripper. It will not restore the fabric to its original state perfectly, but it removes bulk stitching in a fraction of the time and gives you a workable surface to re-embroider. Keep one in your toolkit for emergencies. "95% of embroidery success is determined before you press start. The right stabilizer, the right needle, the right hooping. Master the preparation and the machine does the rest." 11 TIP Use a Flame to Clean Up Loose Threads and Fray Excess threads and fray peeking out of a satin stitch border can often be cleaned up with a brief pass of a gas lighter flame. The heat melts synthetic thread ends instantly and cleanly. Work quickly and keep the flame moving — you are melting, not burning. Test on a scrap piece first and never use this technique on natural fibers or very delicate fabrics where the heat could cause damage. SECTION 3 | Time-Saving Tips — Work Smarter at the Machine Time is the most valuable resource you have — especially if embroidery is both your creative outlet and your income source. These tips will meaningfully reduce the time you spend per project without compromising quality. 13 TIP Use Adhesive Spray Instead of Pins to Secure Fabric Spray adhesive — 505 or KK2000 — is one of the great time-saving tools in home embroidery. Apply a light coat to your stabilizer, position your fabric once, smooth it flat, and you are done. No pins to remove, no pin holes in delicate fabric, and no fabric shifting mid-project. The adhesive washes away completely and leaves no marks on the finished piece. 14 TIP Pre-Cut Your Stabilizer in Batches Rather than cutting stabilizer pieces one at a time as you need them, spend fifteen minutes cutting a whole stack of standard sizes — 6x8, 8x10, 10x12 — and storing them in a labeled drawer or bin. When a project comes up, the stabilizer is already the right size and ready to go. This one batch habit saves the small but cumulative time cost of cutting for every single project. 15 TIP Invest in Magnetic Hoops for Difficult Items Magnetic hoops are one of the most significant time-saving upgrades available for the home embroiderer. What takes four to five minutes of careful screw-tightening with a traditional hoop can be done in under sixty seconds with a magnetic hoop — and the tension is more consistent. They are particularly transformative for caps, bags, and other items that resist traditional hooping. 16 TIP Use a Thread Stand for Metallic and Specialty Threads Metallic, glow-in-the-dark, and some variegated threads behave erratically when fed directly from the machine's thread post. Placing the spool on a thread stand positioned two to three feet from the machine gives the thread more distance to unwind and relax before it enters the thread guides. Fewer tangles, fewer breaks, and smoother running — all from a ten-dollar accessory. 17 TIP Remove Water-Soluble Topping Fast With a Wet Paper Towel When water-soluble topping is used and you are short on time for soaking, press a damp paper towel firmly over the design for thirty seconds. The topping dissolves on contact and can be peeled away cleanly without having to wait for the item to dry. This approach works just as reliably as soaking and takes a fraction of the time — particularly useful when working through multiple items in a production run. 18 TIP Maintain Your Machine on a Regular Schedule A well-maintained machine is a fast machine. Lint, thread debris, and inadequate lubrication slow stitching speed, increase thread breaks, and eventually cause mechanical failures at the worst possible moment. Build a simple routine: clean the bobbin area after every project, oil on the manufacturer's schedule, and have a professional service done once a year. A machine that runs smoothly is a machine that earns its keep. QUICK CHECKLIST ✓ Pre-cut stabilizer in standard sizes and store in labeled bins ✓ Use adhesive spray instead of pins for faster, cleaner fabric placement ✓ Invest in magnetic hoops — they pay for themselves in time saved ✓ Use a thread stand for metallics and specialty threads to reduce breaks ✓ Clean your machine's bobbin area after every single project ✓ A damp paper towel dissolves water-soluble topping in under a minute SECTION 4 | Creativity Tips — Expanding Your Design Vocabulary The machine is not the limit of your creativity — your willingness to experiment is. The embroiderers who produce the most original, most sought-after work are the ones who consistently push outside their comfort zone, try unexpected materials, and treat every project as an opportunity to learn something new. 19 TIP Experiment With Unexpected Fabrics Cotton and polyester are the defaults for good reason — but some of the most stunning embroidery work happens on unexpected surfaces. Denim, canvas, velvet, faux leather, cork, and even wood veneer all accept embroidery beautifully with the right needle and stabilizer setup. Each new fabric you try opens design possibilities that simply do not exist on conventional surfaces. Start with one unfamiliar fabric per month and build your material vocabulary deliberately. 20 TIP Build a Personal Stitch Sample Book Create a physical reference book of your own stitch samples — different fill types, stitch densities, thread weights, fabric combinations. Label every sample with the exact settings used. This resource becomes invaluable when planning future projects: instead of guessing whether a particular stitch density works on a particular fabric, you can flip to the answer. It is an investment of an afternoon that pays dividends for years. 21 TIP Keep a Project Journal Document every project with a note of the design used, the fabric, the stabilizer, the thread colors, and any adjustments made. Include what worked beautifully and what you would change. This journal becomes your personal design bible — a growing record of everything you have learned that lives exactly where you need it, in your own words, in your own context. Digital or paper, the format matters less than the habit. 22 TIP Mix Direct Embroidery With Appliqué Some of the most visually compelling embroidery work combines techniques within a single design: a directly embroidered background with appliqué fabric elements, or an appliqué shape finished with dense decorative stitching. These combinations add texture, dimension, and visual interest that solid stitching alone cannot achieve. Once you are comfortable with each technique independently, experimenting with combining them is where the most original work happens. 23 TIP Let Your Thread Choices Define the Mood Thread is your primary creative tool — and its range is far wider than most home embroiderers use regularly. Rayon thread has a high sheen and a luxury feel. Polyester is colorfast and durable for everyday use. Cotton gives a soft, matte, vintage appearance. Metallic thread adds drama. Variegated thread creates a painterly, multi-tonal effect with no color changes required. Glow-in-the-dark thread creates genuine surprise and delight. Expanding your thread palette is one of the lowest-cost, highest-impact creative investments you can make. "The embroiderers who produce the most original work are the ones who consistently push outside their comfort zone — one unfamiliar fabric, one new technique, one unexpected thread at a time." SECTION 5 | Business Tips — From Hobby to Profitable Studio The gap between a productive hobby and a profitable embroidery business is almost never about skill — it is about systems. Organization, pricing, production habits, and the ability to market what you make. These tips apply whether you are taking your first paid order or scaling toward a full-time studio. 24 TIP Niche Down Before You Scale Up The most successful home embroidery businesses are not generalists — they are specialists. Dog breed embroidery. Coastal patch collections. Faith-based personalized gifts. Bridal party accessories. Corporate uniform services. Choosing a niche sharpens your SEO, clarifies your photography, attracts your ideal customer, and makes every marketing decision easier. You can always expand later. But starting specific is almost always the faster path to profitability than starting broad. 25 TIP Photograph Everything — It Is Your Most Valuable Marketing Asset Every finished piece is a potential customer acquisition. Natural light near a large window, a clean background, and a styled context shot — a monogrammed tote at a farmers market, a baby blanket in a nursery, a cocktail napkin set on a styled bar cart — transforms a product photo into an aspiration. Your photography does not need expensive equipment. It needs good light, a clean background, and the willingness to shoot every finished piece before it leaves your hands. These images become your Etsy listings, your Instagram content, your word-of-mouth engine, and your portfolio. Make it a habit from day one. Five More Business Truths Worth Knowing Price for profit, not to compete. The most common mistake new embroidery businesses make is pricing based on what feels fair rather than what covers real costs plus a sustainable margin. Calculate your true cost — blank, thread, stabilizer, your time, overhead — and price above it. A buyer looking for a $12 tote is not your customer. A buyer looking for a beautifully crafted, personalized gift at $38 is. Your customer list is your most valuable business asset. Include a card in every shipped order that drives buyers to your email list or social media. An Etsy sale that becomes an email subscriber becomes a repeat customer you can reach directly — independent of any platform's algorithm or policy changes. Build this list from the very first order. Sets sell better than singles. A single cocktail napkin at $12 is a $12 sale. A set of four at $40 is a $40 sale — and the customer feels like they got a better deal. Package your products into sets, gift bundles, and curated collections. The per-item price may be the same or even lower, but the average order value climbs consistently. Never start a large design when you cannot monitor it. This is practical wisdom from experienced embroiderers that saves both time and materials. A complex design that runs unattended while you step away for thirty minutes is an expensive gamble. Thread breaks, bobbin exhaustion, and hoop shifts happen — and catching them early is the difference between a minor correction and a ruined b lank. Organize your workspace as if it is a studio, not a hobby corner. Thread racks. Labeled stabilizer bins. A dedicated hooping area. An ergonomic chair. Good lighting. The physical environment you work in directly affects your production speed, your design quality, and your creative energy. Investing in an organized, intentional workspace is not indulgence — it is infrastructure. THE EMBROIDERER'S CREED Prepare well. Test everything. Keep the machine clean. Experiment often. Document what you learn. And never underestimate what a perfectly hooped piece of fabric can become.
Learn more
Learn How to Create Applique
WILD THREADS · FUNDAMENTALS The Quick Guide to Simple Appliqué Three stitches. One clean finish. 1 PLACEMENT 2 TACKING 3 FINISHING HANDOUT EDITION · WILD THREADS STUDIO The Three-Step Principle Every appliqué element in a standard embroidery design follows the same three-stitch sequence. Once you recognize it, you can run any appliqué design with confidence. How It Works Each stitch is a separate color in your embroidery machine. That is intentional — the color change is what makes the machine stop and wait for you between steps. The sequence never changes: Step 1 · Placement A dashed outline shows you where the appliqué fabric will go. Step 2 · Tacking A tight outline locks the fabric in place and defines the trim line. Step 3 · Finishing A satin or zigzag border covers the raw edge for a clean, sealed finish. THE PRINCIPLE Each stitch has one job: show, lock, seal. Run the design. Watch for the pause. Place. Tack. Trim. Finish. BEFORE YOU BEGIN What You'll Need Everything fits within arm's reach. Most of it is already on your embroidery table. Essentials • Hooped base fabric with the stabilizer of your choice, already loaded on the machine • Appliqué fabric, cut at least 1″ larger than the design outline on every side • Curved-tip or duckbill appliqué scissors — sharp blades are non-negotiable • Embroidery threads, including a coordinating color for the finishing satin stitch • 75/11 embroidery needle for most fabric; 90/14 for denim or canvas Recommended • Lightweight fusible web (Heat n Bond Lite or similar) — see callout below • Spray adhesive (505 or KK2000) for slippery fabrics like vinyl or satin • A small travel iron for in-hoop fusing during placement WHY FUSIBLE WEB MATTERS A lightweight fusible web like Heat n Bond Lite ironed to the back of the appliqué fabric stops the edges from fraying, prevents the fabric from bubbling during the tacking stitch, and makes a clean trim much easier. Skip it only for raggy-edge designs where fray is intentional. STEP 01 Placement Stitch The machine stitches a dashed outline showing exactly where the appliqué will go — then pauses. How It Goes 1a · Machine stitches the outline. The first color is a basting-style dashed outline of the appliqué shape. The machine will stop when it finishes — that's your cue. 1b · Place the fabric over the outline. Lay your appliqué fabric, right side up, completely covering the stitched outline with a little overlap on every side. If the fabric is slippery, a light coat of spray adhesive keeps it in place. If you have Heat n Bond on the back, a quick press with a mini iron fuses it now. STEP 02 Tacking Stitch The machine stitches a tight outline that locks the appliqué fabric in place — and gives you a precise line to trim against. How It Goes 2a · Tacking stitch locks the fabric. Run the next color. The machine stitches a tight outline of the appliqué shape that catches both the appliqué fabric and the base. Hold the fabric gently as it stitches to prevent bubbling. The machine pauses again when done. 2b · Trim the excess fabric. Carefully — without unhooping the fabric — trim away the excess appliqué outside the tacking stitch. Use curved-tip scissors and cut as close to the stitch as you can without nicking it. See the next section for trimming technique. PRO TECHNIQUE Trimming the Tacked Appliqué This is the step that decides how clean your finished edge looks. The four rules below come from professional appliqué workflows. 1. Use curved-tip scissors. Curved or duckbill appliqué scissors are designed to glide along the tacking stitch without nicking it. Straight scissors fight you on every curve — if you find yourself struggling, swap them out before troubleshooting anything else. 2. Cut as close as you dare. Trim within ⅛″ of the tacking stitch. The closer the cut, the cleaner the satin stitch covers the edge in step 3. Just don't snip the tacking itself — that's how you end up redoing the whole step. 3. Rotate the piece, not the scissors. Turn the hoop toward the scissors rather than reaching the scissors around the piece. The motion is smoother, your hand is steadier, and the cut line stays cleaner. 4. Don't unhoop. Keep the fabric in the hoop throughout the trim. Unhooping mid-design shifts the alignment, and when the finishing stitch runs it may not land on the appliqué edge — leaving a visible gap that's nearly impossible to hide. DIAGNOSIS If the trimming is leaving ragged edges, your scissors are dull. Replace them before troubleshooting anything else. STEP 03 Finishing Stitch A satin or zigzag stitch surrounds the appliqué, covering the raw edge and sealing the work for a clean, professional finish. Common Finishing Stitches Most appliqué designs use one of these four. Your designer chose the stitch when they digitized the file — you just run it. Satin stitch. Dense, smooth zigzag — the polished classic. Used on most retail appliqué designs and what most embroiderers default to. Covers the raw edge completely. Zigzag stitch. Looser and faster than satin. Lets a little of the fabric edge peek through. A more casual, modern look. Blanket / buttonhole. An open, decorative stitch with a folk-craft feel. Common on quilt blocks, totes, and home-goods designs. Bean / triple run. Just a heavy running stitch around the edge. Lets the appliqué fabric fray gently — a deliberately raw-edged, casual finish. PRO TIPS Set Yourself Up for a Clean Finish Five small habits that separate amateur appliqué from professional appliqué. 1. Iron fusible web to the back of the appliqué fabric first. A lightweight web like Heat n Bond Lite ironed to the back of the appliqué fabric prevents fraying, eliminates fabric bubbling under the tacking stitch, and makes a clean trim much easier. Peel off the paper backing before placement. Skip the web only on raggy-edge designs where fray is intentional. 2. Cut your appliqué fabric oversized. At least 1″ larger than the placement-stitch outline on every side. Stretching a piece that's too small to cover the placement is the most common beginner frustration — it leaves gaps the tacking stitch can't fix. 3. Slow the machine down. Drop the speed to around 600 SPM for the tacking and finishing stitches. Appliqué rewards control, not speed — especially around tight curves and corners. The placement stitch can run full speed; it's only the bonded steps that need the slowdown. 4. Use a coordinating bobbin thread. For colored appliqué fabric, match the bobbin thread to the appliqué color rather than the base. This prevents the bobbin from showing through at the cut edge in the finished design. 5. Press the finished design. After the design is done and the hoop is off, press from the back through a pressing cloth or parchment paper. This activates any fusible web fully, smooths hoop marks, and gives the finished block a polished, retail-ready feel. FABRIC IDEAS Appliqué Beyond Cotton The same three-stitch sequence works with almost any fabric. Each one brings a different feel to the finished design. FABRIC WHY IT WORKS Cotton Quilting The classic. Clean edges, easy to trim, thousands of prints and solids. The default choice for most appliqué designs. Minky & Velour Soft, plush, dimensional. Use a slightly wider tacking-stitch margin to account for the pile. Especially good for baby and children's designs. Vinyl & Faux Leather Smooth and graphic with no-fray edges. Trim cleanly, no fusible web needed. Reduce machine speed slightly. Excellent for bags and totes. Denim & Canvas Heavy, structured, fashion-forward. Use a 90/14 needle for the extra thickness. Great for tote bags, jackets, and patches. Felt No fraying, no seam allowance needed, easy to trim. The most beginner-friendly fabric. Comes in a huge range of colors. Metallic & Specialty Sequin fabric, holographic vinyl, metallic lamé. Statement texture. Use a Teflon presser foot and slower machine speed. PICK YOUR STITCH The finishing stitch matters as much as the fabric — a satin border on denim reads premium, a bean stitch on cotton reads casual. Match the stitch to the project, not just the fabric. Quick Reference The whole sequence on one page. Tape this to the wall above your machine. STEP STITCH WHAT TO DO 1 Placement Run the first color. Lay appliqué fabric over the dashed outline, right side up, covering completely. 2 Tacking Run the second color. Trim away excess fabric outside the tacking stitch using curved-tip scissors. Keep the fabric in the hoop. 3 Finishing Run the third color. The satin or decorative stitch covers the raw edge for a clean, sealed finish. THE APPLIQUÉ PRINCIPLE Three stitches. One clean finish. Run the design. Watch for the pause. Place. Tack. Trim. Finish.
Learn more
Host a Trucker Hat Pop Up
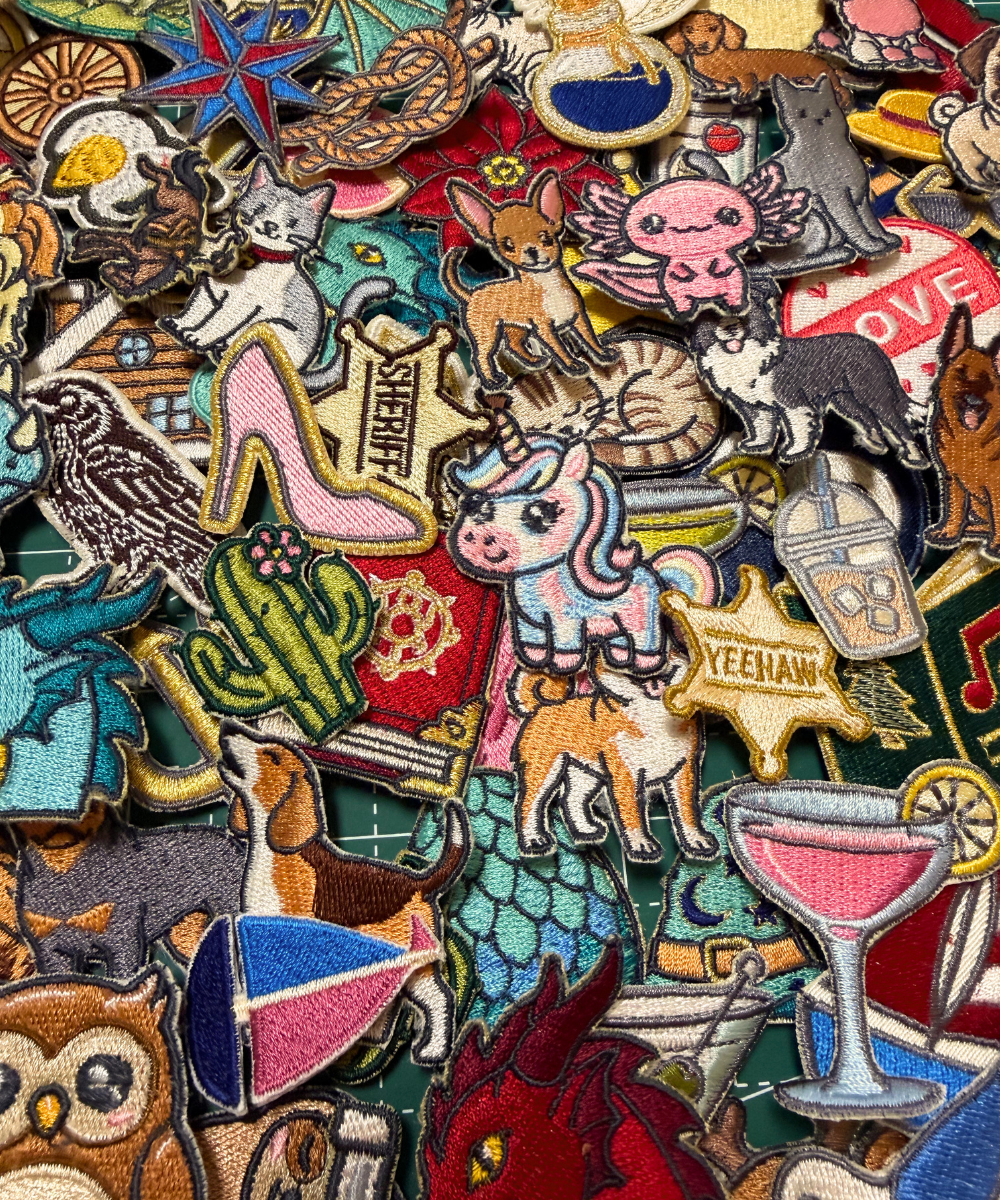
Welcome If you've been looking for a mobile embroidery format that's fast, fun, and practically sells itself — you just found it. The Trucker Hat Bar is one of the most exciting things happening in the embroidery business world right now, and the good news is, it's totally within reach for Wild Threads members. Here's how it works: guests pick a blank hat, choose from a beautiful wall of pre-made patches, and you press them on in seconds. That's it. The experience is the product. The hat is the souvenir. And every finished hat is a walking advertisement. This guide walks you through everything — the pricing models, the equipment, the setup, and the booking strategy — so you can take this concept from idea to your first event with total confidence. What This Guide Covers Part 1 · The Business Model— Pricing structures, unit economics, and why this format is exploding right now. Part 2 · Equipment & Supplies— Heat press options, hat sourcing, patch tiers, and startup costs at every budget level. Part 3 · The Setup— Station design, the patch wall, the host position, and signage. Part 4 · The Process— The five-step guest journey and the heat-press technique. Part 5 · Where to Book— Event types that work, package structures, and what to charge. Part 6 · Build & Grow— The operator playbook from the most successful hat bars in the country. PART 01 The Business Model Three pricing models. One product. And the highest margins in mobile embroidery. The trucker hat bar isn't a craft project — it's a high-throughput retail format with a built-in entertainment element. Here's why it works so well: Why It Works ● It's interactive. Guests participate in the design — the experience is the product, and that's what makes it shareable on social. ● It's fast. A pressed patch takes 10–15 seconds versus 12 minutes for direct embroidery. Volume per event is dramatically higher. ● It scales with demand. Two presses double your throughput. Six presses serve 100+ guests in 3 hours without slowing the line. ● The market is still expanding. Started in Nashville, now in every event city — and there's still plenty of room for new operators. Three Pricing Models Every operator in the country uses one of these three. Each has a different customer, a different price ceiling, and a different operational rhythm. Model Price Point What's Included Best For A · Flat Per-Person $40 – $85 / guest 1 hat + 3–8 patches + 90 min to 2 hrs station time. Easy to quote. Birthdays, bachelorettes, team building. 5–20 person groups. B · Base + À-La-Carte $15 + patches Lower entry; guests pay per patch. Settled at end of party. Cost-conscious groups, larger gatherings where engagement varies. C · Event Minimum $1,000+ event min. Billed on hat count with a floor. 120-hat, 3-hr event ≈ $3,000. Corporate activations, weddings, festivals, brand launches. Unit Economics — The Math on a Single Hat These are the real operating numbers behind the format. Margins hold up even at the low end of the price range — the upside comes from premium positioning and event minimums. Line Item Range Notes Blank trucker cap (wholesale) $4.00 – $5.00 Otto Cap 39-165 is the industry workhorse at ~$4 Patches (bulk off-the-shelf) $0.40 – $1.50 PatchStop, Faire wholesale, similar suppliers Patches (boutique / chenille) $3.00 – $6.00 Katydid, premium suppliers, average ~$6 Patches (custom-embroidered) $2.50 – $4.00 MOQ ~50 per design at most suppliers Heat press electricity & wear ~$0.10 Negligible per hat Total cost per finished hat $7 – $20 Depends on patch tier and count Retail price per hat $35 – $70 Market range across operators Gross margin per hat 70% – 84% Hits the high end when you use your own patches OPERATOR NOTE Per-event profit reports of $750–$800 are common for a single mobile operator at a 3-hour booking. Two operators with multiple presses can clear $2,000+ at a corporate event. PART 02 Equipment & Supplies The entire kit fits in the back of a car. Total startup ranges from $1,000 for a single-press solo operator up to $3,000 for a multi-press setup ready for corporate event work. There's no embroidery machine at the activation — just your heat press, your hats, and your patch wall. The Heat Press Three tiers. Buy one tier above what you think you need — you'll scale faster than expected, and a bigger press handles every hat the smaller one does. Tier Price Notes Tier 1 · Mini Press $80 – $150 Casual pop-ups, kids' parties, low volume. Bottlenecks at 20+ guests. Start here only if you're just testing the format. Tier 2 · Standard 5×5" / 6×6" $200 – $400 The workhorse. Bachelorettes, birthdays, small corporate, festivals. One operator can press ~40 patches/hr. Buy this one. Tier 3 · Cap Press / Curved $400 – $600+ Curved plate fits trucker-cap front panel without distortion. Worth it once you're doing 2+ events per month. Hats — The Canvas You're not just selling personalization — you're selling the hat. Color and style variety are the visual draw of the bar itself. Here are the key stocking rules to keep in mind: ● Stock 20+ colors per hat style. Variety reads as 'more options' before guests ever see the patches. ● Carry 2–3 hat styles: classic trucker (mesh back, foam front), dad hat (unstructured 6-panel), and snapback. Don't over-extend at launch. ● Default workhorse: Otto Cap 39-165. Mesh-back trucker, ~$4 wholesale, available in 20+ colors. The most-stocked blank in the country. ● Sources: CapBargain (Otto Cap direct), S&S Activewear, Augusta Sportswear. Free shipping kicks in around $119. ★ Opening-Day Hat Mix 60 hats across 12 colors — 3 of each: black, white, cream, khaki, navy, hunter green, burgundy, dusty pink, sage, lavender, tan, and charcoal. Approximate inventory cost: $240–$300 wholesale. Replenish bestsellers after the first event, then add a second style. Patches — Three Tiers of Sourcing Most operators mix all three tiers: cheap bulk for volume, premium for visual standouts, and custom for brand differentiation. The mix is the moat. Tier Cost / Patch Source Role in Your Inventory Bulk Off-the-Shelf $0.40 – $1.50 PatchStop · Faire · Ivamis Trading Volume tier. Stock 200+ designs for the patch wall depth that closes sales. Boutique / Chenille $3.00 – $6.00 Katydid Wholesale · curated Faire Visual standouts. Chenille, sequin, glitter — the patches guests photograph. Custom Embroidered $2.50 – $4.00 Ninja Patches · domestic shops Your own designs at scale. MOQ ~50/design. The moat — nobody else has them. Your Own (Wild Threads) Production cost Internal — your existing work Best margin and best differentiator. Repurpose existing patches as inventory. PART 03 The Setup The patch wall is the magnet. The heat press is the show. The host is the salesperson. Three zones, one footprint — fits a 6-foot folding table or a small pop-up tent, and travels in the trunk of a car. Three Zones, One Table Apply the same retail discipline as any great mobile setup: discovery in front, transaction in the middle, production at the back. 01 Discovery · The Front Hat display rack and the patch wall. Guests stop, browse, get curious, pick their hat and 2–4 patches. This zone is the visual magnet — and the part that photographs well. 02 Transaction · The Middle Where guests confirm their selection, you ring it up, and the patches get arranged on the hat. Small surface — clipboard, payment device, sample finished hats for inspiration. 03 Production · The Back Heat press, parchment paper, finished-hat staging. Position so guests can watch the press in action — the moving heat plate is your best advertising. The Patch Wall — Display Strategy The patch wall does 80% of the marketing for you. Top operators stock 200–400 designs. The visual abundance is the experience. ● Group by theme, not by color. Coastal, country, faith, snarky, florals. Theme groups help guests self-identify quickly. ● Premium patches at eye level. Chenille and metallic patches go in the prime visual real estate. They lift average ticket. ● $3 patches up front, $1 patches in depth. High-margin items in arm's reach. Volume bin patches behind, accessible after the impulse. ● Sample hats as the focal point. 3–5 finished hats in stands, showing your best combinations. These do more selling than any sign. ● Hat colors in a vertical rack. Vertical display reads as 'collection.' Horizontal piles read as 'leftover stock.' PART 04 The Process From the moment a guest stops at the patch wall to the moment they walk away with their finished hat, the entire experience is 5–10 minutes. Repeatable, scalable, and short enough that guests come back for a second hat. The Five-Step Guest Journey 1 Choose a Hat Guest browses the rack and picks a color and style. Most guests choose in under 30 seconds. 2 Browse the Patch Wall Pick 2–4 patches. Host stands by, offers suggestions, helps with combinations. 3 Arrange the Layout Lay the chosen patches on the hat front to test placement. Adjust until the guest is happy. 4 Press in Sequence Largest patch first, then layer smaller ones. 10–15 seconds per patch with parchment between iron and patch. 5 Inspect & Hand Off Let cool for 30 seconds. Check edges. Hand the finished hat to the guest. The whole thing took 5–10 minutes. Heat Press Technique · Temperature, Time, Pressure Three variables. Get them right and the patch is permanent. Get them wrong and patches lift after the first wash — the fastest way to kill repeat business. Variable Setting Why It Matters Temperature 300–320°F (150–160°C) Standard iron-on adhesive activates here. Trucker hat foam fronts don't tolerate higher — too hot and the foam compresses. Time 10–15 seconds per patch Too brief: patch lifts. Too long: scorches foam, melts mesh. Use a timer until the rhythm is automatic. Pressure Medium-firm (level 4–5) Firm enough to bond, not so hard it crushes the foam front. Most digital presses have pressure indicators on the handle. Do ● Always use parchment paper between the press and the patch. Protects thread, prevents glue residue. ● Press largest patch first, then layer smaller ones over it. Don't ● Don't press on the foam front directly without a curved cap plate. Press only the patch area — never crush the entire crown. ● Don't stack patches in the same press. Stacked patches have uneven bonding and will peel within the first wear. PART 05 Where to Book Five event categories where trucker hat bars consistently book — and book well. Each has a different price ceiling, volume profile, and lead time, but the same kit serves all of them. Event Type Typical Size Pricing Model Notes Bachelorette parties 8–15 guests Flat per-person ($55–$85) Highest social-media velocity. Group photo at the end is the marketing. Birthday parties 10–30 guests Flat per-person ($40–$65) Kids' parties, milestone birthdays, mom's-night-out groups. Year-round. Corporate activations 50–500 guests Event minimum + per-hat Team builds, client events, conference giveaways. Largest single-event revenue. Weddings 20–150 guests Event minimum ($1,000+) Reception entertainment, welcome gifts, day-after farewell brunches. Festivals & pop-ups Walk-up volume Per-hat retail ($45–$70) Booth fee + retail. Highest volume, requires staff and queue management. Sports & fundraisers 30–80 guests Fundraiser split (60/40) School sports, dance teams, booster clubs. Highly repeatable annual booking. ★ Lead Times to Know Bachelorettes book 2–4 weeks out. Corporate books 4–8 weeks. Weddings book 3–6 months. Build your calendar template around all three lead times so you're never scrambling. Three Starting Packages Three is the magic number for booking pages: good, better, best. Most guests pick the middle. Use these as starting templates and adjust to your market. The Party · $50 per person · 90 minutes 1 hat (any color, any style) · 3 patches from main wall · On-site host · Up to 20 guests Best for: Birthday parties, casual gatherings. The Bachelorette · $75 per person · 2 hours · Most Popular 1 hat (any color, any style) · 5 patches including 1 premium · Hat band / chain accessory · Photo wall backdrop · Host + assistant for 10+ guests Best for: Bachelorettes, milestone birthdays. The Event · Quoted · $1,000 Minimum · 3 hours+ Custom-branded patches · Two presses + two hosts · Up to 120 hats included · Color-coordinated to event theme · Setup, breakdown, travel included Best for: Corporate, weddings, festivals. PART 06 Build & Grow The most successful trucker hat bars in the country share five common moves. None of them are about the patches or the hats — they're about the business model built around them. Cross-referenced from Sercy & Co. (Nashville), HomeGrown Truckers (Atlanta), Flea Style (Dallas), Native Hat Co. (Scottsdale), and a dozen smaller regional operators. Five Moves From the Top Operators ● Own a regional identity. Nashville Hat Bar. Atlanta Trucker Co. Scottsdale Patch Studio. The geographic brand creates immediate SEO and local press appeal. ● Publish a booking calendar. A public calendar on your site showing booked dates creates two outcomes: urgency (limited slots) and proof (you book). Both close more deals. ● Sell custom patches as an upsell. Brides, corporate clients, and sports teams all want their own. MOQ 50 patches per design at $4–$6 each — a premium add-on for the right buyer. ● Repeat clients are 50%+ of revenue. Annual school fundraisers, recurring corporate, brides who book bachelorette plus wedding. Build your CRM from day one. ● Photography is the marketing. Every event gets shot. Finished hats in stands, group photos, action shots at the press. The patch wall is gorgeous — use it. Your Next Steps Ready to take it into the field? Here's how to get started: ● Buy the press. Tier 2 standard ($200–$400). Test on 5 sample hats with patches from your existing stock. ● Order 60 blank hats. 12 colors × 5 each. Otto Cap 39-165 wholesale. Approx. $240–$300 all-in. ● Build the wall. 200 patches minimum. Mix bulk ($1) and premium ($5). Group by theme on a vertical display. ● Book one event. A friend's birthday or a local market. Charge the Party rate ($50/person). Use it to test the rhythm. ● Photograph everything. The wall, the press in action, finished hats, guests holding hats. This becomes your booking material. THE HAT BAR PRINCIPLE The experience is the product. The hat is the souvenir. Price for the experience. Photograph everything. Repeat. Wild Threads · The Trucker Hat Bar · www.anitagoodesign.com
Learn more
Stitch to Success
STITCH TO SUCCESS Building a Profitable Embroidery Business A Complete Seminar for Embroiderers Ready to Turn Their Passion into Profit SECTION Stitch to Success PRESENTED BY Stephen Wilson SECTIONS 6 Complete Guides 1 Section 1 — So You Want to Make Money? Let's be honest — embroidery isn't just a hobby. For many people, it becomes an obsession. And that obsession has real money-making potential. This seminar is designed to help you transform your passion for embroidery into a sustainable, profitable business. How Did You Get the Embroidery Bug? Every embroiderer has a story. For some it was a single moment — a glimpse of a machine in a store window, a video on social media, a friend's beautifully monogrammed gift. For others it was a natural progression from another craft. No matter how you arrived here, you arrived for a reason. Common entry points into embroidery include: ◆ Seeing a machine online — a YouTube rabbit hole, an Instagram ad, or a TikTok that stopped you mid-scroll ◆ Visiting a store or trade show and watching a machine in action — that first moment seeing thread become art ◆ Coming from quilting or sewing — and discovering embroidery as the natural next creative step ◆ Receiving a personalized embroidered gift and thinking, 'I could do that' — and then doing it ◆ Wanting to create custom items for family, teams, or small businesses Whatever your entry point, the moment you saw that machine, you knew. You had to have it. And now that you do — let's talk about how to make it pay for itself and then some. The Pivot: From Hobby to Business Mindset Making money with embroidery requires a mindset shift. You are no longer just creating — you are producing a product and delivering a service. That means thinking about time, pricing, quality control, customer relationships, and marketing. The good news: if you love embroidery, building a business around it is one of the most rewarding things you can do. 2 Section 2 — Choosing the Right Machine Your machine is your most important business investment. The right choice depends on your intended volume, the types of items you plan to embroider, your workspace, and your budget. Single-Needle vs. Multi-Needle ◆ Single-needle machines are great for beginners and hobbyists transitioning to business — lower cost, easier learning curve, ideal for small batch and custom one-offs ◆ Multi-needle machines (6, 10 needles) dramatically increase your speed and productivity — essential once your order volume grows, as you spend far less time re-threading for multi-color designs Key Features to Evaluate ◆ Hoop size range — larger hoops open up more product types (jackets, bags, large logos) ◆ Speed (stitches per minute) — commercial machines run 800-1,200 SPM vs. home machines at 400-600 ◆ Built-in designs vs. import capability — always choose a machine that accepts your own digitized designs ◆ USB and wireless connectivity for easy design transfer ◆ Warranty and service network — critical for a business machine that runs daily ◆ Cap/hat attachment capability — a high-demand product category that requires special hooping frames Budget Guidance Entry-level single needle Starting at $1,000 Mid-range multi-needle $10,000 – $15,000 Commercial / production $15,000 and up Choosing where you buy your machine matters just as much as which machine you choose — and here is why. Machines need service. Machines break. That is not a flaw in the technology; it is simply the reality of any piece of equipment that runs hard and runs often. If embroidery is your business, plan for it — which is exactly why starting with two machines is the right move. When one is down, the other keeps you running. Seek out a reputable dealer who does three things well: they teach you how to use the machine properly, they service it when it needs attention, and they will trade it in and move you up when you are ready to grow. That relationship is worth more than any discount. Resist the temptation of lower prices online or unfamiliar brands with no track record. Buy from a dealer with a stellar reputation in the embroidery community — one who will be in your corner not just on the day of the sale, but at every stage of your business. 3 Section 3 — Ways to Make Money — The Traditional Methods These time-tested business models have built countless embroidery businesses. They're reliable, scalable, and offer consistent demand year-round. 1. Monogramming & Personalization Personalization is the heartbeat of the embroidery industry. People will always want their name, initials, or a special message stitched onto something meaningful. This is often the first revenue stream for new embroiderers — and for good reason. ◆ Most popular items: towels, robes, bags, pillowcases, baby blankets, bibs, and apparel ◆ Peak seasons: back to school, weddings, holidays, baby showers, and graduations ◆ Pricing advantage: personalized items command a significant premium — customers expect to pay 2-3x the base product price ◆ Low setup cost: monogram fonts are pre-digitized, so turnaround is fast and profitable per hour 2. Selling in Bulk Bulk orders are the foundation of a sustainable embroidery business. Once you land a repeat bulk customer, you have predictable income and the ability to plan your production schedule. ◆ Target customers: sports teams, schools, churches, gyms, salons, restaurants, real estate offices, medical practices ◆ Typical bulk items: polo shirts, staff uniforms, team jerseys, hats, tote bags ◆ Pricing strategy: offer volume discounts (e.g., $12/piece for 1-11, $9/piece for 12-23, $7/piece for 24+) ◆ Wholesale sourcing: partner with distributors like S&S Activewear, SanMar, or Alpha Broder 3. Selling to Companies (B2B) Business-to-business sales are where the largest orders live. Companies have ongoing uniform and promotional needs, meaning a single corporate client can generate thousands of dollars annually. ◆ High-value targets: construction companies, hotels, healthcare facilities, retail chains, and hospitality businesses ◆ Approach strategy: walk into local businesses with a sample kit of your work — a polo, a hat, a bag with their logo ◆ Build relationships with purchasing managers and HR departments — they are often the decision makers ◆ Offer contract pricing for annual agreements — businesses love predictable costs, and you love predictable revenue 4. Exhibiting at Shows Craft shows, trade shows, farmers markets, and local festivals are a powerful way to build brand awareness, generate immediate sales, and collect customer contacts for future marketing. ◆ Best show types: local craft fairs, holiday markets, bridal expos, school fundraiser events, and home & garden shows ◆ Booth setup tips: display a variety of finished products at multiple price points, and have a sign-up for custom orders ◆ If possible, bring your machine and embroider live — nothing draws a crowd like watching it work in real time ◆ Always collect emails: a show customer who gives you their email is a repeat customer — follow up with seasonal promotions 4 Section 4 — Ways to Make Money — The New Methods The embroidery business landscape has evolved dramatically. These newer business models offer flexibility, lower overhead, and access to customers that traditional shops can't reach. 1. Mobile Embroidery Mobile embroidery is one of the fastest-growing business models in the industry. You bring your machine to the customer — making you a service, not just a product. This model is especially powerful at events where on-the-spot personalization creates excitement and urgency. ◆ Setup: a portable multi-needle machine, a folding table, a generator or venue power connection, and a display of thread colors and design options ◆ Best venues: corporate parties, college orientation fairs, sports championships, birthday parties, weddings, and trade shows ◆ Revenue model: charge per item (the customer brings their own or you sell blanks), plus a setup/travel fee ◆ The experience is the marketing: watching their item being personalized in minutes is unforgettable — people photograph it, share it, and tell friends ◆ Tip: Create event packages (e.g., 2-hour minimums, 20-piece guarantees) to ensure profitability for each booking 2. Home Shows Modeled after the direct sales party model, home shows bring embroidery to a captive, warm audience in an intimate setting. The host invites friends, you showcase your products and capabilities, and guests place orders on the spot. ◆ How it works: host invites 10-20 friends, you bring samples and a machine, guests browse, order personalized items, and you fulfill within 1-2 weeks ◆ Incentivize the host: offer free personalized items based on total show sales (e.g., $25 in free goods for every $200 in orders) ◆ Average home show revenue: $300-$800 in orders per event, with minimal overhead ◆ Snowball effect: every attendee is a potential future host — one show can generate three more shows if you make it fun and easy 3. Activations Brand activations are experiential marketing events where companies want to create memorable moments for their customers or employees. Embedding an embroidery station into an activation is a premium, high-paying service that is still relatively new — which means less competition. ◆ What it looks like: a fashion brand launches a new line and hires you to embroider custom patches or initials onto products at the launch party ◆ Other activation clients: luxury retail brands, sneaker companies, sports leagues, music festivals, and corporate team-building events ◆ Pricing: activation work commands premium rates — $500 to $3,000+ per event depending on scope, hours, and items produced ◆ How to get in: reach out to event marketing agencies, brand managers, and PR firms — they book these experiences and are always looking for unique vendors 5 Section 5 — Selling Online The internet has removed every geographic barrier from your embroidery business. You can now serve customers across the country — or the world — from your home studio. 1. Etsy — Your First Online Storefront Etsy is the world's largest marketplace for handmade and personalized goods — and embroidery fits perfectly within its ecosystem. With over 90 million active buyers, Etsy provides built-in traffic that would take years to build independently. ◆ Getting started: open a free shop, pay $0.20 per listing, and 6.5% transaction fee on each sale — low barrier to entry ◆ What sells best on Etsy: personalized baby items, wedding gifts, bridesmaid accessories, holiday ornaments, and custom patches ◆ Photography is everything: your product photos are your storefront — invest time in beautiful, well-lit lifestyle images ◆ SEO on Etsy: use all 13 tags, write detailed titles with keywords, and update listings regularly ◆ Reviews build trust: follow up with every buyer to ensure satisfaction — 5-star reviews are your most valuable marketing asset ◆ Etsy Ads: even a small daily budget ($1-$5/day) can significantly increase your visibility in competitive categories 2. Your Own Website — Building Long-Term Brand Equity While Etsy is an excellent starting point, your own website gives you complete control — no fees, no algorithm changes, no risk of your shop being suspended. A well-built website positions you as a professional brand. ◆ Platform options: Shopify (best for product sales), Squarespace (best for design-forward brand), or Wix (most beginner-friendly) ◆ Essential pages: Home, Shop, Custom Orders, About, Gallery/Portfolio, and Contact ◆ Custom order form: make it easy for customers to submit order details without back-and-forth emails ◆ Blog for SEO: write articles about embroidery care, gift ideas, and how-tos — this drives organic search traffic over time ◆ Email list: offer a discount or freebie in exchange for an email sign-up — your list is your most valuable marketing asset ◆ Strategy tip: run Etsy and your own website simultaneously — Etsy builds traffic and reviews early on, while your website builds long-term brand independence 6 Section 6 — The Multi-Channel Approach — How to Start and Grow The best way to start an embroidery business is not to pick one sales channel and go all in. It is to launch across multiple channels simultaneously — online, in person, and B2B — letting each one feed the others. Why Multiple Channels From the Start? Most new embroidery businesses make the mistake of going deep on one channel before trying anything else. The problem is simple: when that one channel has a slow month, the whole business has a slow month. A multi-channel approach from day one creates a natural cushion. Your online sales carry slow weekends. Your in-person events generate referrals that feed your B2B pipeline. Your B2B clients see your in-person work and share it online. The channels are not competing — they are compounding. Channel 1: Online — Reach Customers Anywhere ◆ Etsy — The fastest entry point. Low setup cost, built-in search traffic, and an audience already looking for personalized handmade items. ◆ Your own website — The long-term goal. No marketplace fees, direct customer relationships, and full control over your brand. ◆ Social media — Instagram and TikTok are the most powerful free marketing tools available. Your feed is your portfolio. ◆ Email list — Every online customer who joins your list is a direct line to repeat business that no algorithm can take away from you. Channel 2: In Person — Build Community and Trust ◆ Craft shows and markets — Your first and most accessible in-person channel. A well-displayed booth with a running machine is the most powerful marketing tool in embroidery. ◆ Mobile embroidery activations — Bring the machine to events, pop-ups, festivals, and brand experiences. ◆ Local boutique partnerships — Wholesale or consignment arrangements with local retailers put your work in front of new audiences. ◆ Community events — Schools, churches, sports teams, and local organizations all need embroidered items. Channel 3: B2B — Build Recurring, Reliable Revenue ◆ Corporate uniforms — Restaurants, salons, medical offices, retail staff, and hospitality businesses all need branded workwear. ◆ Branded merchandise — Hats, bags, apparel, and accessories with a business logo. ◆ Sports teams and organizations — Schools, recreational leagues, and competitive teams need jerseys, bags, and spirit wear. ◆ Event and activation partnerships — Corporate events and experiential marketing campaigns increasingly use live personalization. ★ The Right Mix for You There is no single formula for the right channel mix. Someone with a full-time job might start heavier on online channels that run passively. Someone with a flexible schedule might lean into craft shows and B2B outreach first. A single Etsy listing, one craft show booking, and one coffee meeting with a local business owner is enough to have all three channels active. Start small in each direction — and let the results tell you where to put more energy. Four Principles That Make the Multi-Channel Approach Work ◆ Start before you are ready. You do not need a perfect website, a full product line, or a large following. You need one listing, one booking, or one email to a local business. Start there. ◆ Let each channel feed the others. An in-person customer becomes an Etsy reviewer. A B2B client becomes a social media tag. A craft show fan becomes an email subscriber. Every interaction connects to every channel. ◆ Diversification creates stability. When Etsy has a slow week, your B2B clients are still ordering. When the craft show season ends, your online shop keeps running. ◆ Price for profit in every channel. Your B2B pricing, your Etsy pricing, and your in-person pricing all need to account for your true costs. Know your numbers and price above them. Your Next Steps You have the passion. You have the machine. Now you have the roadmap. The only thing standing between you and a profitable embroidery business is action. Here's where to begin: ◆ Define your niche: monogramming, corporate uniforms, mobile events, or online sales — start with one and master it ◆ Set your prices: calculate your true cost (materials + time + overhead) and price for profit, not just to cover costs ◆ Create samples: build a portfolio of your best work across different product types to show potential customers ◆ Launch your Etsy shop: even 5-10 listings is enough to start capturing online orders ◆ Book your first show or event: get your machine in front of people and let the work speak for itself ◆ Connect with other embroiderers: join online groups, attend trade shows, and never stop learning THE THREAD THAT CONNECTS ALL SUCCESSFUL EMBROIDERY BUSINESSES They started. Thank you for attending — now go build something beautiful.
Learn more