|
TUTORIALS · MACHINE EMBROIDERY Free-Standing Butterflies A complete guide to stitching, trimming, and installing dimensional embroidered butterflies — from supplies to final display.
|
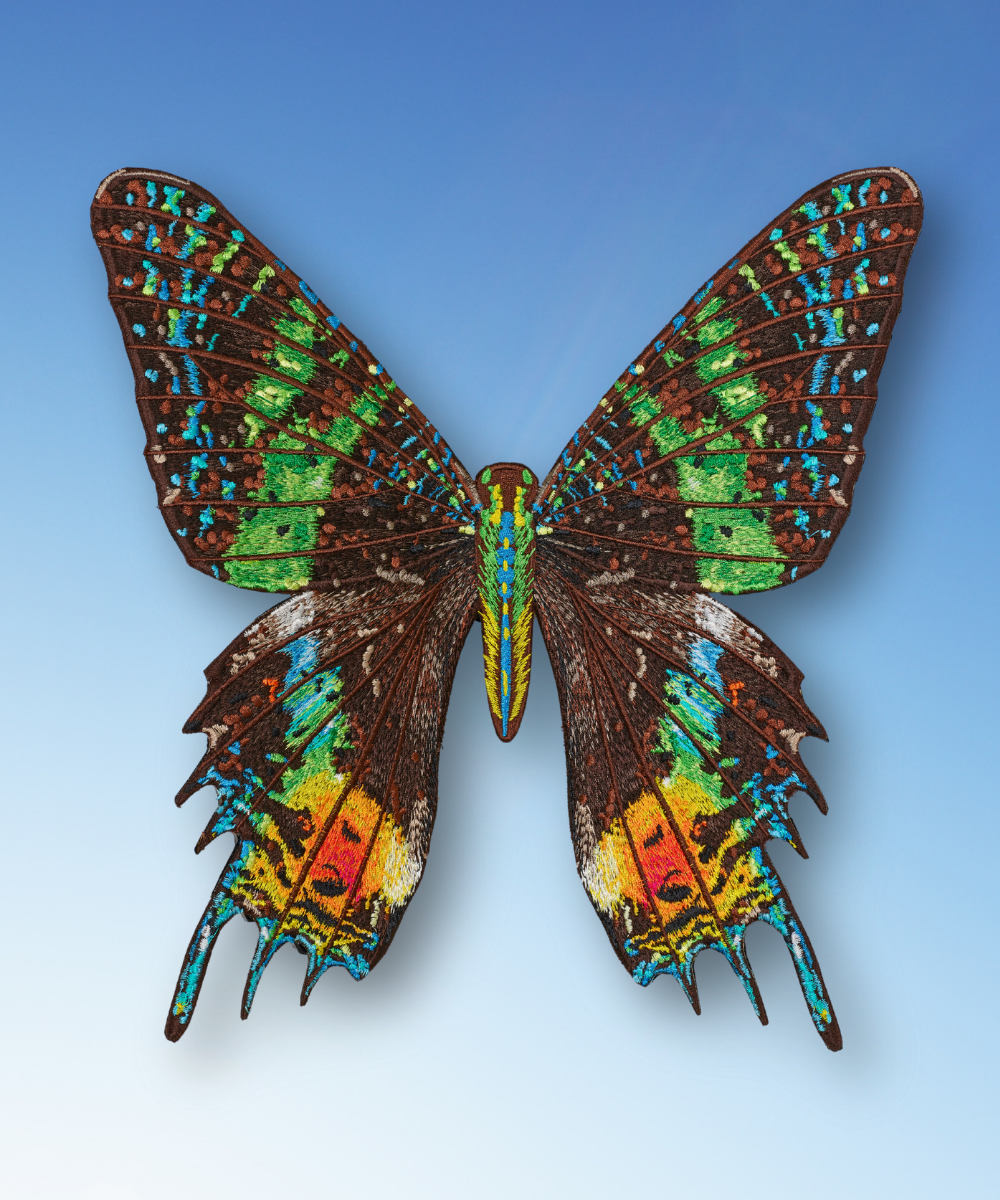
A selection of species from Signature Series Vol. 2: Butterflies — each stitched in rich, realistic detail
About this collection
|
Stephen Wilson has been creating embroidered butterflies for over 20 years — from quilts and garments to freestanding art pieces. Butterflies have become a signature element of his work because of what they represent: transformation, metamorphosis, and beauty in nature. Signature Series Vol. 2: Butterflies features 100 different species, each digitized in rich realistic detail, and available in three sizes — 2.5", 3.0", and 3.5". The range in sizing opens up new possibilities for everything from jewelry and accessories to large-scale wall installations. This guide covers everything you need to stitch, trim, and display these dimensional butterflies. |
|

Supplies & Materials

Threads, Stahls' Poly-TWILL™ fabric, curved-tip scissors, and wash-away stabilizer — everything you need
|
SUPPLY |
NOTES |
|
Threads |
Use real-life colors or tonal options. Wilson's originals draw on Robison-Anton, Madeira, and Floriani — design steps call out generic color names so you can use any brand. |
|
Stabilizer |
Double up two layers of wash-away stabilizer for durability with a soft, flexible finish. |
|
Base fabric |
Stahls' Poly-TWILL™ — a tightly woven 100% polyester with a diagonal weave that holds up to high stitch counts. |
|
Scissors |
Sharp curved-tip embroidery scissors (such as Gingher double-curved) for close, clean trimming. |
|
Finishing tool |
A hot knife or candle-length lighter to singe wing edges for a clean, uniform appearance. |
|
Thread selection tip With 100 species to choose from, keep reference images nearby — printed or on screen. Design steps use generic color names ("deep orange," "midnight blue") so you can match any thread brand to the real butterfly's palette. |
Stitching the Butterflies
Each butterfly design begins with a placement stitch that outlines the shape. From there, place your Poly-TWILL™ fabric over the stitched area — it acts as the hidden base that supports the entire embroidery. Then run the design through to completion, following the thread color changes indicated in your machine steps.
Due to the high stitch density of each species, run these designs on a double layer of wash-away stabilizer to give enough durability without sacrificing the soft, flexible finish of the final piece.
|
|
Trimming & finishing Once stitched, remove the piece from the hoop and tear it away from the stabilizer. Using curved-tip scissors, trim as closely as possible to the stitched outline without cutting into the stitch lines. Any stray threads or exposed Poly-TWILL™ remaining after trimming can be singed away with a hot knife or a lighter. Work slowly — a light pass melts stray fibers instantly and leaves a clean, professional edge.
|

Display Inspiration

Blue Morpho butterflies framing a room concept — a preview of the kind of installation these designs make possible
Installing Your Butterflies
Once trimmed and finished, the butterflies are ready to go anywhere. The collection tutorial includes dozens of display options — below are a few of the most popular applications.
|
Wall display — butterflies pinned in a flowing arrangement |
Stephen Wilson installing butterflies on a gallery wall |


For wall display, a simple pin or adhesive dot is all you need. The dimensional finish of the freestanding embroidery creates natural shadow and depth against any surface — the butterflies appear to be in flight.
|
|
Wearable & accessories The smaller 2.5" size works beautifully as a brooch, bag charm, or lapel pin. Back a finished butterfly with a pin finding using a drop of fabric glue or a few hand stitches for an instant accessory. The diversity of sizing across 2.5", 3.0", and 3.5" means one species can serve multiple purposes — a smaller version as jewelry, a larger as a wall piece, framed art, or a statement on a garment. Other popular applications: Wall installations · Framed shadowbox art · Picture frames · Jewelry & brooches · Garments & accessories · Gift toppers · Seasonal décor |

|
Signature Series Vol. 2: Butterflies Available now for immediate download at anitagoodesign.com |
Free-Standing Butterflies Guide | anitagoodesign.com
Stephen Wilson has spent over 20 years perfecting the art of freestanding embroidered butterflies, and in this guide he shares exactly how it's done. Using just three key materials — wash-away stabilizer, Poly-TWILL™ fabric, and your thread palette — you can stitch any of 100 realistic butterfly species, trim them cleanly with curved scissors, and singe the edges to a polished finish. Once complete, these dimensional butterflies can go anywhere: walls, frames, jewelry, garments, or gift toppers. This collection comes in three sizes (2.5", 3.0", and 3.5"), making them endlessly versatile for both small accessories and large statement installations.