THE EMBROIDERERS HANDBOOK
25 Tips, Hacks & Creative Ideas
For Hobbyists and Small Business Owners
Whether you are stitching for joy or building a business, these are the tips the most successful home embroiderers swear by.
|
PUBLISHED BY Wild Threads |
AUDIENCE All Levels |
TIPS INCLUDED 25 Practical Tips |
INTRODUCTION
There is a moment every embroiderer knows. The machine is running, the thread is perfectly tensioned, the design is unfolding exactly as planned — and you feel like you could do this forever. Getting to that moment consistently, session after session, is what separates a frustrating hobby from an addictive and profitable one.
The tips in this guide come from years of experience — both at the home machine and in the studio. Some are technical. Some are creative. Some will seem embarrassingly simple. But every single one will make your embroidery faster, better-looking, or more enjoyable. And for those building a business from the machine, several will directly affect your bottom line.
We have organized these 25 tips into five categories: Foundation, Technique, Time-Saving, Creativity, and Business. Work through them in order, or jump to the section that speaks to where you are right now. Either way — your best embroidery is ahead

of you.
|
SECTION 1 | Foundation Tips — Getting the Basics Exactly Right |
Experienced embroiderers will tell you the same thing: ninety-five percent of embroidery success happens before you press start. The preparation decisions you make — stabilizer, hooping, needle, thread — determine whether the design runs beautifully or fights you every step of the way.
|
01 TIP |
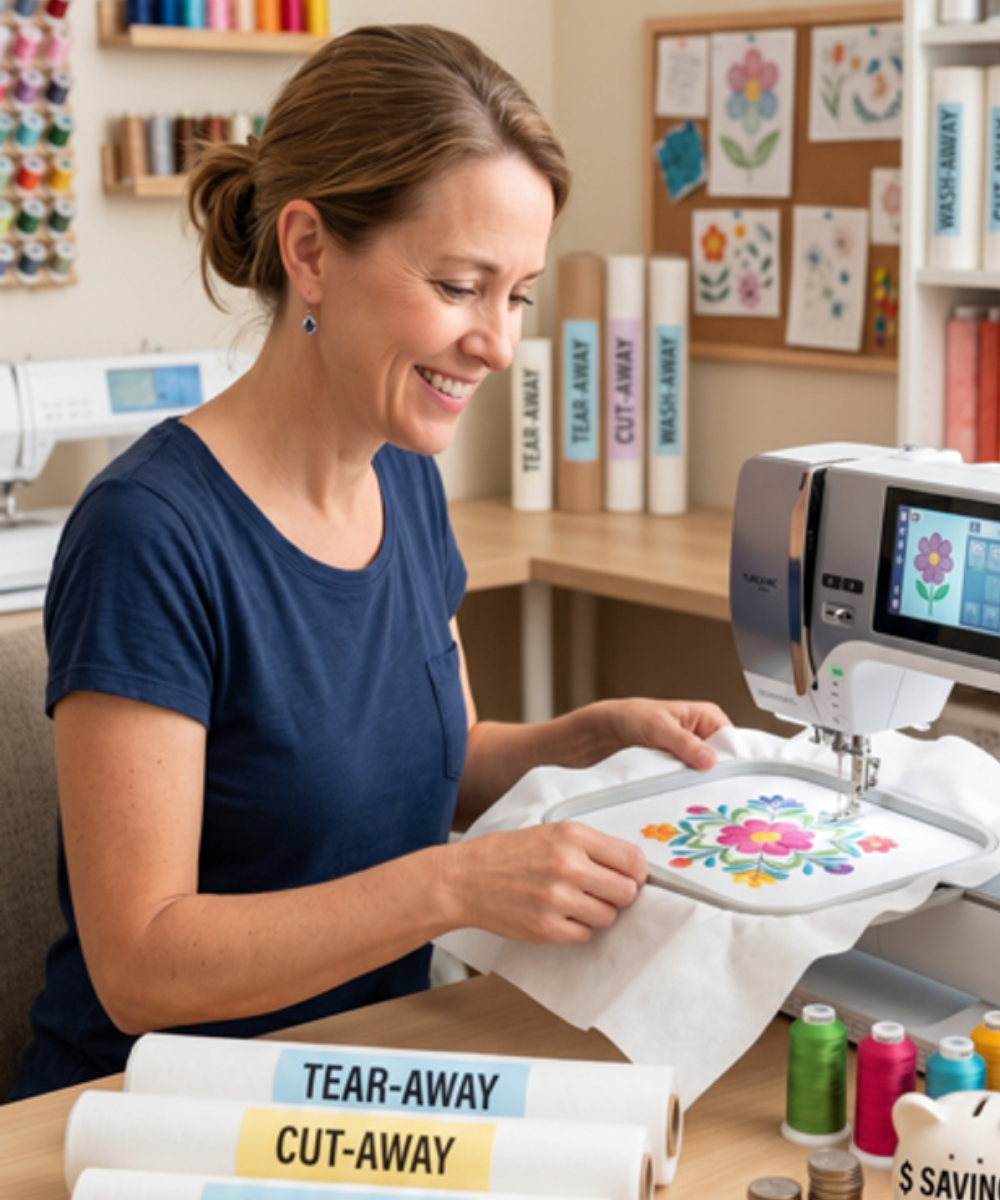
Treat Stabilizer Selection as a Non-Negotiable The single most common cause of poor embroidery results is the wrong stabilizer for the fabric. Tearaway works beautifully on stable wovens. Cutaway is essential for knits, stretchy fabrics, and anything that will be washed repeatedly. Water-soluble stabilizer is your go-to for delicate or sheer fabrics where no backing should remain. When in doubt, go more supportive rather than less — you can always trim excess, but you cannot undo a distorted design. |
|
02 TIP |
Label Your Stabilizers Before They Get Confused If you keep multiple types and weights of stabilizer on hand — and you should — label every roll or sheet with a small piece of tape at the corner. Tearaway, cutaway, no-show mesh, water-soluble: they look nearly identical in low light. Grabbing the wrong one mid-project is a frustrating and completely avoidable mistake. |
|
03 TIP |
Hoop the Stabilizer, Not the Fabric For most projects, the stabilizer should be what goes into the hoop drum-tight, with the fabric adhered on top using adhesive spray. Hooping the fabric itself stretches and distorts it, leading to registration errors and fabric damage — especially on knits and delicates. Float the fabric. Your designs will be straighter, your fabric will be happier, and your hoop marks will be gone. |
|
04 TIP |
Use a Non-Slip Mat Under Your Hoop If your outer hoop frame slides around when you are trying to hoop — and it will — place a non-slip mat or grip pad underneath. A child's non-slip meal mat works just as well as any specialty embroidery product. Consistent, even hooping tension is one of the most underrated skills in machine embroidery, and a stable surface makes it dramatically easier to achieve. |
|
05 TIP |
Change Your Needle More Often Than You Think A dull or damaged needle is responsible for more skipped stitches, thread breaks, and fabric snags than almost any other single cause. The general rule is a fresh needle every eight to ten hours of stitching time, or at the start of every significant new project. Sharp needles for woven fabrics, ballpoint for knits, and a needle with a larger eye for metallic threads — the right needle for the right fabric is one of the highest-impact, lowest-cost improvements you can make. |
|
QUICK CHECKLIST ✓ Tearaway stabilizer for stable wovens — easy removal after stitching ✓ Cutaway stabilizer for knits and stretch fabrics — permanent support ✓ No-show mesh for lightweight fabrics — minimal bulk and visibility ✓ Water-soluble for delicates and freestanding work — dissolves completely ✓ Always label your stabilizer rolls — they all look the same in the heat of a project |

|
SECTION 2 | Technique Tips — The Details That Separate Good from Great |
Great technique is not about perfection on the first attempt. It is about building consistent habits that produce reliable results — and knowing exactly what to do when something goes sideways, because in embroidery, something always eventually does.
|
06 TIP |
Do a Test Stitch-Out on Every New Design Before committing to your final fabric or blank, always run the design on a scrap piece of similar weight and texture. This single habit will save you more money, materials, and frustration than any other practice in embroidery. A test stitch-out reveals tension issues, stabilizer problems, color sequence errors, and sizing mismatches — all of which are easily corrected before they matter. |
|
07 TIP |
Sort Your Thread Colors Before You Press Start Lay out all the thread colors your design calls for before the machine runs. This sounds obvious, but many embroiderers rely on the 'I'll find it as I go' approach — and end up scrambling mid-sequence, losing their place, or making the wrong color swap. Pre-sorting takes two minutes and eliminates entirely a very common source of project errors. |
|
08 TIP |
Float Difficult Items Rather Than Forcing Them Into the Hoop Not everything can or should be hooped directly. Very small items, thick items like hats and bags, and items with awkward shapes can be floated: the stabilizer is hooped drum-tight, and the item is secured to it using adhesive spray, basting stitches, or pins. This approach also works beautifully for items you cannot risk marking with hoop impressions, like fine leather or delicate silk. |
|
09 TIP |
Fix White Bobbin Thread Pulling Through with a Permanent Marker When white or light-colored bobbin thread pulls through to the top of an embroidered design around the edges, do not panic and do not restart. A permanent marker in the same color as the embroidery thread dabbed over the offending thread blends it in invisibly. Keep a basic set of fine-tip permanent markers in your embroidery workspace — they solve this problem in under ten seconds. |
|
10 TIP |
Use a Stitch Eraser for Mistakes on Irreplaceable Items When you make an embroidery mistake on a garment, bag, or blank that cannot be replaced, a Stitch Eraser tool is far faster than removing stitches one by one with a seam ripper. It will not restore the fabric to its original state perfectly, but it removes bulk stitching in a fraction of the time and gives you a workable surface to re-embroider. Keep one in your toolkit for emergencies. |
|
"95% of embroidery success is determined before you press start. The right stabilizer, the right needle, the right hooping. Master the preparation and the machine does the rest." |
|
11 TIP |
Use a Flame to Clean Up Loose Threads and Fray Excess threads and fray peeking out of a satin stitch border can often be cleaned up with a brief pass of a gas lighter flame. The heat melts synthetic thread ends instantly and cleanly. Work quickly and keep the flame moving — you are melting, not burning. Test on a scrap piece first and never use this technique on natural fibers or very delicate fabrics where the heat could cause damage. |

|
SECTION 3 | Time-Saving Tips — Work Smarter at the Machine |
Time is the most valuable resource you have — especially if embroidery is both your creative outlet and your income source. These tips will meaningfully reduce the time you spend per project without compromising quality.
|
13 TIP |
Use Adhesive Spray Instead of Pins to Secure Fabric Spray adhesive — 505 or KK2000 — is one of the great time-saving tools in home embroidery. Apply a light coat to your stabilizer, position your fabric once, smooth it flat, and you are done. No pins to remove, no pin holes in delicate fabric, and no fabric shifting mid-project. The adhesive washes away completely and leaves no marks on the finished piece. |
|
14 TIP |
Pre-Cut Your Stabilizer in Batches Rather than cutting stabilizer pieces one at a time as you need them, spend fifteen minutes cutting a whole stack of standard sizes — 6x8, 8x10, 10x12 — and storing them in a labeled drawer or bin. When a project comes up, the stabilizer is already the right size and ready to go. This one batch habit saves the small but cumulative time cost of cutting for every single project. |
|
15 TIP |
Invest in Magnetic Hoops for Difficult Items Magnetic hoops are one of the most significant time-saving upgrades available for the home embroiderer. What takes four to five minutes of careful screw-tightening with a traditional hoop can be done in under sixty seconds with a magnetic hoop — and the tension is more consistent. They are particularly transformative for caps, bags, and other items that resist traditional hooping. |
|
16 TIP |
Use a Thread Stand for Metallic and Specialty Threads Metallic, glow-in-the-dark, and some variegated threads behave erratically when fed directly from the machine's thread post. Placing the spool on a thread stand positioned two to three feet from the machine gives the thread more distance to unwind and relax before it enters the thread guides. Fewer tangles, fewer breaks, and smoother running — all from a ten-dollar accessory. |
|
17 TIP |
Remove Water-Soluble Topping Fast With a Wet Paper Towel When water-soluble topping is used and you are short on time for soaking, press a damp paper towel firmly over the design for thirty seconds. The topping dissolves on contact and can be peeled away cleanly without having to wait for the item to dry. This approach works just as reliably as soaking and takes a fraction of the time — particularly useful when working through multiple items in a production run. |
|
18 TIP |
Maintain Your Machine on a Regular Schedule A well-maintained machine is a fast machine. Lint, thread debris, and inadequate lubrication slow stitching speed, increase thread breaks, and eventually cause mechanical failures at the worst possible moment. Build a simple routine: clean the bobbin area after every project, oil on the manufacturer's schedule, and have a professional service done once a year. A machine that runs smoothly is a machine that earns its keep. |
|
QUICK CHECKLIST ✓ Pre-cut stabilizer in standard sizes and store in labeled bins ✓ Use adhesive spray instead of pins for faster, cleaner fabric placement ✓ Invest in magnetic hoops — they pay for themselves in time saved ✓ Use a thread stand for metallics and specialty threads to reduce breaks ✓ Clean your machine's bobbin area after every single project ✓ A damp paper towel dissolves water-soluble topping in under a minute |

|
SECTION 4 | Creativity Tips — Expanding Your Design Vocabulary |
The machine is not the limit of your creativity — your willingness to experiment is. The embroiderers who produce the most original, most sought-after work are the ones who consistently push outside their comfort zone, try unexpected materials, and treat every project as an opportunity to learn something new.
|
19 TIP |
Experiment With Unexpected Fabrics Cotton and polyester are the defaults for good reason — but some of the most stunning embroidery work happens on unexpected surfaces. Denim, canvas, velvet, faux leather, cork, and even wood veneer all accept embroidery beautifully with the right needle and stabilizer setup. Each new fabric you try opens design possibilities that simply do not exist on conventional surfaces. Start with one unfamiliar fabric per month and build your material vocabulary deliberately. |
|
20 TIP |
Build a Personal Stitch Sample Book Create a physical reference book of your own stitch samples — different fill types, stitch densities, thread weights, fabric combinations. Label every sample with the exact settings used. This resource becomes invaluable when planning future projects: instead of guessing whether a particular stitch density works on a particular fabric, you can flip to the answer. It is an investment of an afternoon that pays dividends for years. |
|
21 TIP |
Keep a Project Journal Document every project with a note of the design used, the fabric, the stabilizer, the thread colors, and any adjustments made. Include what worked beautifully and what you would change. This journal becomes your personal design bible — a growing record of everything you have learned that lives exactly where you need it, in your own words, in your own context. Digital or paper, the format matters less than the habit. |
|
22 TIP |
Mix Direct Embroidery With Appliqué Some of the most visually compelling embroidery work combines techniques within a single design: a directly embroidered background with appliqué fabric elements, or an appliqué shape finished with dense decorative stitching. These combinations add texture, dimension, and visual interest that solid stitching alone cannot achieve. Once you are comfortable with each technique independently, experimenting with combining them is where the most original work happens. |
|
23 TIP |
Let Your Thread Choices Define the Mood Thread is your primary creative tool — and its range is far wider than most home embroiderers use regularly. Rayon thread has a high sheen and a luxury feel. Polyester is colorfast and durable for everyday use. Cotton gives a soft, matte, vintage appearance. Metallic thread adds drama. Variegated thread creates a painterly, multi-tonal effect with no color changes required. Glow-in-the-dark thread creates genuine surprise and delight. Expanding your thread palette is one of the lowest-cost, highest-impact creative investments you can make. |
|
"The embroiderers who produce the most original work are the ones who consistently push outside their comfort zone — one unfamiliar fabric, one new technique, one unexpected thread at a time." |

|
SECTION 5 | Business Tips — From Hobby to Profitable Studio |
The gap between a productive hobby and a profitable embroidery business is almost never about skill — it is about systems. Organization, pricing, production habits, and the ability to market what you make. These tips apply whether you are taking your first paid order or scaling toward a full-time studio.
|
24 TIP |
Niche Down Before You Scale Up The most successful home embroidery businesses are not generalists — they are specialists. Dog breed embroidery. Coastal patch collections. Faith-based personalized gifts. Bridal party accessories. Corporate uniform services. Choosing a niche sharpens your SEO, clarifies your photography, attracts your ideal customer, and makes every marketing decision easier. You can always expand later. But starting specific is almost always the faster path to profitability than starting broad. |
|
25 TIP |
Photograph Everything — It Is Your Most Valuable Marketing Asset Every finished piece is a potential customer acquisition. Natural light near a large window, a clean background, and a styled context shot — a monogrammed tote at a farmers market, a baby blanket in a nursery, a cocktail napkin set on a styled bar cart — transforms a product photo into an aspiration. Your photography does not need expensive equipment. It needs good light, a clean background, and the willingness to shoot every finished piece before it leaves your hands. These images become your Etsy listings, your Instagram content, your word-of-mouth engine, and your portfolio. Make it a habit from day one. |
Five More Business Truths Worth Knowing
Price for profit, not to compete. The most common mistake new embroidery businesses make is pricing based on what feels fair rather than what covers real costs plus a sustainable margin. Calculate your true cost — blank, thread, stabilizer, your time, overhead — and price above it. A buyer looking for a $12 tote is not your customer. A buyer looking for a beautifully crafted, personalized gift at $38 is.
Your customer list is your most valuable business asset. Include a card in every shipped order that drives buyers to your email list or social media. An Etsy sale that becomes an email subscriber becomes a repeat customer you can reach directly — independent of any platform's algorithm or policy changes. Build this list from the very first order.
Sets sell better than singles. A single cocktail napkin at $12 is a $12 sale. A set of four at $40 is a $40 sale — and the customer feels like they got a better deal. Package your products into sets, gift bundles, and curated collections. The per-item price may be the same or even lower, but the average order value climbs consistently.
Never start a large design when you cannot monitor it. This is practical wisdom from experienced embroiderers that saves both time and materials. A complex design that runs unattended while you step away for thirty minutes is an expensive gamble. Thread breaks, bobbin exhaustion, and hoop shifts happen — and catching them early is the difference between a minor correction and a ruined b lank.
Organize your workspace as if it is a studio, not a hobby corner. Thread racks. Labeled stabilizer bins. A dedicated hooping area. An ergonomic chair. Good lighting. The physical environment you work in directly affects your production speed, your design quality, and your creative energy. Investing in an organized, intentional workspace is not indulgence — it is infrastructure.
|
THE EMBROIDERER'S CREED Prepare well. Test everything. Keep the machine clean. Experiment often. Document what you learn. And never underestimate what a perfectly hooped piece of fabric can become. |