
|
ANITA GOODESIGN | Anita's Tutorials Folded Fabric Crisp edges and a seamless finish — one fold at a time |
|
SKILL LEVEL Intermediate |
HOOPINGS Single Hooping |
TECHNIQUE Folded Fabric |
|
Folded fabric is a technique we love for the stunning visual effects it creates. With very little effort you can achieve clean, crisp edges and a seamless, professional-looking finish. The technique is wonderfully versatile — use it inside appliqués the way you would traditional paper piecing, as borders in your quilting collections, or even as the main design element of a block. Every folded fabric design is digitized around three key machine steps: a placement stitch that shows exactly where the fabric will sit, a folding stitch that creates the clean folded edge, and a tacking stitch that locks the fabric securely in place. Follow along with the tutorial below and you'll always know which direction your fabric needs to be placed. |
|
MATERIALS LIST |
|
◆ No-Show mesh stabilizer |
|
◆ Batting |
|
◆ Base fabric |
|
◆ Accenting fabrics for folds and appliqués |
|
◆ Embroidery threads |
|
◆ Embroidery tape |
|
◆ Curved-tip embroidery scissors |
|
◆ Ruler |
|
◆ Rotary cutter and mat |
|
◆ Embroidery hoop |
|
◆ 75/11 embroidery needle |
|
|
|
|
Step 1 |
Hoop Your Stabilizer To begin, hoop a single piece of No-Show mesh stabilizer, pulling it drum-tight in the hoop. This stabilizer is the foundation that every following stitch is built on, so make sure there is no slack. TIP: Our design happened to load in rotated 90° to the left. Rather than rotating it back, we simply stitched it as it appeared on screen — in Fundamentals you can rotate any design whenever you need to. |

|
|
|
|
Step 2 |
Run the Squaring Stitch Run the first machine step, which is the squaring stitch for your batting. This outline marks exactly where your batting needs to go and acts as your roadmap for the steps that follow. |

|
|
|
|
Step 3 |
Place the Batting Place a piece of batting over the squaring stitches, making sure you completely cover the stitched outline on all four sides. It is fine for the batting to extend a little past the line — you will trim it precisely in a later step. |

|
|
|
|
Step 4 |
Run the Batting Tacking Stitch Your next machine step is the tacking stitch for the batting. This step stitches the batting down and locks it firmly to the stabilizer underneath. |

|
|
|
|
Step 5 |
Trim the Excess Batting Using a sharp pair of curved-tip embroidery scissors, carefully trim away any excess batting outside the tacking stitch. Cut as close to the stitch line as you comfortably can, taking care not to clip the stitches themselves. |

|
|
|
|
Step 6 |
Run the Base Fabric Placement Stitch Once trimmed, your batting block should look like this — neat and tacked inside the outline. Now proceed to run the next machine step, which is the placement stitch for your block's base fabric. |

|
|
|
|
Step 7 |
Place and Tack the Base Fabric Place your base fabric over the batting with the right side facing up, making sure it covers the placement stitches on all sides. Smooth it flat, then run the tacking stitch to secure the base fabric to the block. |

|
|
|
|
Step 8 |
Trim Around the Base Fabric Once the base fabric is tacked down, you can remove the excess — this particular block is going to receive folded fabric borders, so a clean edge matters. Use your curved-tip scissors to trim away any extra material from around the tacking stitch. |

|
|
|
|
Step 9 |
Check Your Progress You should now have something that looks like this: a tidy base fabric square tacked cleanly inside the outline, ready for the appliqué work to begin. |

|
|
|
|
Step 10 |
Run to the First Appliqué Placement Continue running any standard embroidery steps in your design, following the numbered machine steps and color changes, until you reach the placement stitch for the first standard appliqué. |

|
|
|
|
Step 11 |
Place the Standard Appliqué Fabric Place your standard appliqué fabric right side facing up, making sure that every side of the placement stitch is fully covered by the fabric. |

|
|
|
|
Step 12 |
Tack the Standard Appliqué Your next machine step is the tacking stitch for the standard appliqué. This locks the appliqué fabric in position over the placement outline. |

|
|
|
|
Step 13 |
Trim the Appliqué Using your curved-tip scissors, trim away any excess appliqué material outside the tacking stitches, cutting close to the line for a clean edge. |

|
|
|
|
Step 14 |
Check the Trimmed Appliqué Once trimmed, your design should look something like this — the appliqué shape neatly tacked and trimmed, ready for the folded fabric work. |

|
|
|
|
Step 15 |
Run the First Folded Fabric Placement Run the next step, which is the placement stitch for your first piece of folded fabric. You will notice this placement stitch overlaps a small portion of the fabric you laid down last — that overlapped area of stitches is intentional and will help guide your placement. |

|
|
|
|
Step 16 |
Lay the Folded Fabric Face Down Lay your fabric right side facing down, aligning its edge so it covers the spot where the placement stitch overlapped the last piece of fabric, as shown. NOTE: Be sure your fabric is cut large enough to cover the entire placement stitch area before you fold it back. |

|
|
|
|
Step 17 |
Run the Folding Stitch The next machine step is the folding stitch. This single line of stitching is what gives folded fabric its signature crisp, clean edge. |

|
|
|
|
Step 18 |
Fold and Press the Fabric Now fold the fabric back over the folding stitch line, pulling it taut and pressing the fold firmly with your finger. You can run a piece of embroidery tape along the edge to help hold the fold in place until the tacking stitch is complete. |

|
|
|
|
Step 19 |
Run the Folded Fabric Tacking Stitch Run your next machine step, which is the tacking stitch that secures the folded fabric to the design and holds the crisp edge permanently in place. |

|
|
|
|
Step 20 |
Trim the Folded Fabric Use your curved-tip embroidery scissors to trim away any excess material from around the tacking stitch, keeping your cut close to the line. |

|
|
|
|
Step 21 |
Check the Folded Piece Once trimmed, your block should look something like this — your first piece of folded fabric tacked down with a clean, finished edge. |

|
|
|
|
Step 22 |
Run to the First Border Placement Continue running any standard embroidery steps, following your design's numbered machine steps for the indicated color changes. STOP once you have run the placement stitch for a folded fabric border. |

|
|
|
|
Step 23 |
Position the Border Strip Now position your fabric border strip right side facing down. Align the raw edge of the strip with the trimmed edge of your base fabric, as shown. |

|
|
|
|
Step 24 |
Run the Border Folding Stitch Then run the next machine step, which is the folding stitch for the border. As before, this creates the clean folded edge for your border strip. |

|
|
|
|
Step 25 |
Fold and Crease the Border Fold your border fabric up and over the folding stitch line, giving it a good firm finger crease. You may place a piece of tape along the edges if needed to hold the fabric taut against the folding stitch. |

|
|
|
|
Step 26 |
Tack the First Border Using a thread color that matches your border fabric, run the tacking stitch for the first folded fabric border. Once it is secured, your first border is complete and you can remove any tape you used to hold it. |

|
|
|
|
Step 27 |
Repeat for the Opposite Border Repeat the same folding and tacking steps for the opposing side's folded fabric border. STOP once both the top and bottom borders are tacked down. |

|
|
|
|
Step 28 |
Trim the Excess Fabric Tabs Now use your scissors to trim away the excess fabric tabs from the left and right sides of your first two borders, as shown. NOTE: This is a vital step in folded fabric borders — trimming these tabs keeps your machine's foot from catching on loose fabric when it travels around for the left and right placement stitches. |

|
|
|
|
Step 29 |
Check the Trimmed Borders Once you have finished trimming the excess tabs of fabric, you should have something that looks like this — two clean, tacked borders with tidy corners. |

|
|
|
|
Step 30 |
Complete the Remaining Borders Repeat the same three-step folded fabric process — fold, crease, tack — for the remaining borders until all of them are complete and your block is fully framed. |

|
|
|
|
Step 31 |
Remove and Trim the Block When the design has finished running, remove it from the embroidery hoop. Using a ruler and rotary cutter, trim your block to a 1/2" seam allowance on all four sides. |

|
|
|
|
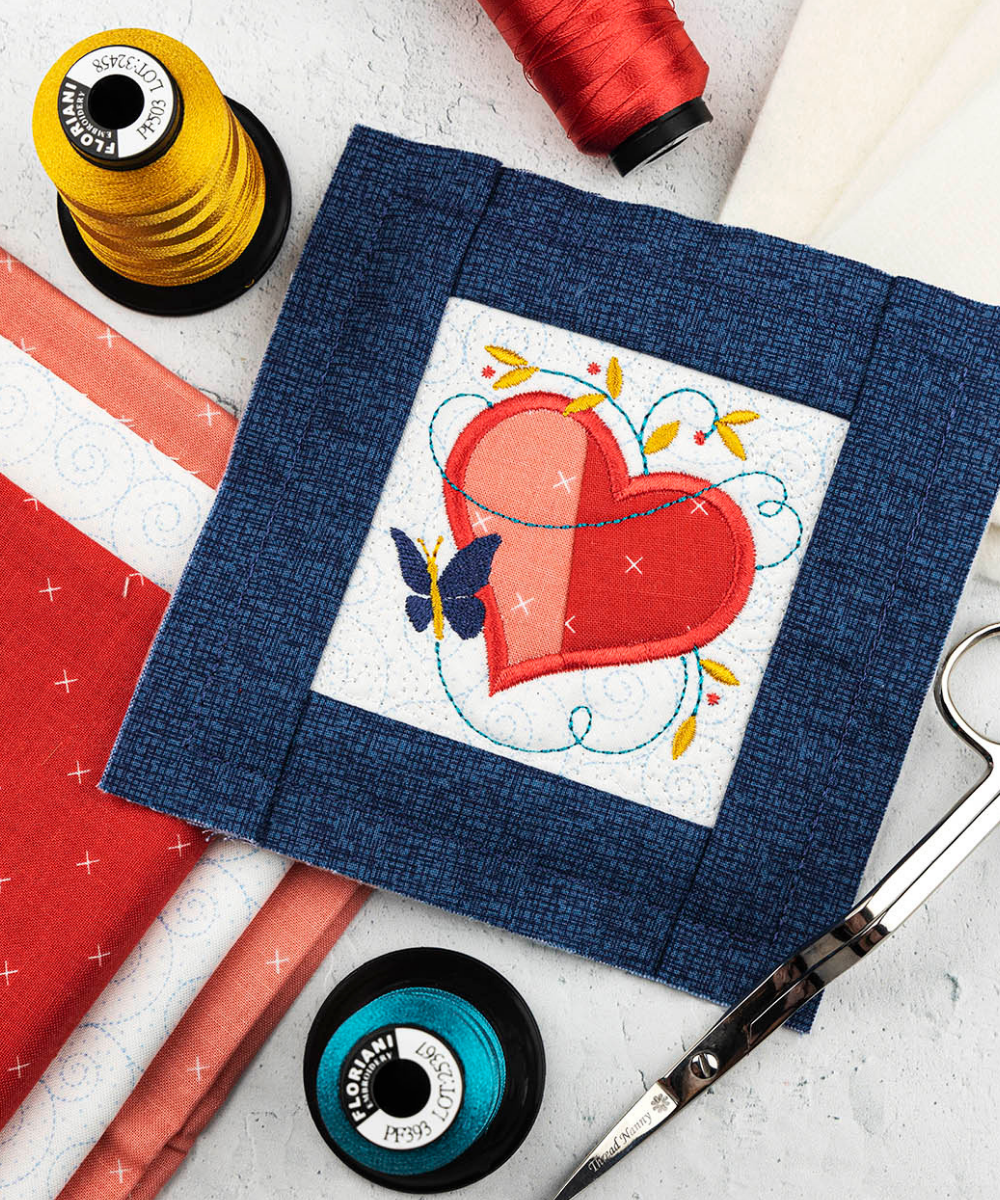
Step 32 |
Finished Block Your Folded Fabric quilt block is now complete! With its crisp folded edges and clean borders, it's ready to piece into your next project. |

|
💡 PRO TIP Folded fabric shines when you plan your color placement ahead of time. Lay out your accent and border fabrics before you start stitching so the folds and borders frame your block exactly the way you imagined. |
|
Your Folded Fabric Quilt Block Is Complete! Crisp edges, clean borders, and a seamless finish — now make it yours. |
Folded Fabric | Anita's Tutorials | Anita Goodesign