fundamentals

How To - Tile Scene - Fundamentals
ANITA GOODESIGN | Anita’s Tutorials Tile Scene Build a stunning multi-block scene — one block at a time SKILL LEVEL Beginner Friendly HOOPINGS Single Hooping TECHNIQUE Appliqué & Piecing A Tile Scene is a single piece of original artwork that has been divided up and digitized across several quilt blocks. You stitch each block on its own, then piece them back together so the separate panels reunite into one complete picture — in this tutorial, a charming bumblebee. Anita Goodesign has crafted many tile scenes over the years, from quaint cottages and gentle nods to nature to more ornate scenes. Whatever theme you choose, the technique is the same, and the payoff is a beautiful stitched scene you will be proud to display. MATERIALS LIST ◆ No-Show mesh stabilizer ◆ Quilt batting ◆ Base fabric ◆ Appliqué fabrics ◆ Embroidery threads ◆ Curved-tip embroidery scissors ◆ Ruler ◆ Rotary cutter and mat ◆ Embroidery hoop ◆ 75/11 embroidery needle Step 1 Hoop Your Stabilizer Hoop a piece of No-Show mesh stabilizer so it is held firm and flat in your embroidery hoop. This stabilizer is the foundation for every stitch that follows, so make sure it is taut with no slack. Then load the first of the four block files for your tile scene — in this example we are stitching design file F-TS1. Step 2 Run the Squaring Stitch Run the first machine step, which is the squaring stitch. This stitched outline marks exactly where your batting needs to go and acts as your roadmap for everything that comes next, so let it finish completely before moving on. Step 3 Place the Batting Take a piece of quilt batting and lay it directly over the squaring stitches, making sure it covers the outline on all four sides. It is fine for the batting to extend past the lines for now — you will trim it neatly in a later step. Step 4 Run the Tacking Stitch Run the next machine step, the tacking stitch. This step stitches around the batting and locks it firmly to the stabilizer so nothing shifts while you continue building the block. Step 5 Trim the Batting Using a pair of curved-tip embroidery scissors, carefully trim away the excess batting as close to the tacking stitch line as you can on all sides. Take your time and avoid clipping the stitches — clean trimming here keeps the finished block smooth and tidy. Step 6 Place Your Base Fabric Lay your base fabric right side facing up over the batting block. Be sure the piece is large enough to cover the entire block while still leaving roughly a 1/2″ of extra fabric on all sides for a seam allowance. Smooth it gently from the center outward to remove any wrinkles. Step 7 Tack Down the Base Fabric Run the next machine step in a matching thread color. This is the tacking stitch that secures your base fabric to the layers underneath. Once it finishes, the full outline of the block will be visible with the fabric held firmly in place. Step 8 Stitch to the First Appliqué Keep running the numbered machine steps in order, following the indicated color changes as you go, until the machine reaches a placement stitch for your first appliqué. This placement outline shows you exactly where the appliqué fabric belongs. Step 9 Place the Appliqué Fabric Take a piece of appliqué fabric and lay it right side facing up over the placement stitch area, making sure it covers the entire outline with a little extra all around. Step 10 Tack Down the Appliqué Run the next machine step, which is the tacking stitch for the appliqué. This stitches around the shape and holds the appliqué fabric securely to the block. Step 11 Trim the Appliqué Using your curved-tip embroidery scissors again, trim away the excess appliqué fabric close to the tacking stitch line. Work slowly around the shape so the edges come out crisp and clean. Step 12 Result After Trimming Once trimmed, your appliqué should look something like this — a clean shape sitting neatly inside its outline. Repeat the place, tack, and trim sequence for any remaining appliqué pieces in the design. Step 13 Continue the Remaining Steps Continue running the design’s numbered machine steps, following the indicated color changes, to complete the rest of the embroidery. Watch your scene come to life as each color is added. Step 14 Remove from Hoop & Trim When the design has finished stitching, remove it from the hoop. Use a rotary cutter and ruler to trim the block down to a 1/2″ seam allowance on all four sides so it is ready to be joined. Step 15 Your First Block Is Complete Your first Tile Scene block is now finished! Go ahead and stitch the remaining three blocks in the scene the same way, then read on to see how they all get joined together. JOINING YOUR TILE SCENE BLOCKS Step 16 Lay Out Your Blocks Once all four blocks are stitched and trimmed, lay them out in the order indicated by the design so the full picture lines up correctly. Take a moment to confirm the arrangement before you start sewing. Step 17 Sew Each Row Work one row at a time. Place one block on top of its neighbor with right sides facing together, then pin or clip them just past the tacking stitch lines. Take the pair to your sewing machine and join them with a straight stitch along their shared edge. Step 18 Press the Seams Open After sewing each row, use a steam iron to butterfly press the seams open on the back. Pressing the seams flat prevents bumps and ridges in the finished scene. Your joined rows should look smooth and flat once pressed. Step 19 Join the Rows Now join the rows to each other the same way. Place the top row of blocks face down over the row below it, line up the seams, pin or clip in place, and straight stitch along the edge at your sewing machine. Step 20 Your Tile Scene Is Complete Once every block and row is joined and pressed, your tile scene comes together into one complete picture. Read on to the Mix & Match Quilting section to see how we back and bind our finished pieces! 💡 PRO TIP Tile scenes only look their best when the panels line up, so accuracy matters more than speed. Trim each block to an even 1/2″ seam allowance and press every seam open before joining — those two habits keep the artwork aligned and the finished surface flat. Your Tile Scene Is Complete! Four blocks, one beautiful picture. Choose your favorite scene and make it yours. Download File Tile Scene | Anita’s Tutorials | Anita Goodesign
Learn more
How To - Cutwork - Fundamentals
ANITA GOODESIGN | Anita’s Tutorials Cutwork Fundamentals Master the art of cutwork embroidery — one window at a time SKILL LEVEL Beginner Friendly HOOPINGS Single Hooping TECHNIQUE Cutwork Cutwork embroidery is a technique where certain areas of your project’s base fabric are removed, or cut out, to create a striking negative-space effect. Cutwork designs include a special marking stitch, so you always know exactly which areas need to be trimmed. The key is leaving your Wash-Away stabilizer intact beneath the fabric you trim, giving the open windows a surface to stabilize against until the design is finished. A quick rinse in hot water then dissolves the remaining stabilizer, leaving a stunning series of “windows” peeking through your fabric — a wonderful, low-density way to add detail to clothing and linens alike. MATERIALS LIST ◆ Wash-Away stabilizer ◆ Base fabric ◆ Appliqué fabric ◆ Embroidery threads ◆ Coordinating bobbin thread ◆ Curved-tip embroidery scissors ◆ Ruler ◆ Rotary cutter and mat ◆ Embroidery hoop ◆ 75/11 embroidery needle Step 1 Hoop the Stabilizer Begin by hooping a piece of Wash-Away stabilizer together with your base fabric, pulling both layers drum-tight so there is no slack. The stabilizer sits underneath and supports the open areas you’ll cut later. (In this example, the base fabric is blue cotton.) Step 2 Run the Marking Stitch Run the first machine step. This is the special marking stitch, and it stitches an outline that shows you exactly where the cutwork openings of the design will be — think of it as a map for the trimming you’re about to do. Step 3 Slice Into the Base Fabric Using a seam ripper or curved-tip embroidery scissors, gently slice into the base fabric inside the marked area. Cut through the top fabric only, taking care not to nick or puncture the Wash-Away stabilizer underneath, since it needs to stay intact to support the window. Step 4 Cut Out the Fabric Once you have an opening, use your scissors to carefully cut away all of the base fabric that sits inside the marking stitches. Trim close to the stitched line for clean edges, again leaving the stabilizer below untouched. Step 5 Check Your Window Once trimmed, your cutwork window should look like this. Notice that the Wash-Away stabilizer is still fully intact inside the opening — that intact layer is what holds the window stable while the rest of the design stitches out. Step 6 Stitch the Cutwork Edges Run the next machine step. This is the specially digitized stitching that wraps and secures the raw fabric edges around each window, finishing them neatly and creating the signature cutwork look. Step 7 Run the Appliqué Placement Stitch Continue to the next machine step, which stitches a placement outline for your first standard appliqué. This light outline shows you exactly where to lay your appliqué fabric in the following step. Step 8 Place the Appliqué Fabric Place your appliqué fabric right side up over the placement outline, making sure it extends past the stitched line on all sides so the entire outline is covered. Smooth it flat before moving on. Step 9 Tack Down the Appliqué Run the next machine step — a tacking stitch that holds the appliqué fabric firmly in place against the design. This locks the fabric down so it won’t shift when you trim it. Step 10 Trim the Appliqué Now carefully trim away the excess appliqué fabric, cutting close to the tacking stitches without clipping them. Once trimmed, the design will look like this, with the appliqué shape neatly revealed. Step 11 Stitch the Decorative Details Continue on to run the decorative embroidery steps. Follow your design’s numbered machine steps in order, changing thread colors whenever the design calls for it, to build up the finished detail. Step 12 Finish All Machine Steps When every machine step is complete, your design should look something like this — the cutwork windows, appliqué, and decorative stitching all finished together inside the hoop. Step 13 Trim to Size With the stitching finished, remove the project from the hoop. Using a rotary cutter and ruler, trim the piece down to your desired finished dimensions, keeping your cuts straight and even. Step 14 Rinse Away the Stabilizer Rinse the finished design in hot water to dissolve any remaining Wash-Away stabilizer. As it washes away, the open cutwork windows are revealed. Press gently with a dry towel and lay the piece flat to dry. Step 15 Your Cutwork Is Complete You’ve now created a beautiful cutwork design! The crisp open windows and layered appliqué are ready to show off on a garment, pillow, or linen of your choice. 💡 PRO TIP The secret to clean cutwork is to leave your Wash-Away stabilizer completely intact beneath the areas you trim. Always cut the base fabric only, never the stabilizer below — it supports the open windows while you stitch, then rinses away at the end to reveal crisp, professional edges. Your Cutwork Design Is Complete! Rinse, press, and admire the windows you’ve created — then add elegant cutwork detail to garments and linens alike. Download Files Cutwork Fundamentals | Anita’s Tutorials | Anita Goodesign
Learn more
How To - Zipper Bags - Fundamentals
ANITA GOODESIGN | Anita's Tutorials Zipper Bag Master the in-the-hoop technique — pretty on both sides SKILL LEVEL Beginner Friendly HOOPINGS Double Hooping TECHNIQUE In-The-Hoop Zipper bags are one of our favorite in-the-hoop projects, and this little bag is the perfect place to learn the technique. Instead of finishing with a plain back, you will embroider both a front and a back panel so the finished bag is pretty from every angle. You will stitch the back panel first using design file F-Z1, then build the zippered front using design file F-Z2, and finally join the two together — all inside the hoop. Take your time, and you'll end up with a polished, fully lined zipper bag. F-Z1 — Back Panel F-Z2 — Zippered Front MATERIALS LIST ◆ No-Show mesh stabilizer (x2) ◆ Nylon coil zipper ◆ Base fabric ◆ Embroidery threads ◆ Curved-tip embroidery scissors ◆ General craft scissors ◆ Ruler ◆ Rotary cutter and mat ◆ Seam ripper ◆ Embroidery tape ◆ Embroidery hoop ◆ 75/11 embroidery needle Step 1 Hoop Your Stabilizer Begin the back panel of your bag. Hoop one piece of No-Show mesh stabilizer, pulling it drum-tight so there is no slack. A taut hoop keeps every stitch in the right place. This first portion uses design file F-Z1, which creates the embroidered back of the bag. Step 2 Run the Placement Stitch Run the first machine step. This is the placement stitch — a simple outline that shows you exactly where to lay your base fabric in the next step. Think of it as your roadmap. Step 3 Tack Down the Back Fabric Place your fabric right side up, directly over the placement stitches, covering the outline entirely on all sides. Then run the next machine step — the tacking stitch — which secures the fabric to the stabilizer. Step 4 Embroider & Set the Back Aside Run the decorative embroidery steps, following your design's numbered machine steps for any color changes. When it finishes, remove the piece from the hoop and trim it to a 1/4" seam allowance. Set this completed back panel aside — you'll need it later. Step 5 Hoop & Start the Front Panel Hoop a fresh piece of No-Show mesh stabilizer and load the second portion of the bag, design file F-Z2. Run the first machine step — the placement stitch — which shows where the zipper and bag pieces will go. Step 6 Position the Zipper The center of the placement stitch has three horizontal lines. Line up the center of your zipper with the middle line and the zipper's fabric edges with the top and bottom lines. Secure both ends with tape, and make sure the zipper's stopper will clear the path of the presser foot. Step 7 Close the Zipper Slider Check that the zipper slider is fully closed and pushed out of the way. This keeps it from getting caught under the embroidery foot as the machine stitches. Step 8 Tack Down the Zipper Run the next machine step — the tacking stitch — which tacks the zipper down securely along both sides. Step 9 Place the Bottom Fabric Remove the tape. Lay your fabric face down, aligning its bottom edge with the bottom edge of the zipper. Make sure the fabric is large enough to cover the placement-stitch area once it's folded up, leaving at least a 1/2" seam allowance around the outer edges. Step 10 Run the Folding Stitch Run the next machine step — the folding stitch — which marks where to fold your fabric. Step 11 Fold & Secure the Fabric Fold the fabric over the folding-stitch line and press the fold with your finger or an iron to set a crease. Use tape to hold the fold in place. Step 12 Tack Down the Fold Run the tacking stitch that secures this folded fabric to the stabilizer. Once it's stitched down, you can peel away any excess tape. Step 13 Repeat for the Top Fabric Repeat the same placing, folding, and tacking process for the top piece of fabric — but this time align the raw edge of the fabric with the top of the zipper. Run the folding stitch, then secure the fabric with tape. Step 14 Tack the Top Fold Run the tacking stitch to lock the top fold in place, then remove any tape. Your design should now look something like the photo — both fabric panels folded back and tacked, framing the zipper. Step 15 Embroider the Front (Stop Before the Last Step) Run the decorative embroidery, following your design's numbered machine steps for the color changes. Stop before the very last machine step runs — you'll need to do something first. Step 16 Open the Zipper This is the important pause: stop and open your zipper. Unzip it so the slider sits about two-thirds of the way open, as shown. Leaving it open now lets you turn the bag right side out later. Step 17 Add the Back Panel Take the back panel you stitched earlier (F-Z1) and place it face down over the hooped design, matching up the outer tacking-stitch lines. Tape it in place. Step 18 Join Front & Back Run the next machine step — a tacking stitch that joins the front and back of your bag together around the edges. Step 19 Trim the Bag Once the layers are joined, remove the design from the hoop. Trim the bag to a 1/4" seam allowance on all sides, using scissors to cut away any excess length of zipper. Step 20 Clear the Zipper Path & Snip the Corners First, snip the four corners of the bag at a 45° angle (shown in the detail photo) to reduce bulk so the corners turn out crisp. Then, using a seam ripper or curved-tip embroidery scissors, carefully trim away the No-Show mesh stabilizer from the zipper's path so the zipper glides smoothly. Step 21 Turn It Right Side Out Turn the bag right side out by gently pulling it through the open zipper. Use your fingers or a turning tool to push the corners all the way out. 💡 PRO TIP Because this bag is embroidered on both sides, it's the perfect practice piece for learning two-sided in-the-hoop construction. Once you're comfortable, try mixing different F-Z front and back designs to create coordinated sets — the technique stays exactly the same. Your Zipper Bag Is Now Finished! Pretty on both sides and fully lined — you've mastered a two-sided in-the-hoop project. Now make it yours. Download Files Zipper Bag | Anita's Tutorials | Anita Goodesign
Learn more
How To - Embroidery on Paper - Fundamentals
ANITA GOODESIGN | Anita's Tutorials Embroidery on Paper Stitch one-of-a-kind cards — far more special than store-bought SKILL LEVEL Beginner Friendly HOOPINGS Single Hooping TECHNIQUE Paper Embroidery Embroidering on paper is a neat technique that involves machine stitching onto card stock or scrapbook paper. Each card-related embroidery design offers a placement stitch for the base paper product — usually a blank 5" x 7" card. Some designs also include a base fabric that is applied over the front of the card, adding extra dimension and a handmade feel. You can also glue or spray-adhere a decorative paper to the inside of your card to conceal the bobbin stitches. Create a mixture of fun holiday or birthday cards using this technique — and rest assured they'll be far more special than any store-bought card! MATERIALS LIST ◆ Tear-Away stabilizer ◆ 5" x 7" blank card or cardstock ◆ Cotton base fabric ◆ Embroidery threads ◆ Curved-tip embroidery scissors ◆ Embroidery tape ◆ Embroidery hoop ◆ 75/11 embroidery needle Step 1 Hoop Your Stabilizer To begin, hoop a piece of Tear-Away stabilizer, pulling it drum-tight in the hoop. This stabilizer is the foundation that supports every stitch, so make sure there's no slack or puckering before you start. Step 2 Run the Placement Stitch Run the first machine step. This stitches a placement outline directly onto the stabilizer, showing you exactly where to position your card in the next step. Step 3 Position Your Card Lay your blank card right side up over the placement stitch, lining it up inside the stitched outline. A few small pieces of embroidery tape will hold the cardstock steady while it stitches. Watch the orientation carefully — if you're using a card that opens, make sure the front of the card is the side laid into the placement stitches. Step 4 Tack Down the Card Run the next machine step to tack the cardstock securely to the stabilizer, then gently peel away any tape you used. This tacking outline also marks exactly where to lay your base fabric in the next step. Step 5 Add the Base Fabric Lay your base fabric right side up over the front of the card, making sure it covers the card's front on all sides. Run the next tacking stitch to lock the fabric in place over the card. Step 6 Trim the Excess Fabric Using a pair of curved-tip embroidery scissors, carefully trim away the excess fabric right up to the tacking stitch line. Take your time and avoid clipping the stitches — clean trimming here gives your finished card a neat, professional edge. Step 7 Check Your Trimming Once trimmed, your base fabric should look like this — a clean panel of fabric tacked neatly within the stitched outline, ready for the decorative embroidery. Step 8 Stitch the Decorative Design Following your design's numbered machine steps, change thread colors as indicated and run the remaining decorative embroidery. Watch the design come to life across the fabric front of your card. Step 9 Remove and Flip Once the machine has finished stitching, remove the design from the hoop. Flip the card over so the back side is facing up, ready for cleanup. Step 10 Trim the Back Use your curved-tip scissors to trim along the edge stitching on the back of the design, removing all the excess stabilizer for a clean, tidy reverse side. Step 11 Finished Card Your embroidered card is now finished! The fabric-fronted design gives it a beautiful handmade, dimensional look that's ready to gift or display. 💡 PRO TIP To finish the inside of your card, hot-glue or spray-adhere a piece of festive or themed scrapbook paper or cardstock over the back. This neatly conceals the bobbin stitches and gives your card a polished, store-quality finish. Your Embroidered Card Is Complete! Once you make one, you'll want to stitch a whole set — mix colors, designs, and papers to make every card your own. Download Files Embroidery on Paper | Anita's Tutorials | Anita Goodesign
Learn more
How To - Fringe Embroidery - Fundamentals
ANITA GOODESIGN | Anita's Tutorials Fringe Embroidery Add a soft, velvety texture — one slice at a time SKILL LEVEL Beginner Friendly HOOPINGS Single Hooping TECHNIQUE Fringe Fringe embroidery adds a soft, tactile element to your stitching that you simply can’t get any other way. Specially digitized satin stitches are worked side by side and locked in place by a tiny anchoring satin stitch along their base. Once the design is stitched, a single careful slice down the center of those wide satin stitches releases the threads into a plush, velvety fringe. It’s as easy as 1–2–3 — the only special tool you’ll want close by is a trusty seam ripper. MATERIALS LIST ◆ Tear Away Stabilizer ◆ Base fabric ◆ Embroidery threads ◆ Curved-tip embroidery scissors ◆ Seam ripper ◆ Ruler ◆ Rotary cutter and mat ◆ Embroidery hoop ◆ 75/11 embroidery needle Step 1 See the Fringe Effect Up Close Here’s the soft, velvety texture you’re about to create. Those raised, fuzzy threads are simply standard satin stitches that have been sliced open and brushed up — take a good look so you’ll recognize the fringe areas once your own design is stitched. Step 2 Hoop Your Stabilizer & Fabric To begin, hoop a piece of Tear Away stabilizer together with the base fabric of your choice, keeping both layers smooth and drum-tight. For this example we’re stitching on white felt, which shows off the fringe beautifully. Step 3 Stitch Out Your Design Run the design just as you would any standard embroidery, following along with your machine’s numbered steps and changing thread colors whenever you’re prompted. Let each step finish stitching completely before moving on to the next. Step 4 Slice Open the Fringe Areas Once the design has finished running, look for the areas that were specially digitized to be fringed. Take your seam ripper and gently slide it down the center of those wide satin stitches to open them up, taking care not to cut into the base fabric underneath. Step 5 Work Slowly and Look Twice Take your time with every cut. Keep a light hand and always “look twice before you slice” so the blade catches only the fringe stitches and never the fabric below. A slow, careful pass gives you the cleanest, most even fringe. Step 6 Reveal the Finished Fringe Once every digitized section has been sliced open, your design should look something like this — the flat satin stitches are now released into soft, raised fringe. Step 7 Admire the Velvety Texture Up close you can see how the cut threads stand up to form that plush, velvety pile. Gently brush or fluff the fringe with your fingers to even it out and bring the full texture to life. Step 8 Trim Away the Excess Remove the finished design from the hoop. Using a ruler and a rotary cutter, carefully trim away any excess stabilizer and fabric from around the edges of the design. Step 9 Your Fringe Embroidery Is Complete That’s it — your fringe embroidery is finished! You now have a soft, dimensional design ready to show off on its own or stitch onto your next project. 💡 PRO TIP Fringe lives or dies by that final slice, so keep a light hand and always look twice before you slice. Cutting only the satin stitches — never the base fabric — keeps your fringe soft and your design intact. A seam ripper gives you far more control than scissors for this step. Your Fringe Embroidery Is Complete! Once you try fringe, you’ll want to add it to everything. Slice, fluff, and make it your own. Download Files Fringe Embroidery | Anita’s Tutorials | Anita Goodesign
Learn more
How To - 3D Applique - Fundamentals
ANITA GOODESIGN | Anita's Tutorials Three-Dimensional Flower Build a freestanding appliqué flower — one layer at a time SKILL LEVEL Intermediate HOOPINGS Multiple Hoopings TECHNIQUE 3D Appliqué Three-dimensional designs are a wonderful way to make a project leap off the fabric. Because the flower stands on its own, the design is worked in two or more hoopings: the dimensional pieces are stitched first, then layered and tacked onto a base in a final hooping. The freestanding petals are stitched onto wash-away or tear-away stabilizer so they can be released cleanly once finished. When the pieces are assembled, you are left with a soft, layered flower that adds real texture and depth to garments, quilts, and home décor. MATERIALS LIST ◆ Wash-Away stabilizer (1st hooping) ◆ Tear-Away stabilizer (2nd hooping) ◆ Appliqué fabrics ◆ Embroidery threads ◆ Coordinating bobbin thread ◆ Curved-tip embroidery scissors ◆ Ruler ◆ Rotary cutter and mat ◆ Pins (optional) ◆ Embroidery tape ◆ Embroidery hoop ◆ 75/11 embroidery needle Step 1 Meet Your Finished Flower Here is the dimensional flower you will be making. Take a moment to see how the layered petals stack to create the raised, three-dimensional look before you begin. Step 2 The Two Flower Pieces Your flower is built from two separate appliqué pieces — a larger lower flower and a smaller upper flower. You will stitch both as freestanding elements first, then combine them in the final hooping. Step 3 A Look at the Center Detail The very last stitch fills the flower’s center with a dense satin texture like this. Keep this finished detail in mind — it is the step that ties the whole flower together at the end. Step 4 Hoop Your Wash-Away Stabilizer Begin the first hooping by hooping a piece of wash-away stabilizer, pulled drum-tight. Load design AFC3DFlower1 to create the petals. A firm, wrinkle-free hooping keeps every stitch in register. Step 5 Run the Placement Stitch Run the first machine step — the placement stitch. This light outline shows you exactly where to lay your appliqué fabric in the next step. Step 6 Position Your Appliqué Fabric Lay your appliqué fabric right side up directly over the placement stitch. Start at one corner and smooth it down so the outline is fully covered on every side. Step 7 Cover the Outline Completely Make sure the fabric extends past the placement outline all the way around. Any gaps will show once the design is tacked, so give yourself a little extra on each edge. Step 8 Tack and Trim the Excess Fabric Run the next machine step — the tacking stitch — to secure the fabric. Then, with curved-tip scissors, carefully trim away the extra fabric close to the tacking line, taking care not to cut through the stitches. Step 9 Check Your Progress After trimming, your design should look like a clean flower shape. Neat trimming here gives you crisp, professional edges in the finished piece. Step 10 Run the Decorative Stitch Run the next machine step, a decorative embroidery stitch that adds detail across the petals. Watch the flower start to take on its finished character. Step 11 Add the Back Fabric Remove the hoop from the machine and flip it over to the back. Lay your backing fabric right side up so it fully covers the back of the design, then hold it in place with embroidery tape. Step 12 Tack the Back Fabric Return the hoop to the machine and run the next step — the tacking stitch that locks the backing fabric to the design from behind. Step 13 Stitch the Satin Edge Wind a bobbin in a color that matches your top thread and load it. Then run the satin-stitch step that wraps the flower’s edges in a smooth, finished border. Your design should look like this. Step 14 Flip and Trim the Backing Take the hoop off again and flip to the back. Trim the excess backing fabric close to the tacking stitch with your curved-tip scissors, being careful not to clip the stitches. Step 15 Begin the Second Flower Using the same sequence you just followed, start stitching the smaller secondary flower. Place, tack, trim, and stitch it exactly as you did the first piece. Step 16 Build Up the Second Flower Continue through the remaining steps for the secondary flower until both pieces are complete. You will now have a larger flower and a smaller one ready to combine. Step 17 Finish the Smaller Petal Set The smallest petal layer is stitched the same way on its own area of the stabilizer. Once it is done, all of your freestanding flower pieces are finished stitching. Step 18 Rinse Away the Stabilizer Remove the pieces from the hoop and trim away the excess wash-away stabilizer — the less you leave, the easier rinsing will be. Then rinse in hot water until the suds are gone and the stabilizer has fully dissolved. Step 19 Press and Dry the Pieces Press the rinsed pieces between a towel and lay them flat to dry. Your dimensional flower elements are now finished and ready to be assembled in the next hooping. Step 20 Hoop Tear-Away for Assembly Begin the second hooping by hooping a piece of tear-away stabilizer. Load design AFC3DFlower2 — this is the design that joins your pieces into one finished flower. Step 21 Run the Center Placement Stitch Run the first machine step, a placement stitch that marks the exact center where your flower will sit. Step 22 Find the Center X The placement stitch forms a small X at the middle of the design. This X is your target for centering the large flower in the next step. Step 23 Center and Secure the Large Flower Push a straight pin down through the center of the large flower, then through the center of the X. With it aligned, tape the flower to the stabilizer and remove the pin. Step 24 Tack the Flower in Place Run the next machine step — a tacking stitch in the center that anchors the large flower to the stabilizer. Step 25 Add the Secondary Petals Repeat the centering and tacking process to add the secondary petal set on top of the first. There is no separate placement stitch this time — use the tacking stitch of the first petals as your guide. Step 26 Layer the Petals With both petal sets tacked down, the layers begin to lift and overlap, giving the flower its dimensional shape. Step 27 Stitch the Center Fill Run the final machine step — the fill stitch that completes the flower’s center. Your design should now look something like this. Step 28 Your 3D Flower Is Finished Gently tear the design away from the stabilizer to release it. Your three-dimensional flower is complete — soft, layered, and ready to show off. 💡 PRO TIP When you add the second petal set there is no placement stitch to guide you — let the tacking stitches from the first petals show you where to lay it. And when trimming wash-away stabilizer, cut close but not too close: leaving a small margin protects your stitches while still making the rinse quick and easy. Your Three-Dimensional Flower Is Complete! Stitch a whole bouquet — vary the colors and layer them to make each bloom your own. Download Files Three-Dimensional Flower | Anita's Tutorials | Anita Goodesign
Learn more
How To - Free Standing Lace - Fundamentals
ANITA GOODESIGN | Anita’s Tutorials Free Standing Lace Master the lace technique — one delicate design at a time SKILL LEVEL Beginner Friendly HOOPINGS Single Hooping TECHNIQUE Free Standing Lace Free standing lace designs are embroidered directly onto a water-soluble stabilizer — with no base fabric underneath. Once the stitching is rinsed in hot water the stabilizer dissolves completely, leaving you with a delicate, self-supporting lace piece. These designs are specially digitized with an adjusted stitch density so the threads lock securely to the bobbin thread and hold their shape entirely on their own. The possibilities are endless. Hand-sew several lace shapes together into a runner, frame them as one-of-a-kind home decor, tie them onto a gift, or arrange them into a stunning lace mosaic on your wall. The very same designs can even be stitched onto fabric as standard embroidery. MATERIALS LIST ◆ Wash-Away water-soluble stabilizer — 2 pieces ◆ Embroidery threads ◆ Coordinating bobbin thread ◆ Embroidery hoop ◆ 75/11 embroidery needle Step 1 Hoop Your Stabilizer Layer two pieces of Wash-Away water-soluble stabilizer and hoop them together as a single unit. Pull the stabilizer drum-tight so there is no slack — a firm, even surface is what keeps your lace stitches crisp and accurate. Note: two layers give most freestanding designs the support they need, but if you are working in a 5” x 7” hoop or smaller, a single layer is usually enough. Step 2 Stitch the Lace Design Load your free standing lace design and begin stitching. Because there is no fabric beneath the needle, the machine builds the entire piece from thread alone, layering the outlines and fills directly onto the stabilizer. Let each color sequence finish completely before moving on to the next. Step 3 Match Your Bobbin Colors Because a finished lace piece is seen from both sides, the bobbin thread shows just as much as the top thread. Each time you change the top thread color, swap in a bobbin wound in a matching color (shown in the close-up here). Coordinating the two keeps the front and back of your lace looking identical and polished. Step 4 Remove, Trim & Rinse Once the stitching is complete, take the hoop off the machine and remove your design from the hoop. Trim away the excess stabilizer from around the edges. Then rinse the design in hot water, gently rubbing the stitches until every trace of stabilizer has dissolved away. Lay the piece flat to dry. Step 5 Your Lace Is Finished! Once it is dry, your free standing lace is complete — a delicate, self-supporting design with no stabilizer left behind. It is now ready to frame, gift, or sew into your next project. 💡 PRO TIP Always confirm your design is digitized specifically for free standing lace before you begin. These designs use a special high-density structure so the stitches lock to one another and keep their shape after rinsing. A standard embroidery design that has not been digitized this way will simply unravel once the stabilizer washes out. Your Free Standing Lace Is Complete! Frame it, gift it, or stitch a whole set — with free standing lace, the possibilities are endless. Download Files Free Standing Lace | Anita’s Tutorials | Anita Goodesign
Learn more
How To - Standard Applique - Fundamentals
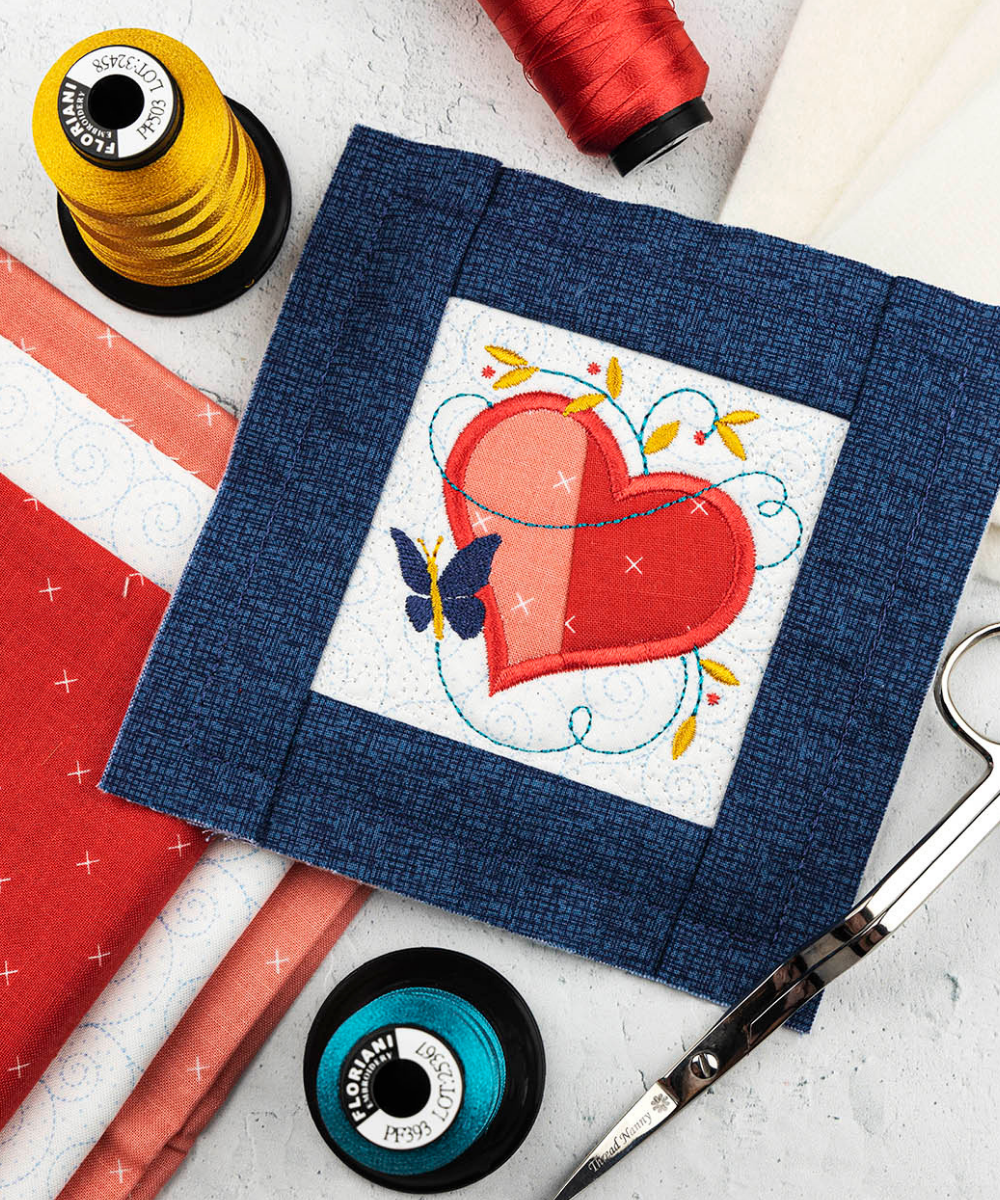
ANITA GOODESIGN | Anita’s Tutorials Standard Appliqué Master the appliqué technique — one layer at a time SKILL LEVEL Beginner Friendly HOOPINGS Single Hooping TECHNIQUE Appliqué Standard Appliqué is a wonderful way to use fabrics for added dimension and color within your embroidery design. It is the process of adding a secondary fabric over your base material so it becomes a main or accenting element of the design. Appliqué designs are always digitized with two key steps: a placement stitch that shows exactly where your fabric will go, and a tacking stitch that secures the added material. Once the fabric is trimmed, its edges are finished off with decorative stitching to complete the look. MATERIALS LIST ◆ No-Show mesh stabilizer ◆ Batting ◆ Base fabric ◆ Appliqué fabric ◆ Embroidery threads ◆ Curved-tip embroidery scissors ◆ Ruler ◆ Rotary cutter and mat ◆ Embroidery hoop ◆ 75/11 embroidery needle Step 1 Hoop Your Stabilizer Hoop a piece of No-Show mesh stabilizer, pulling it drum-tight so there is no slack at all. This stabilizer is the foundation that every later stitch builds on. A quick tip: if your design loads in rotated (ours pulled up at a 90° turn to the left), there’s no need to rotate it back — you can simply run it as it appears, or rotate any Fundamentals design first if you prefer. Step 2 Run the Squaring Stitch Run the first machine step, which is the squaring stitch. This outline marks exactly where your batting will sit and acts as your guide for everything that follows. Step 3 Place the Batting Lay a piece of batting over the squaring stitches, making sure it completely covers them on all sides. It’s fine for the batting to extend a little past the outline — you’ll trim it down in the next step. Step 4 Tack Down the Batting Run the next machine step, the tacking stitch. This locks the batting firmly to the stabilizer so nothing shifts while you continue stitching. Step 5 Trim the Batting Using curved-tip embroidery scissors, carefully trim away the excess batting as close to the tacking stitch as you can. Take your time and avoid clipping any stitches — clean trimming here makes for a tidy finished block. Step 6 Check Your Progress Your block should now look something like this, with the batting neatly tacked down and trimmed inside the stitched outline, ready for your base fabric. Step 7 Place Your Base Fabric Place your base fabric over the batting with the right side facing up. Make sure it covers the entire area and leaves at least a 1/2” seam allowance all the way around. Smooth it out from the center to remove any wrinkles. Step 8 Tack Down the Base Fabric Run the tacking stitch for your base fabric, ideally in a thread color that matches the fabric. This secures the base fabric in place over the batting. Step 9 Stitch Up to the Placement Line Continue running the standard embroidery steps in order, following your design’s color changes, until you reach the placement stitch for the appliqué. Step 10 Place Your Appliqué Fabric Take a piece of your appliqué material and lay it right side up directly over the placement stitch, covering it completely. Step 11 Tack Down the Appliqué Run the next machine step, the tacking stitch for the appliqué. This holds the appliqué fabric firmly in position over the placement stitch. Step 12 Trim the Appliqué Using your scissors, carefully trim away the excess appliqué material right up to the tacking stitch, leaving a clean, crisp edge. Step 13 Check Your Progress Once trimmed, your design should look similar to this, with the appliqué fabric neatly secured and the edges tidied up. Step 14 Finish the Embroidery Run any remaining embroidery steps, following along with your design’s numbered machine steps and changing thread colors as indicated. These steps add the decorative stitching that frames and finishes the appliqué. Step 15 Remove from Hoop & Trim Once your design has finished stitching, remove it from the hoop. Using a ruler and rotary cutter, trim away the excess stabilizer and fabric — remember to still leave at least a 1/2” seam allowance on all sides. Step 16 Finished Block Your Standard Appliqué block is now complete and ready to use! The added fabric brings extra dimension, color, and texture that makes your finished piece truly stand out. 💡 PRO TIP Appliqué isn’t limited to cotton. Try other materials such as vinyl, minky, leather, and more to add unique texture and dimension — each fabric gives the finished block a completely different look and feel. Your Standard Appliqué Block Is Complete! Layer, stitch, and trim — then make it yours with color and texture all your own. Download Files Standard Appliqué | Anita’s Tutorials | Anita Goodesign
Learn more
How To - Trapunto Quilt Block - Fundamentals
ANITA GOODESIGN | Anita’s Tutorials Trapunto Quilt Block Master the trapunto technique — one puffed block at a time SKILL LEVEL Beginner Friendly HOOPINGS Single Hooping TECHNIQUE Trapunto Trapunto — Italian for “to quilt” — is a traditional relief technique that adds a raised, “puffed” element to a quilt block, giving it extra dimension and depth. The effect is created by layering additional quilt batting underneath the base fabric in select areas of the design. In this tutorial we’ll walk you through making your very own trapunto block, one step at a time. By the end you’ll have added a beautiful little “puff” to your quilting skills — and you’ll be a master at it in no time. MATERIALS LIST ◆ No-Show Mesh Stabilizer ◆ Quilt batting (3 layers total) ◆ Base fabric — enough to cover the block + 1/2" seam allowance on all sides ◆ Embroidery threads ◆ Curved-tip embroidery scissors ◆ Ruler ◆ Rotary cutter and mat ◆ Embroidery hoop ◆ 75/11 embroidery needle Step 1 Hoop Your Stabilizer Begin by hooping a piece of No-Show mesh stabilizer, pulling it drum-tight so there is no slack or puckering. This stabilizer is the foundation that every other layer is built on, so a firm, even hoop here keeps the whole block from shifting as you stitch. Helpful note: if your design loads in rotated (ours came in turned 90° to the left), you don’t have to rotate it back — you can simply stitch it as it pulled up, or rotate any design in Fundamentals if you prefer. Step 2 Run the Squaring Stitch Run the very first machine step, which is the squaring stitch. This single outline stitches a rectangle onto the stabilizer that marks exactly where your batting needs to go. Think of it as your placement guide — it shows you the boundaries to work within for everything that follows. Step 3 Place the Batting Lay a piece of quilt batting directly over the squaring stitches you just ran. Make sure the batting completely covers the stitched rectangle on all four sides, letting a little extra hang past the lines. Don’t worry about the overhang — you’ll trim it away neatly in a later step. Step 4 Tack Down the Batting Run the next machine step, which is the tacking stitch for the batting. This stitch sews the batting securely to the stabilizer so the layer can’t shift while you keep working. Once it finishes, your batting will be locked firmly in place along the outline. Step 5 Trim the Excess Batting Using a pair of curved-tip embroidery scissors, carefully trim away all the excess batting right up to the tacking-stitch line. The curved tips let you cut close and flat without snagging the stabilizer underneath. Take your time and trim cleanly — neat edges here give you a tidier finished block. Inset: once your block has been trimmed, it should look like this. Step 6 Add the Trapunto Batting Now for the step that creates the signature trapunto puff. Take two additional pieces of batting and stack them directly over the batting you just tacked and trimmed. These extra layers are what give select areas of the design their raised, dimensional look. Step 7 Tack the Trapunto Batting Run the next machine step, which tacks down the additional batting. This is the stitch that forms the puffed shape — you’ll see the raised design (here, a butterfly) begin to take shape in the batting. That concentrated padding is exactly what creates the trapunto effect. Step 8 Trim the Trapunto Batting Once the extra batting is tacked, trim away the excess right up to the tacking stitch with your curved-tip scissors, just as you did before. Work slowly around the puffed shape so you keep its clean, well-defined outline. Inset: once trimmed, the puffed area will look similar to this. Step 9 Add and Tack the Base Fabric Lay your base fabric over the block with the right side facing up. Be sure it covers the entire block with at least a 1/2" of extra fabric (your seam allowance) all the way around, then smooth it flat. Run the next machine step to tack the base fabric down over all of the layers beneath it. Inset: your tacked block should look like this. Step 10 Stitch the Embroidery Design Continue running the remaining embroidery steps, following your design’s numbered machine steps and changing thread colors whenever the machine indicates. As the stitching builds up, the quilted design appears across the base fabric, with the trapunto areas standing up in soft relief. Step 11 Trim the Finished Block When the design has finished stitching, remove the block from the hoop. Using a ruler and rotary cutter on a cutting mat, trim away the excess stabilizer and fabric, leaving a 1/2" seam allowance on all sides. This squares up your block so it’s ready to piece into a project. Step 12 Your Trapunto Block Is Complete That’s it — your trapunto block is finished! The raised, puffed design gives it a beautiful dimensional texture that sets trapunto apart from flat quilting. It’s now ready to show off on its own or to combine with other blocks in a larger project. 💡 PRO TIP The puff comes entirely from those extra batting layers, so trim them cleanly right to the tacking stitch. Crisp, close trimming around the trapunto area keeps the raised shape sharp and well defined in your finished block. Your Trapunto Block Is Complete! Once you feel the dimension trapunto adds, you’ll want to puff up every block. Mix, match, and make it yours. Download File Trapunto | Anita’s Tutorials | Anita Goodesign
Learn more
How To - Free Standing Designs - Fundamentals
ANITA GOODESIGN | Anita’s Tutorials Free Standing Designs Master the fundamentals — beautiful embroidery that stitches on its own SKILL LEVEL Beginner Friendly HOOPINGS Single Hooping TECHNIQUE Free Standing Free standing designs are embroidery designs that have been digitized to do just that: stitch out on their own without the need for a base project! These types of designs are generally best done on a Tear-Away or Wash-Away stabilizer, making finishing up the project a breeze. When classifying our free standing projects, we look for two key components in their construction: a back fabric added to cover any bobbin stitches, and a satin stitch along the edge for a clean, finished look. Free standing designs are great for quick projects, simple gifts, or fun accessories — from kids’ puzzles and cup cozies to patches, ornaments, and gift tags. You’ll find a free standing design for just about any occasion! MATERIALS LIST ◆ Tear-Away stabilizer ◆ Batting ◆ Appliqué fabrics ◆ Coordinating back fabric ◆ Embroidery threads ◆ Coordinating bobbin ◆ Curved-tip embroidery scissors ◆ Ruler ◆ Rotary cutter and mat ◆ Embroidery tape ◆ Embroidery hoop ◆ 75/11 embroidery needle Step 1 Hoop Your Stabilizer To begin, hoop a piece of Tear-Away stabilizer, pulling it drum-tight in the hoop. This stabilizer is the foundation that holds everything in place while the design stitches out, so make sure there is no slack. Step 2 Run the Placement Stitch Run the first machine step. This is the placement stitch — a simple outline that shows you exactly where to position the batting for your design. Think of it as your roadmap for the steps that follow. Step 3 Place the Batting Place a piece of batting directly over the placement stitches, making sure it covers the outline entirely on all sides. The batting can extend a little past the lines — you will trim it neatly in a later step. Step 4 Tack Down the Batting Run the next machine step, which is the tacking stitch. This stitch locks the batting firmly to the stabilizer so it stays put while you continue. Step 5 Trim the Batting Using a pair of curve-tipped embroidery scissors, carefully trim away the excess batting as close to the tacking stitch as you can. Take your time and be careful not to clip into any of the stitches. Step 6 Check Your Progress Pause and take a look — your design should now look something like this, with the batting neatly tacked and trimmed inside the stitched outline. Step 7 Mark the Appliqué Placement Run the next machine step, which is the placement stitch for your appliqué. This outline shows you exactly where to lay down your first piece of appliqué fabric. Step 8 Add the Appliqué Fabric Place your first appliqué fabric directly over the placement stitches, being sure to cover the outline entirely. Smooth it flat so there are no wrinkles before the next step. Step 9 Tack Down the Appliqué Run the next machine step — the tacking stitch — which secures the appliqué fabric firmly to the design. Step 10 Trim the Appliqué Using your curved-tip embroidery scissors, trim away the excess appliqué fabric close to the tacking stitches, again taking care not to snip the stitching itself. Step 11 Check Your Progress Your design should now look similar to this, with the first appliqué piece tacked down and neatly trimmed. Step 12 Secure Any Remaining Appliqué Continue running the design’s steps to place, tack, and trim any remaining appliqué pieces the same way. Once all the appliqué is secured, your design should look like this. Step 13 Stitch the Design — Then Pause Go ahead and run the embroidery steps for the design, but STOP before the next tacking stitch runs. Use the design’s numbered machine steps as a guide so you know exactly where to pause. Step 14 Add the Back Fabric Remove the hoop from your machine and flip it over so the bobbin stitches on the back are facing you. Lay a piece of back fabric over the back of the design with its right side facing up, cover the stitches completely, and tape the fabric securely in place. Step 15 Tack the Back Fabric Return the hoop to your machine, being careful not to bunch up the fabric as you slide it in. Run the next machine step — the tacking stitch — to secure the back fabric. The back of your design should now look like this. Step 16 Trim the Back Fabric Using your curved-tip embroidery scissors, neatly trim away the excess back fabric, working close to the tacking stitches without snipping into them. Step 17 Wind a Coordinating Bobbin Once trimmed, the back of your design should look like this. Now STOP and wind a bobbin in a color that coordinates with the remaining steps — these will stitch the decorative satin edges, which show on both the front and back. Step 18 Finish the Satin Stitches With a matching bobbin swapped in for each color step, continue running the remaining steps to finish the embroidered elements. When you are done, your design should look something like this. Step 19 Remove from the Stabilizer To free your design from the hoop, gently tear it away from the Tear-Away stabilizer around the edges. Step 20 Your Design Is Finished! That’s it — your Free Standing design is now complete and ready to enjoy, gift, or turn into your next favorite project. 💡 PRO TIP Notice a little Tear-Away pulp left around the edges? You can color it in with a marker to blend it away, or carefully trim it with curved-tip scissors — just be careful not to clip the stitches. Your Free Standing Design Is Complete! Quick to stitch and endlessly versatile — make patches, ornaments, cup cozies, gift tags, and more. Download Files Free Standing Designs | Anita’s Tutorials | Anita Goodesign
Learn more
In the Hoop Quilt Blocks
Learn to create a quilt block in your hoop without measuring or cutting fabric ANITA GOODESIGN | Anita's Tutorials Mix & Match Quilt Block Master the free motion technique — one block at a time SKILL LEVEL Beginner Friendly HOOPINGS Single Hooping TECHNIQUE Free Motion Free motion embroidery is specially-digitized to run long, continuous bean stitches — often reaching from edge to edge of the block in a single unbroken line. When multiple blocks are sewn together, the continuous stitching connects them effortlessly. Mix and match blocks from different collections to design the ultimate bed set, coordinating pillows, shams, or a stunning duvet. Free motion is perfect for adding a quilted look to home decor and garments alike. MATERIALS LIST ◆ No-Show Mesh Stabilizer ◆ Quilt batting ◆ Base fabric — enough to cover block + 1/2" seam allowance on all sides ◆ Embroidery threads ◆ Curved-tip embroidery scissors ◆ Ruler ◆ Rotary cutter and mat ◆ Embroidery hoop ◆ 75/11 embroidery needle Step 1 Hoop Your Stabilizer Hoop a piece of No-Show mesh stabilizer drum-tight. This is the foundation for all the stitching. Any slack in the hoop will cause registration errors throughout the design. Step 2 Run the Squaring Stitch Run the first machine step — the squaring stitch. This placement outline indicates exactly where to position your batting and is your roadmap for everything that follows. Step 3 Place the Batting Place a piece of quilt batting directly over the squaring stitches, being sure to cover them entirely on all sides. The batting should extend slightly beyond the outline — it will be trimmed precisely in the next step. Step 4 Run the Tacking Stitch Run the next machine step — the tacking stitch — which locks the batting firmly to the stabilizer. Step 5 Trim the Batting Using a pair of curved-tip embroidery scissors, neatly trim away the excess batting as close to the tacking stitch line as possible. Take care not to clip through any stitches. Clean, precise trimming here directly affects the quality of the finished block. Step 6 Result After Trimming Your block should now look something like this — the batting neatly tacked and trimmed inside the stitch outline, ready for your base fabric. Step 7 Place Your Base Fabric Place your base fabric right side facing up over the batting. Be sure to have enough fabric to cover the entire block as well as a 1/2" seam allowance on all four sides. Smooth from the center outward to remove any wrinkles. Step 8 Tack Down the Fabric Run the next machine step in a matching thread color — the tacking stitch that secures the base fabric to the stabilizer. After this step your block should show the full outline shape with both the batting and fabric locked in position. Step 9 Stitch the Free Motion Design Continue on to run the free motion embroidery in a thread color of your choice. Watch as the long, continuous bean stitches create the beautiful quilted texture that makes free motion so distinctive. Step 10 Remove from Hoop & Trim When your design is finished stitching, remove it from the hoop. Use a rotary cutter and ruler to trim the block to a 1/2" seam allowance on all sides. Step 11 Finished Block Your Free Motion quilt block is now complete and ready to piece! The continuous line stitching will connect seamlessly with adjacent blocks when sewn together. 💡 PRO TIP Free motion designs are built to connect block to block seamlessly when sewn together. Stitch multiple blocks and arrange them before sewing to plan your final quilt layout — you'll love how the stitching flows across the entire piece. Your Free Motion Quilt Block Is Complete! Once you make one block, you'll want to fill an entire quilt. Mix, match, and make it yours. Mix & Match Quilt Block | Anita's Tutorials | Anita Goodesign
Learn more