
|
ANITA GOODESIGN | Anita's Tutorials Zipper Bag Master the in-the-hoop technique — pretty on both sides |
|
SKILL LEVEL Beginner Friendly |
HOOPINGS Double Hooping |
TECHNIQUE In-The-Hoop |
|
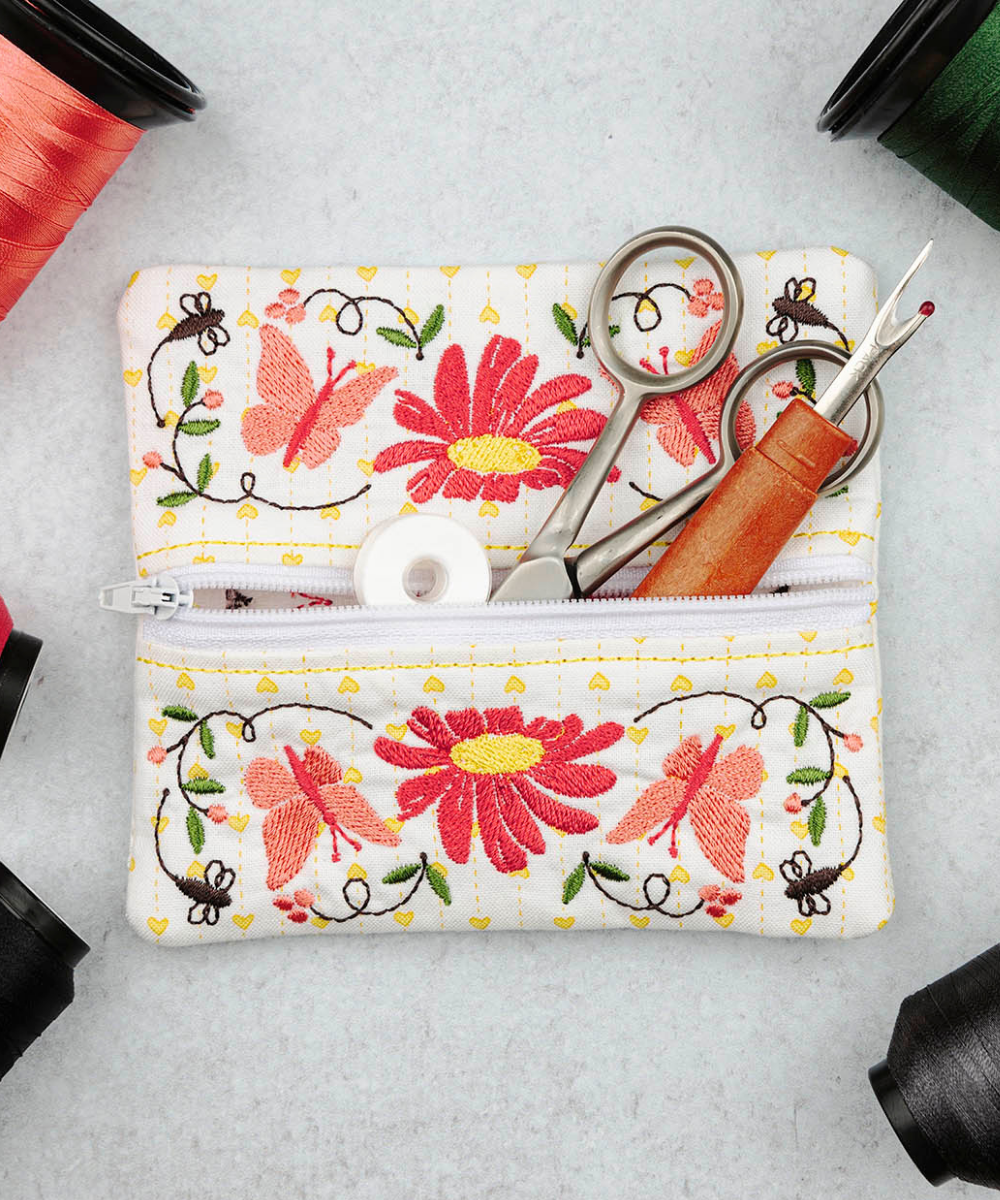
Zipper bags are one of our favorite in-the-hoop projects, and this little bag is the perfect place to learn the technique. Instead of finishing with a plain back, you will embroider both a front and a back panel so the finished bag is pretty from every angle. You will stitch the back panel first using design file F-Z1, then build the zippered front using design file F-Z2, and finally join the two together — all inside the hoop. Take your time, and you'll end up with a polished, fully lined zipper bag. |
|
|
|
|
F-Z1 — Back Panel |
F-Z2 — Zippered Front |


|
MATERIALS LIST |
|
◆ No-Show mesh stabilizer (x2) |
|
◆ Nylon coil zipper |
|
◆ Base fabric |
|
◆ Embroidery threads |
|
◆ Curved-tip embroidery scissors |
|
◆ General craft scissors |
|
◆ Ruler |
|
◆ Rotary cutter and mat |
|
◆ Seam ripper |
|
◆ Embroidery tape |
|
◆ Embroidery hoop |
|
◆ 75/11 embroidery needle |
|
Step 1 |
Hoop Your Stabilizer Begin the back panel of your bag. Hoop one piece of No-Show mesh stabilizer, pulling it drum-tight so there is no slack. A taut hoop keeps every stitch in the right place. This first portion uses design file F-Z1, which creates the embroidered back of the bag. |
|
|
|

|
Step 2 |
Run the Placement Stitch Run the first machine step. This is the placement stitch — a simple outline that shows you exactly where to lay your base fabric in the next step. Think of it as your roadmap. |
|
|
|

|
Step 3 |
Tack Down the Back Fabric Place your fabric right side up, directly over the placement stitches, covering the outline entirely on all sides. Then run the next machine step — the tacking stitch — which secures the fabric to the stabilizer. |
|
|
|

|
Step 4 |
Embroider & Set the Back Aside Run the decorative embroidery steps, following your design's numbered machine steps for any color changes. When it finishes, remove the piece from the hoop and trim it to a 1/4" seam allowance. Set this completed back panel aside — you'll need it later. |
|
|
|

|
Step 5 |
Hoop & Start the Front Panel Hoop a fresh piece of No-Show mesh stabilizer and load the second portion of the bag, design file F-Z2. Run the first machine step — the placement stitch — which shows where the zipper and bag pieces will go. |
|
|
|

|
Step 6 |
Position the Zipper The center of the placement stitch has three horizontal lines. Line up the center of your zipper with the middle line and the zipper's fabric edges with the top and bottom lines. Secure both ends with tape, and make sure the zipper's stopper will clear the path of the presser foot. |
|
|
|

|
Step 7 |
Close the Zipper Slider Check that the zipper slider is fully closed and pushed out of the way. This keeps it from getting caught under the embroidery foot as the machine stitches. |
|
|
|

|
Step 8 |
Tack Down the Zipper Run the next machine step — the tacking stitch — which tacks the zipper down securely along both sides. |
|
|
|

|
Step 9 |
Place the Bottom Fabric Remove the tape. Lay your fabric face down, aligning its bottom edge with the bottom edge of the zipper. Make sure the fabric is large enough to cover the placement-stitch area once it's folded up, leaving at least a 1/2" seam allowance around the outer edges. |
|
|
|

|
Step 10 |
Run the Folding Stitch Run the next machine step — the folding stitch — which marks where to fold your fabric. |
|
|
|

|
Step 11 |
Fold & Secure the Fabric Fold the fabric over the folding-stitch line and press the fold with your finger or an iron to set a crease. Use tape to hold the fold in place. |
|
|
|

|
Step 12 |
Tack Down the Fold Run the tacking stitch that secures this folded fabric to the stabilizer. Once it's stitched down, you can peel away any excess tape. |
|
|
|

|
Step 13 |
Repeat for the Top Fabric Repeat the same placing, folding, and tacking process for the top piece of fabric — but this time align the raw edge of the fabric with the top of the zipper. Run the folding stitch, then secure the fabric with tape. |
|
|
|

|
Step 14 |
Tack the Top Fold Run the tacking stitch to lock the top fold in place, then remove any tape. Your design should now look something like the photo — both fabric panels folded back and tacked, framing the zipper. |
|
|
|

|
Step 15 |
Embroider the Front (Stop Before the Last Step) Run the decorative embroidery, following your design's numbered machine steps for the color changes. Stop before the very last machine step runs — you'll need to do something first. |
|
|
|
|
|
|


|
Step 16 |
Open the Zipper This is the important pause: stop and open your zipper. Unzip it so the slider sits about two-thirds of the way open, as shown. Leaving it open now lets you turn the bag right side out later. |
|
|
|

|
Step 17 |
Add the Back Panel Take the back panel you stitched earlier (F-Z1) and place it face down over the hooped design, matching up the outer tacking-stitch lines. Tape it in place. |
|
|
|

|
Step 18 |
Join Front & Back Run the next machine step — a tacking stitch that joins the front and back of your bag together around the edges. |
|
|
|

|
Step 19 |
Trim the Bag Once the layers are joined, remove the design from the hoop. Trim the bag to a 1/4" seam allowance on all sides, using scissors to cut away any excess length of zipper. |
|
|
|

|
Step 20 |
Clear the Zipper Path & Snip the Corners First, snip the four corners of the bag at a 45° angle (shown in the detail photo) to reduce bulk so the corners turn out crisp. Then, using a seam ripper or curved-tip embroidery scissors, carefully trim away the No-Show mesh stabilizer from the zipper's path so the zipper glides smoothly. |
|
|
|
|
|
|


|
Step 21 |
Turn It Right Side Out Turn the bag right side out by gently pulling it through the open zipper. Use your fingers or a turning tool to push the corners all the way out. |
|
|
|

|
💡 PRO TIP Because this bag is embroidered on both sides, it's the perfect practice piece for learning two-sided in-the-hoop construction. Once you're comfortable, try mixing different F-Z front and back designs to create coordinated sets — the technique stays exactly the same. |
|
Your Zipper Bag Is Now Finished! Pretty on both sides and fully lined — you've mastered a two-sided in-the-hoop project. Now make it yours. |
Zipper Bag | Anita's Tutorials | Anita Goodesign