

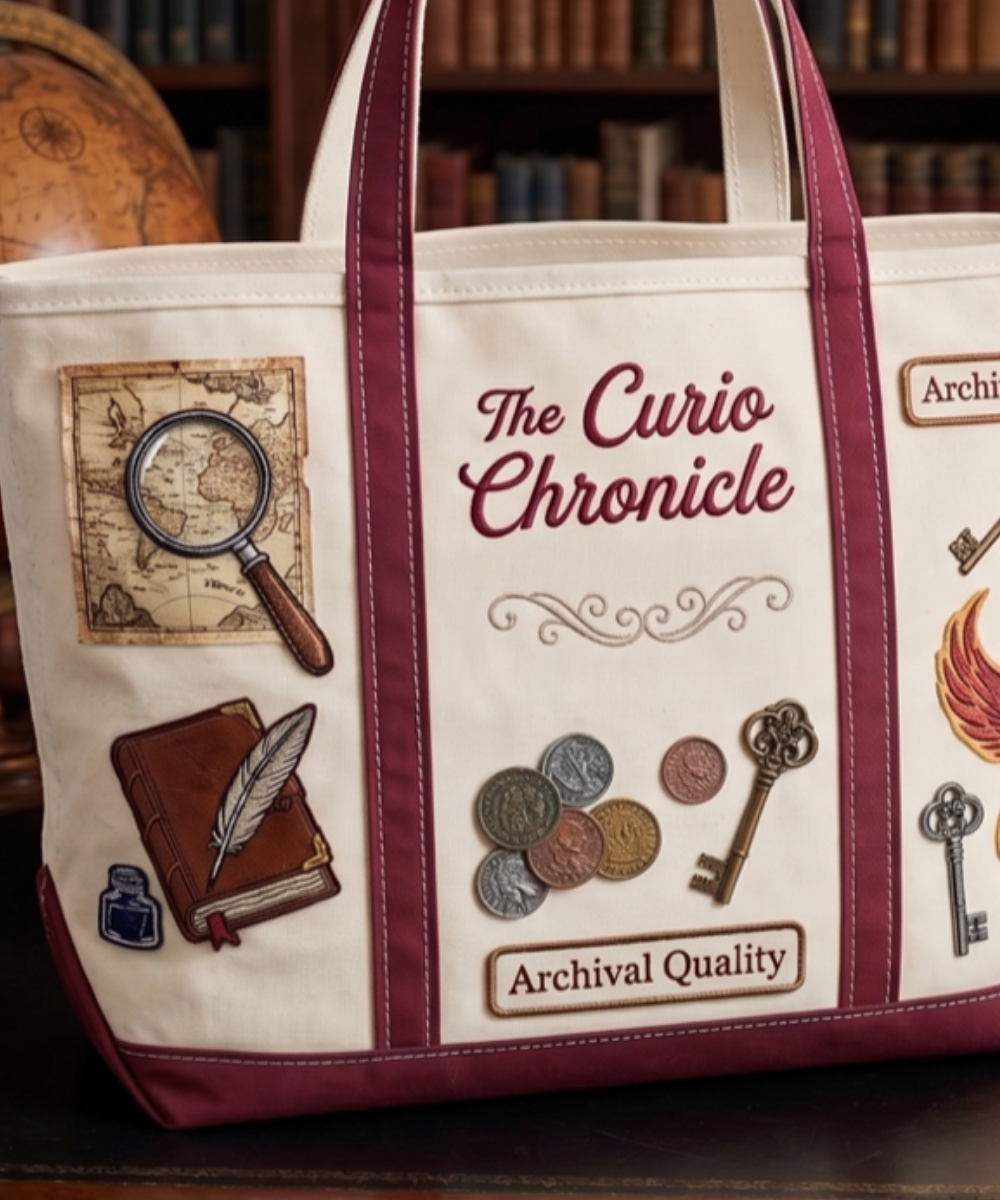
THE BOAT TOTE
Embroidery, Patches & Personalization
Your complete guide to direct tote embroidery, creative design thinking, combination products, niche development, and building a brand around the boat tote.
|
DURATION 2.5 Hours |
LEVEL All Levels |
PRESENTED BY Stephen Wilson |
CLASS AGENDA
Opening The Boat Tote Opportunity — Market & Business Case
Part 1 Embroidering Directly on a Tote — Technique & Process
Part 2 Getting Creative — Design, Colour & Personalisation
Part 3 Creative Combinations — Building Premium Products
Part 4 Niche, Collection & Brand — Thinking Like a Designer
Part 5 From Idea to Product — Your Creative Process
Closing Pricing, Selling & Your Next Steps
|
WHO IS SELLING PERSONALIZED BOAT TOTES RIGHT NOW? Threadart | 14 oz natural cotton canvas boat totes. Offers varsity chenille letter, shadow block monogram, and glossy thread styles. Sells for $35–$65 per tote with custom embroidery. Kits Threads | 16 oz 100% cotton canvas XL boat tote, 22.5" handles. Embroidered name or monogram on front pocket. Custom fonts via Shopify. Strong repeat customer base. MK Southern Creations | 18 oz and 14 oz canvas boat totes with Avery, Fishtail, and Blair monogram fonts. Traditional first-LAST-middle monogram format. Top-selling Etsy shop. KenzKustomz | 22.5" x 14.5" canvas boat totes. Embroidery included in base price; icon add-ons $3 each. Strong social media presence and repeat customer loyalty. Cece DuPraz | Premium bespoke embroidery on Ironic Boat Totes. Studio in Santa Monica. Specialty in custom phrases and text. 10–14 day turnaround. Commands top-of-market pricing. |
|
★ |
Opening — The Boat Tote Opportunity |
The boat tote is one of the most recognized, most personalized, and most giftable canvas products in the market today. Embroidered boat totes are everywhere — and the demand for personalization continues to grow. Today we learn two distinct methods of personalizing them, giving you two products, two markets, and twice the opportunity.
◆ The commercial market — Top Etsy sellers and boutique brands charge $28–$85+ for personalized boat totes. The difference between a $32 sale and a $75 sale is usually the method: a directly embroidered monogram vs. a dimensional satin-border patch.
◆ Two methods, two markets — Direct embroidery appeals to customers who want clean, integrated, permanent personalization. Patch-adorned totes appeal to a fashion-forward buyer who values dimension, texture, and a more collectible aesthetic.
◆ The patch advantage — Patches can be made in batches and applied quickly. You can carry pre-made stock and personalize on demand — ideal for craft shows, activations, and pop-up events.
◆ What this guide builds — By the end of this guide you will be able to embroider directly on a tote bag, think creatively about design and combinations, build a product collection with a clear brand identity, and price your work for profit.
|
★ Two Products, Two Markets The boat tote is one of the most flexible and profitable embroidery canvases available. By the end of this guide you will not just know how to stitch on it — you will know how to design for it, how to build products around it, and how to develop a brand identity that makes your totes unmistakably yours. |
|
1 |
Method A: Embroidering Directly on a Tote Bag |
Direct embroidery means stitching your design straight into the canvas fabric — no patch, no applique. The result is clean, integrated, and sophisticated. It is also the simplest approach, making it the ideal starting point for your tote embroidery journey.
The Canvas Tote — Selecting the Right Blank
◆ Weight is everything — Minimum 10 oz canvas for direct embroidery. 12–16 oz is ideal — the denser weave holds stitches without puckering and resists distortion under hoop pressure. Avoid lightweight polyester grocery totes; they pucker badly and look unprofessional.
◆ Wholesale sources — S&S Activewear (Liberty Bags, Prime Line), JiffyShirts (Port Authority BG100), SanMar (Q-Tees). Natural or tan canvas shows thread most vividly. Navy and hunter green are strong sellers for gift markets.
◆ Construction to look for — Flat gusseted bottom for stability. Handles at least 22" for shoulder carry. An exterior front pocket is a bonus embroidery location — great for a small monogram while the main panel carries a larger design.
◆ Popular dimensions — Medium: 12" x 18" x 5.5". Large: 14" x 25" x 9". Extra-large: 22" x 16" x 6". Larger totes allow larger designs but increase hooping complexity.
Stabilizer Selection for Canvas Totes
The most common beginner mistake is choosing the wrong stabilizer for canvas. Canvas looks simple but has stretch when pulled, and hoop pressure leaves marks if you are not careful.
|
Stabilizer Type |
Best For |
Why It Works |
Avoid When |
|
Cutaway (firm) |
Logos, large fills, dense designs |
Permanent support prevents distortion through repeated washing |
Very light canvas — too stiff |
|
Tearaway (medium) |
Monograms, open fills, text |
Easy removal; clean result on stable 12–16 oz canvas |
Density over 12,000 stitches — causes sinking |
|
Cutaway (soft) |
Script fonts, light designs |
Permanent support without stiffness; good for everyday-use bags |
Very high density — use firm cutaway instead |
|
Water-soluble topping |
Textured or open-weave canvas |
Prevents stitches sinking into canvas texture; dissolves cleanly |
Tight smooth canvas — not needed |
Hooping a Tote Bag — Step by Step

|
1 |
Prepare the bag Turn the bag inside out. Push any interior pockets or liners away from the embroidery area so they cannot be accidentally caught in the hoop. |

|
2 |
Mark placement Use a heat-erasable pen to mark the center of your design. Standard front-panel placement: 3"–4" down from the top opening, centered horizontally. Always measure — do not eyeball. |

|
3 |
Apply stabilizer Place cutaway or tearaway stabilizer against the outside of the bag beneath the embroidery area. Use light adhesive spray (505 or KK2000) to hold it flat without hooping it separately. |

|
4 |
Hoop the front panel only Slide the hoop between the front and back panels. Hoop only the front canvas layer plus the stabilizer — never hoop through the back of the bag. Choose a hoop large enough that its frame clears the side seams. |

|
5 |
Check tension The canvas must be drum-tight. Any slack causes design registration errors. If the seam is pulling the fabric, re-hoop with the seam positioned outside the hoop frame. |
|
6 |
Embroider and finish Run the design. After completion, remove stabilizer, lint-roll, and press the embroidered area with a pressing cloth to remove hoop marks. |
Design Placement Reference
|
Placement |
Best Design Types |
Notes |
|
Front center (large panel) |
Oversized monogram, last name, large graphic |
Bold statement; leave 1" margin from edges |
|
Front lower-center |
Name + small icon, short phrase |
Casual, conversational feel |
|
Exterior pocket |
3-letter monogram, small initial, single icon |
Easiest to hoop; great starting project |
|
Back panel |
Business logo, website, brand name |
Corporate and promotional totes |
|
Handle base |
Tiny repeat motif, small initials |
Subtle, understated detail |
|
★ Time It Yourself Once you have the process down, time yourself from unboxing the tote to holding the finished monogrammed piece. Most experienced embroiderers complete a 3-letter monogram on a medium tote in under 12 minutes. That number — 12 minutes per tote — is what makes this product category so compelling for a production workflow. Keep a mental note of your personal time as you practice. |

|
2 |
Getting Creative — Design, Colour & Personalisation |
The boat tote is one of the most versatile canvases in embroidery. Its generous front panel and clean canvas surface invite experimentation. This section is about pushing your creative thinking — going beyond the standard monogram into designs that stand out, sell fast, and reflect your personal aesthetic.
Beyond the Monogram — Design Ideas That Sell
The three-letter monogram will always be a bestseller — but it is far from the only thing this canvas wants to carry. The embroiderers building the most profitable tote businesses are the ones treating the bag as a design surface rather than a functional object. Here is where to start thinking creatively.
◆ Sayings and phrases — Short, bold typography works exceptionally well on canvas. A single sentence — a coastal phrase, a wine quote, a travel line — in a strong font reads from across a market stall and creates an instant emotional connection. Think: SALTY HAIR DON'T CARE, WINE O'CLOCK, NOT ALL WHO WANDER ARE LOST.
◆ Name plus motif — A customer's name paired with a personalised motif — a lighthouse, a shell, a floral wreath, their pet breed — creates a custom product that no online shop can copy. These are the highest-converting custom listings because they feel completely one-of-a-kind.
◆ All-over pattern panels — A repeating pattern element — shells, anchors, citrus, botanicals — stitched across a section of the tote rather than centred in one spot. This creates a visual texture effect that reads as considered and elevated. Lower stitch count than it looks.
◆ Oversized single motif — A large, bold, single design element that fills the panel — a maximalist floral, a giant initial, a crest, a detailed illustration. Oversized designs communicate confidence and stand out in a sea of small-chest-placement embroidery.
◆ Two-sided storytelling — The boat tote has a back panel that most embroiderers ignore completely. Stitch a coordinating design on the back — a compass rose that echoes the front anchor, a list of coastal coordinates, a word that completes the phrase on the front.
|
★ The Seasonal Rotation Strategy Create three to four tote designs per season — Spring, Summer, Fall, Holiday — and retire them at the end of each season. Seasonal exclusivity drives urgency: customers who love your summer coastal collection know it will be gone in September. This strategy increases sales velocity and gives your repeat customers a reason to come back every few months. |

Colour as a Design Decision
The canvas is not your only colour choice. Thread colour, thread type, and their interaction with the natural canvas creates the finished aesthetic. Most embroiderers choose thread colours instinctively — here is a more intentional framework.
◆ Tone on tone — Navy thread on natural canvas. White thread on navy canvas. Cream thread on sand canvas. Tone-on-tone embroidery has a sophisticated, editorial quality that appeals to customers who want something elegant rather than bold. It also photographs beautifully.
◆ High contrast — Bright thread on dark canvas, or dark thread on white canvas. Maximum visual impact, reads well at a distance, stops people at a market stall. Best for statement pieces and phrases.
◆ Multi-colour storytelling — Using three or more thread colours intentionally — not just because the design calls for them, but because the colour relationship itself creates the mood. A sunset palette on a beach phrase. A botanical green palette on a floral. Colour as a narrative tool.
◆ Thread type as texture — The same design in rayon versus cotton versus metallic looks like three completely different products. Rayon has sheen and luminosity. Cotton is matte and vintage. Metallic reads as special occasion. Build thread type into your design decisions, not just as an afterthought.
|
3 |
Creative Combinations — Building Premium Products |
The most profitable tote products are almost never single-technique. They combine direct embroidery with another design element — appliqué, patch application, fabric inserts, or mixed materials — to create something that cannot be replicated by someone with just a machine and a blank. This is where your craft becomes your competitive advantage.
Direct Embroidery + Appliqué
Combining direct embroidery with appliqué elements on the same tote creates visual depth that neither technique achieves alone. The appliqué brings fabric texture and dimensional colour; the direct embroidery adds fine detail, lettering, and outline definition that appliqué cannot deliver at small scales.
◆ Monogram over appliqué field — Stitch a large fabric shape — a circle, a square, a chevron — as the appliqué background, then embroider a bold monogram or phrase directly over it. The fabric creates the colour block; the embroidery adds the personalisation.
◆ Floral wreath with fabric centre — A large embroidered wreath with an appliqué fabric circle at its centre — add a name, a date, or a motif to the fabric centre. The combination of thread and fabric in a single design reads as a sophisticated custom product.
◆ Patchwork panel effects — Multiple appliqué fabric pieces arranged in a geometric pattern — stripes, triangles, a quilt-block arrangement — with embroidery stitching over the joins. Creates a product with the visual complexity of a handmade quilt but produced with machine precision.
The Combination Product — Direct + Patch
One of the highest-value tote configurations: a directly embroidered element on one part of the bag — a small monogram on the pocket, a name on the handle strap, a date below the opening — combined with a dimensional patch on the main panel. The two techniques at different scales create a layered, considered product.
|
Combination Type |
Effect |
Price Premium |
|
Large patch + pocket monogram |
Dimensional focal point with personal detail |
High — $55–$80 |
|
Phrase on front + name on handle |
Two personalisation points, one bag |
Medium — $45–$65 |
|
Appliqué colour block + embroidered monogram |
Fabric texture + thread detail combined |
Medium–High — $48–$70 |
|
Seasonal patch + year date below |
Collector appeal — dated keepsake |
Medium — $42–$60 |
|
Breed silhouette patch + owner name |
Pet personalisation — high repeat purchase |
High — $55–$75 |
|
4 |
Niche, Collection & Brand — Thinking Like a Designer |
The embroiderers who build the strongest businesses are not the ones with the most techniques — they are the ones with the clearest point of view. A niche, a collection structure, and a consistent visual language turn a collection of individual products into a brand. This section helps you think like a designer, not just a maker.

Finding Your Niche
A niche is not a limitation — it is a competitive advantage. When you are known for something specific, customers seek you out rather than stumbling across you. A coastal embroiderer has a different customer than a faith-based embroiderer or a dog-breed specialist. But within each niche, the boat tote is a perennial bestseller because it is a canvas that travels, displays, and gifts beautifully.
◆ Coastal and nautical — Anchors, lighthouses, shells, compass roses, coastal phrases. The natural-canvas boat tote is the home environment for coastal design. This niche has consistent year-round demand with a summer peak and a strong holiday gift season.
◆ Botanical and floral — Large-scale florals, herb bundles, leaf patterns, garden-inspired designs. Appeals to a home-decor and farmers-market customer. Elevated aesthetic, tends toward muted thread palettes and natural linen or stone canvas.
◆ Preppy and collegiate — Bold fonts, classic crests, university aesthetics, varsity letters. Strong demand in certain regional markets and among sorority and Greek life customers. Clean, high-contrast, and very repeatable.
◆ Pet and breed-specific — Breed silhouettes, custom pet names, paw motifs. One of the highest repeat-purchase niches in embroidery — pet owners collect items featuring their breed and often buy for themselves, as gifts, and as memorial pieces.
◆ Faith and inspiration — Verses, crosses, faith-based phrases, spiritual motifs. Strong community-based word-of-mouth marketing, consistent demand, and a customer base that values handcrafted personal items highly.
Building a Collection, Not Just Products
A collection is a group of products that belong together — same palette, same design language, same story. When a customer finds one piece they love in your shop and sees five more that feel like a family, they buy multiple. Individual products create individual sales. Collections create carts.
|
1 |
Choose a palette Three to four thread colours that work together across every design in the collection. Navy, cream, sand, and coral for a coastal collection. Sage, terracotta, cream, and gold for a botanical. The palette is the visual glue that makes products feel curated. |
|
2 |
Establish a design motif One repeated element — a specific shell shape, a particular font, a framing device like a wreath or a banner — that appears in every design in the collection. Repetition creates recognition. Recognition creates brand. |
|
3 |
Create product variations Same design language, different products: tote, small pouch, towel, baby item, hat. A customer who loves your coastal collection can now buy across product categories rather than just buying more totes. Breadth at consistent quality builds loyalty. |
|
4 |
Name the collection A name turns a group of products into something a customer can talk about, share, and return to. Your summer coastal collection becomes The Harbour Edit or The Shore Collection. Naming creates narrative. Narrative creates attachment. |
Photographing for Impact
Your photography is your most powerful marketing tool — more important than your Etsy SEO, your social media frequency, or your pricing. A beautifully photographed tote sells itself. A poorly lit photo of a great tote stays in the queue. Here is the photography framework that works for canvas totes specifically.
◆ The lifestyle context shot — A tote at a farmers market, on a beach blanket, hanging from a bicycle, at a winery. The customer does not just see the product — they see themselves with it. Context shots consistently outperform plain-background product shots for conversion.
◆ The flat lay — Tote laid flat with coordinating objects — sunscreen, a beach read, sunglasses, a shell. The flat lay tells the story of the bag's world. Coordinate the objects to the collection palette so everything reads together.
◆ The detail close-up — A macro shot of the embroidery itself — showing stitch quality, thread sheen, and design detail. This shot builds trust with embroidery customers who know what good stitching looks like and are looking for evidence of quality.
◆ Natural light always — A large north-facing window on an overcast day is a photography studio. No flash, no ring light needed. Embroidery thread reflects artificial light in ways that flatten the design — natural diffused light shows the dimensional quality of the stitching.
|
5 |
From Idea to Product — Your Creative Process |
Great embroidery products start with a clear creative brief, not just a machine and a hoop. This section gives you a repeatable process for moving from an idea — a trend you spotted, a customer request, a design that excited you — to a finished product ready for sale.

The Creative Brief — Five Questions
Before loading any design, answer these five questions. The brief takes two minutes and prevents hours of rework.
|
1 |
Who is this for? Describe the customer specifically. Not 'women who like totes' — 'coastal-lifestyle women 30–55 who shop at farmers markets and buy handmade gifts for themselves and friends.' The more specific the customer, the more targeted the design. |
|
2 |
What feeling does it need to create? Elegant? Playful? Nostalgic? Bold? Seasonal? The feeling defines the font choice, the palette, the scale, and the thread type before you open a single design file. |
|
3 |
Where will it be used? Beach bag, grocery bag, gift bag, work bag? The use context defines the design scale, the placement, and the appropriate fabric weight. A beach bag wants big, bold, and relaxed. A work bag wants refined and understated. |
|
4 |
What makes it different from what already exists? Search Etsy for your intended design before you make it. If there are 400 identical listings, you need a creative angle — a different combination, a bolder scale, a unique phrase, an unexpected colour choice. |
|
5 |
What is it worth? Price it before you make it. If the materials and time do not support the price point the market will bear, rethink the product rather than undercharging for it. A product that cannot be priced for profit should not be made. |
Testing Before Producing
Every new tote design deserves a single test run before it goes into a collection or onto a listing. The test run is not just a quality check — it is a creative review. Here is what to assess when you hold the finished test piece:
◆ Placement — Is the design exactly where it should be — or does it need to move up, down, or sideways? Placement errors are invisible on screen and obvious on canvas. Always test.
◆ Scale — Does the design read correctly at the actual size on this specific tote? A design that looks right at 4 inches may need to be 5 inches on a large tote, or 3 inches on a small one.
◆ Thread colour on canvas — Thread colours shift significantly between screen and canvas. Navy reads differently on natural canvas than on white cotton. Always see the actual colour combination before committing to a production run.
◆ The one-second impression — Hold the finished tote at arm's length and look at it for one second. What does it communicate? What feeling does it create? If you cannot articulate the impression immediately, the design needs refinement.
|
💡 PRO TIP Keep a physical sample of every tote design you make — even failed experiments. Over time, your sample collection becomes a reference library and a portfolio you can show to wholesale buyers, boutique owners, and corporate clients. Physical samples sell in ways that photographs simply cannot. |
|
★ |
Closing — Pricing, Selling & Your Next Steps |
Pricing the Boat Tote — All Methods
|
Product |
Blank Cost |
Prod. Time |
Sell Price |
Est. Margin |
|
Direct embroidery tote (monogram) |
$4–$6 |
12 min |
$28–$42 |
78% |
|
Direct embroidery tote (large graphic) |
$4–$6 |
20 min |
$35–$55 |
83% |
|
Tote + traditional patch applied |
$5–$7 |
22 min |
$38–$58 |
80% |
|
Tote + two-hooping satin border patch |
$5–$7 |
35 min |
$48–$72 |
82% |
|
Tote + patch cluster (3 patches) |
$5–$7 |
50 min |
$65–$90 |
84% |
|
Tote + combination (direct + patch) |
$5–$7 |
40 min |
$55–$80 |
83% |
Your Next Steps
1. Embroider one tote using the direct method. Use the creative brief — answer all five questions before you start.
2. Source your blanks. Order at least 6 boat tote blanks in your preferred weight. Set up a reorder system with your wholesale supplier before your first sale.
3. Build two patch design files. One for the traditional method (single-hooping with outline) and one split into two files for the satin border method. Practice on scrap before committing to a tote.
4. Photograph the process. Document hooping, trimming, and pressing step by step. Behind-the-scenes content is highly engaging on Instagram and TikTok and builds an audience of future customers.
5. Price your first listing. Use today's table as your guide. Start with your best work — the two-hooping satin patch on a 12 oz canvas tote — and price it at its true value.
|
THE BOAT TOTE PRINCIPLE Anyone can buy a tote bag. Nobody else has yours. Personalization is not a feature. It is the product. |


1 comment
Thank you for clearing ans decisive info related to costing and selling product!