
|
ANITA GOODESIGN | Anita’s Tutorials Standard Appliqué Master the appliqué technique — one layer at a time |
|
SKILL LEVEL Beginner Friendly |
HOOPINGS Single Hooping |
TECHNIQUE Appliqué |
|
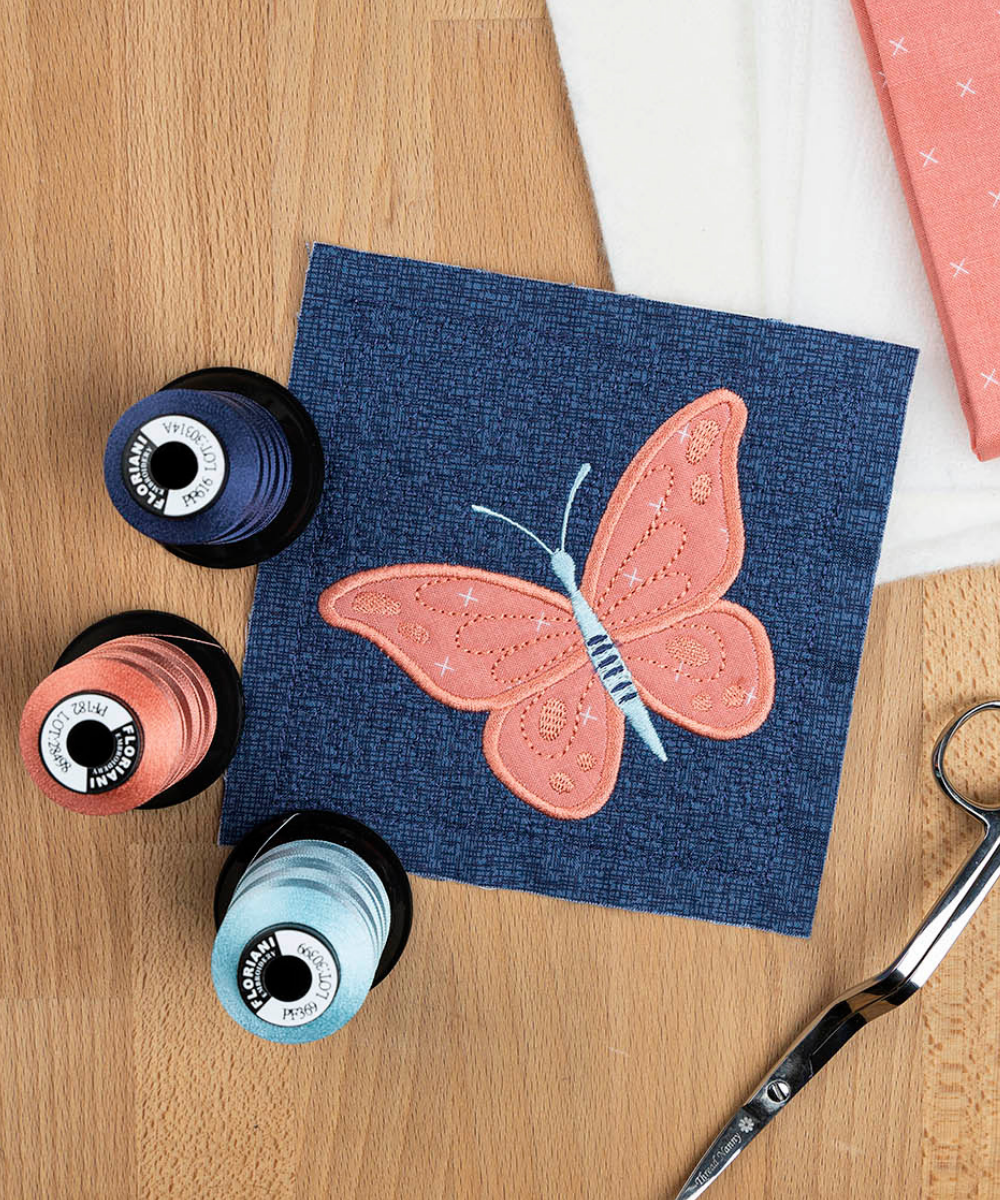
Standard Appliqué is a wonderful way to use fabrics for added dimension and color within your embroidery design. It is the process of adding a secondary fabric over your base material so it becomes a main or accenting element of the design. Appliqué designs are always digitized with two key steps: a placement stitch that shows exactly where your fabric will go, and a tacking stitch that secures the added material. Once the fabric is trimmed, its edges are finished off with decorative stitching to complete the look. |
|
MATERIALS LIST |
|
◆ No-Show mesh stabilizer |
|
◆ Batting |
|
◆ Base fabric |
|
◆ Appliqué fabric |
|
◆ Embroidery threads |
|
◆ Curved-tip embroidery scissors |
|
◆ Ruler |
|
◆ Rotary cutter and mat |
|
◆ Embroidery hoop |
|
◆ 75/11 embroidery needle |
|
Step 1 |
Hoop Your Stabilizer Hoop a piece of No-Show mesh stabilizer, pulling it drum-tight so there is no slack at all. This stabilizer is the foundation that every later stitch builds on. A quick tip: if your design loads in rotated (ours pulled up at a 90° turn to the left), there’s no need to rotate it back — you can simply run it as it appears, or rotate any Fundamentals design first if you prefer. |
|
|
|

|
Step 2 |
Run the Squaring Stitch Run the first machine step, which is the squaring stitch. This outline marks exactly where your batting will sit and acts as your guide for everything that follows. |
|
|
|

|
Step 3 |
Place the Batting Lay a piece of batting over the squaring stitches, making sure it completely covers them on all sides. It’s fine for the batting to extend a little past the outline — you’ll trim it down in the next step. |
|
|
|

|
Step 4 |
Tack Down the Batting Run the next machine step, the tacking stitch. This locks the batting firmly to the stabilizer so nothing shifts while you continue stitching. |
|
|
|

|
Step 5 |
Trim the Batting Using curved-tip embroidery scissors, carefully trim away the excess batting as close to the tacking stitch as you can. Take your time and avoid clipping any stitches — clean trimming here makes for a tidy finished block. |
|
|
|

|
Step 6 |
Check Your Progress Your block should now look something like this, with the batting neatly tacked down and trimmed inside the stitched outline, ready for your base fabric. |
|
|
|

|
Step 7 |
Place Your Base Fabric Place your base fabric over the batting with the right side facing up. Make sure it covers the entire area and leaves at least a 1/2” seam allowance all the way around. Smooth it out from the center to remove any wrinkles. |
|
|
|

|
Step 8 |
Tack Down the Base Fabric Run the tacking stitch for your base fabric, ideally in a thread color that matches the fabric. This secures the base fabric in place over the batting. |
|
|
|

|
Step 9 |
Stitch Up to the Placement Line Continue running the standard embroidery steps in order, following your design’s color changes, until you reach the placement stitch for the appliqué. |
|
|
|

|
Step 10 |
Place Your Appliqué Fabric Take a piece of your appliqué material and lay it right side up directly over the placement stitch, covering it completely. |
|
|
|

|
Step 11 |
Tack Down the Appliqué Run the next machine step, the tacking stitch for the appliqué. This holds the appliqué fabric firmly in position over the placement stitch. |
|
|
|

|
Step 12 |
Trim the Appliqué Using your scissors, carefully trim away the excess appliqué material right up to the tacking stitch, leaving a clean, crisp edge. |
|
|
|

|
Step 13 |
Check Your Progress Once trimmed, your design should look similar to this, with the appliqué fabric neatly secured and the edges tidied up. |
|
|
|

|
Step 14 |
Finish the Embroidery Run any remaining embroidery steps, following along with your design’s numbered machine steps and changing thread colors as indicated. These steps add the decorative stitching that frames and finishes the appliqué. |
|
|
|

|
Step 15 |
Remove from Hoop & Trim Once your design has finished stitching, remove it from the hoop. Using a ruler and rotary cutter, trim away the excess stabilizer and fabric — remember to still leave at least a 1/2” seam allowance on all sides. |
|
|
|

|
Step 16 |
Finished Block Your Standard Appliqué block is now complete and ready to use! The added fabric brings extra dimension, color, and texture that makes your finished piece truly stand out. |
|
|
|

|
💡 PRO TIP Appliqué isn’t limited to cotton. Try other materials such as vinyl, minky, leather, and more to add unique texture and dimension — each fabric gives the finished block a completely different look and feel. |
|
Your Standard Appliqué Block Is Complete! Layer, stitch, and trim — then make it yours with color and texture all your own. |
Standard Appliqué | Anita’s Tutorials | Anita Goodesign